Reducing Assets Import times in Unity
Source: Dev.to
Import Activity Overview
Whenever we add new assets to our project, Unity needs to process them through its importers. In most cases Unity cannot work directly with the source file in its original format. Instead, it reads the assets contained in your Assets folder and stores an internal representation of them in the Library folder, in a format the engine can understand.
Everyone working on games has experienced cases where a seemingly unrelated action triggered large re‑imports of other assets, or where opening a new project takes a very long time. Luckily, Unity provides many tools to run diagnostics and understand what actually happened, allowing us to reduce re‑import times and spend more time actually working on the game.
Inspecting the Import Activity window
The Import Activity window lets you see a list of the most recent imports, along with diagnostic information to understand what triggered the import, its duration, and so on. You can open it via Window > Analysis > Import Activity.
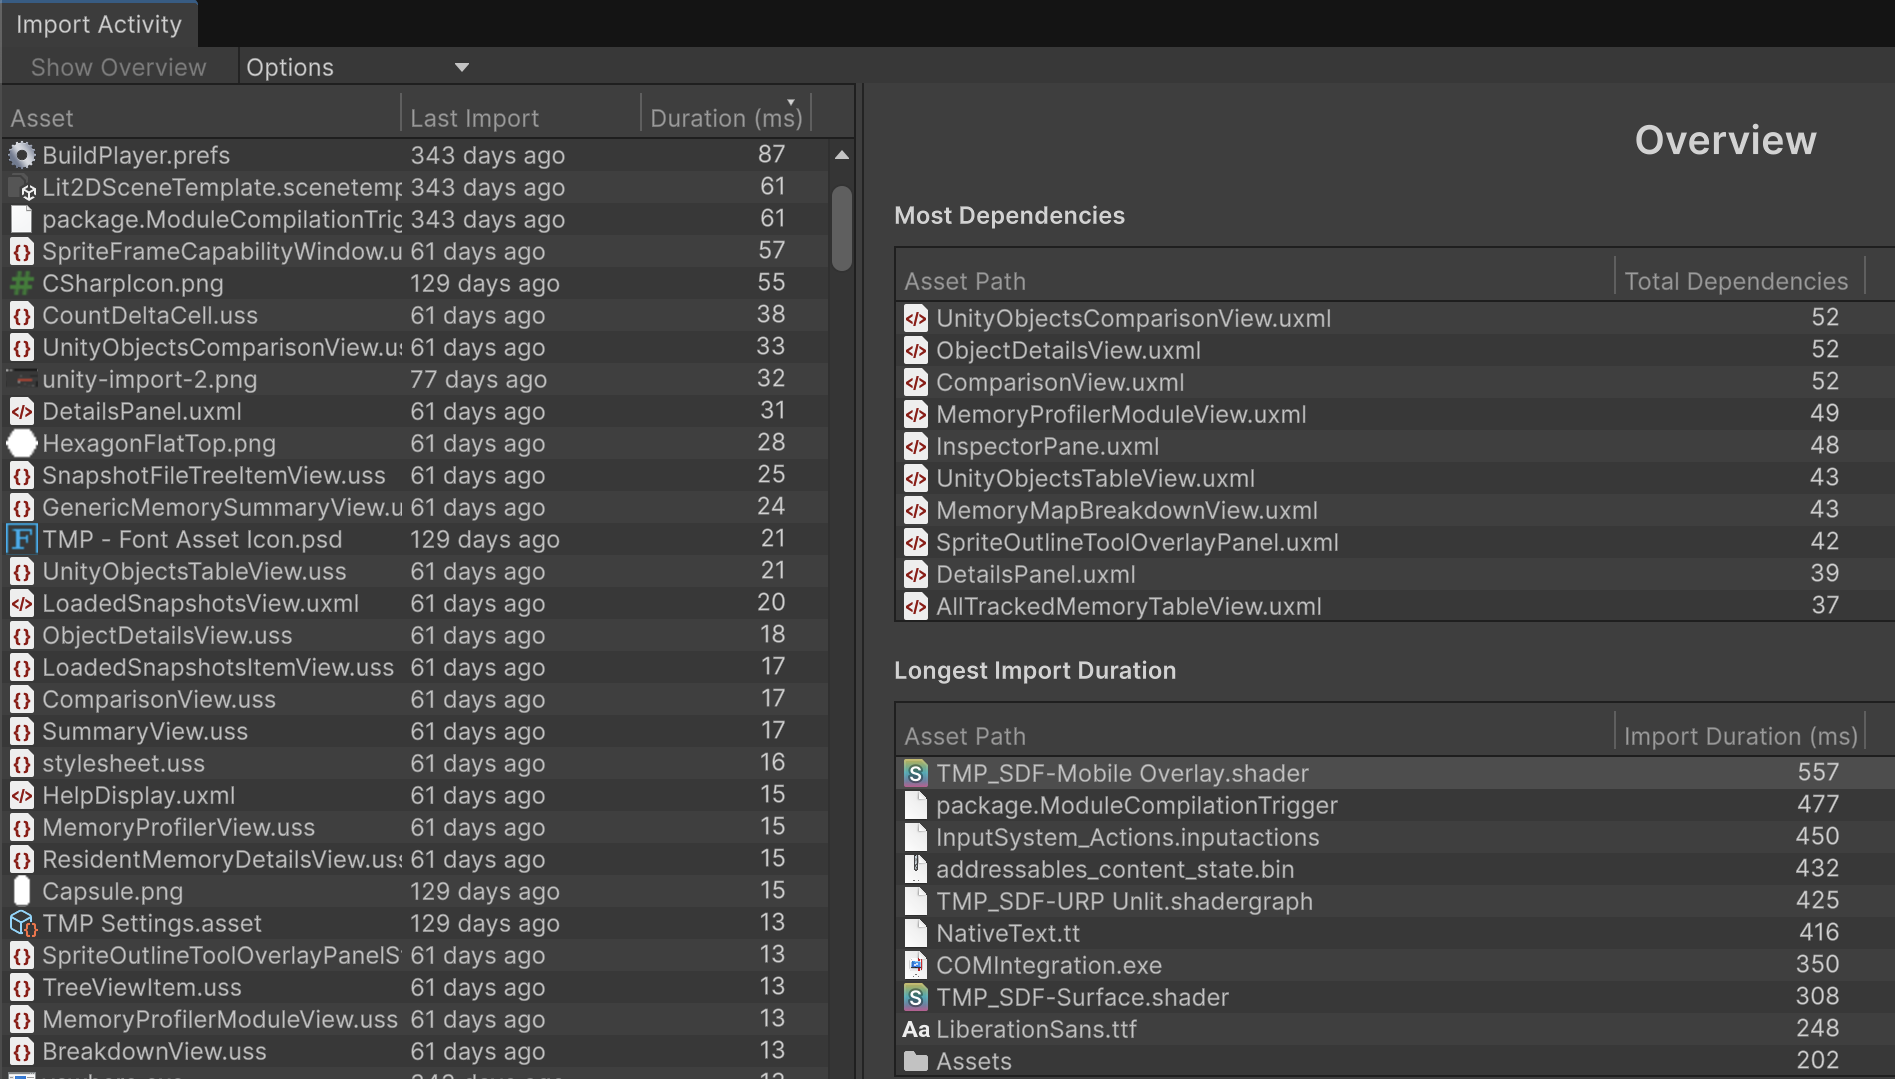
- Right pane – Shows a quick overview of the assets that had the longest import time and the assets with the most dependencies. Prioritising these assets can reduce overall import time and give you faster iteration cycles.
- Left pane – Lists all assets that have been (re‑)imported. Selecting an entry reveals more information, including:
- A list of its dependencies.
- The reason why the import was triggered (e.g., first import, missing library artifact, change in custom or dynamic dependencies, Unity version upgrade, build‑target change, etc.).
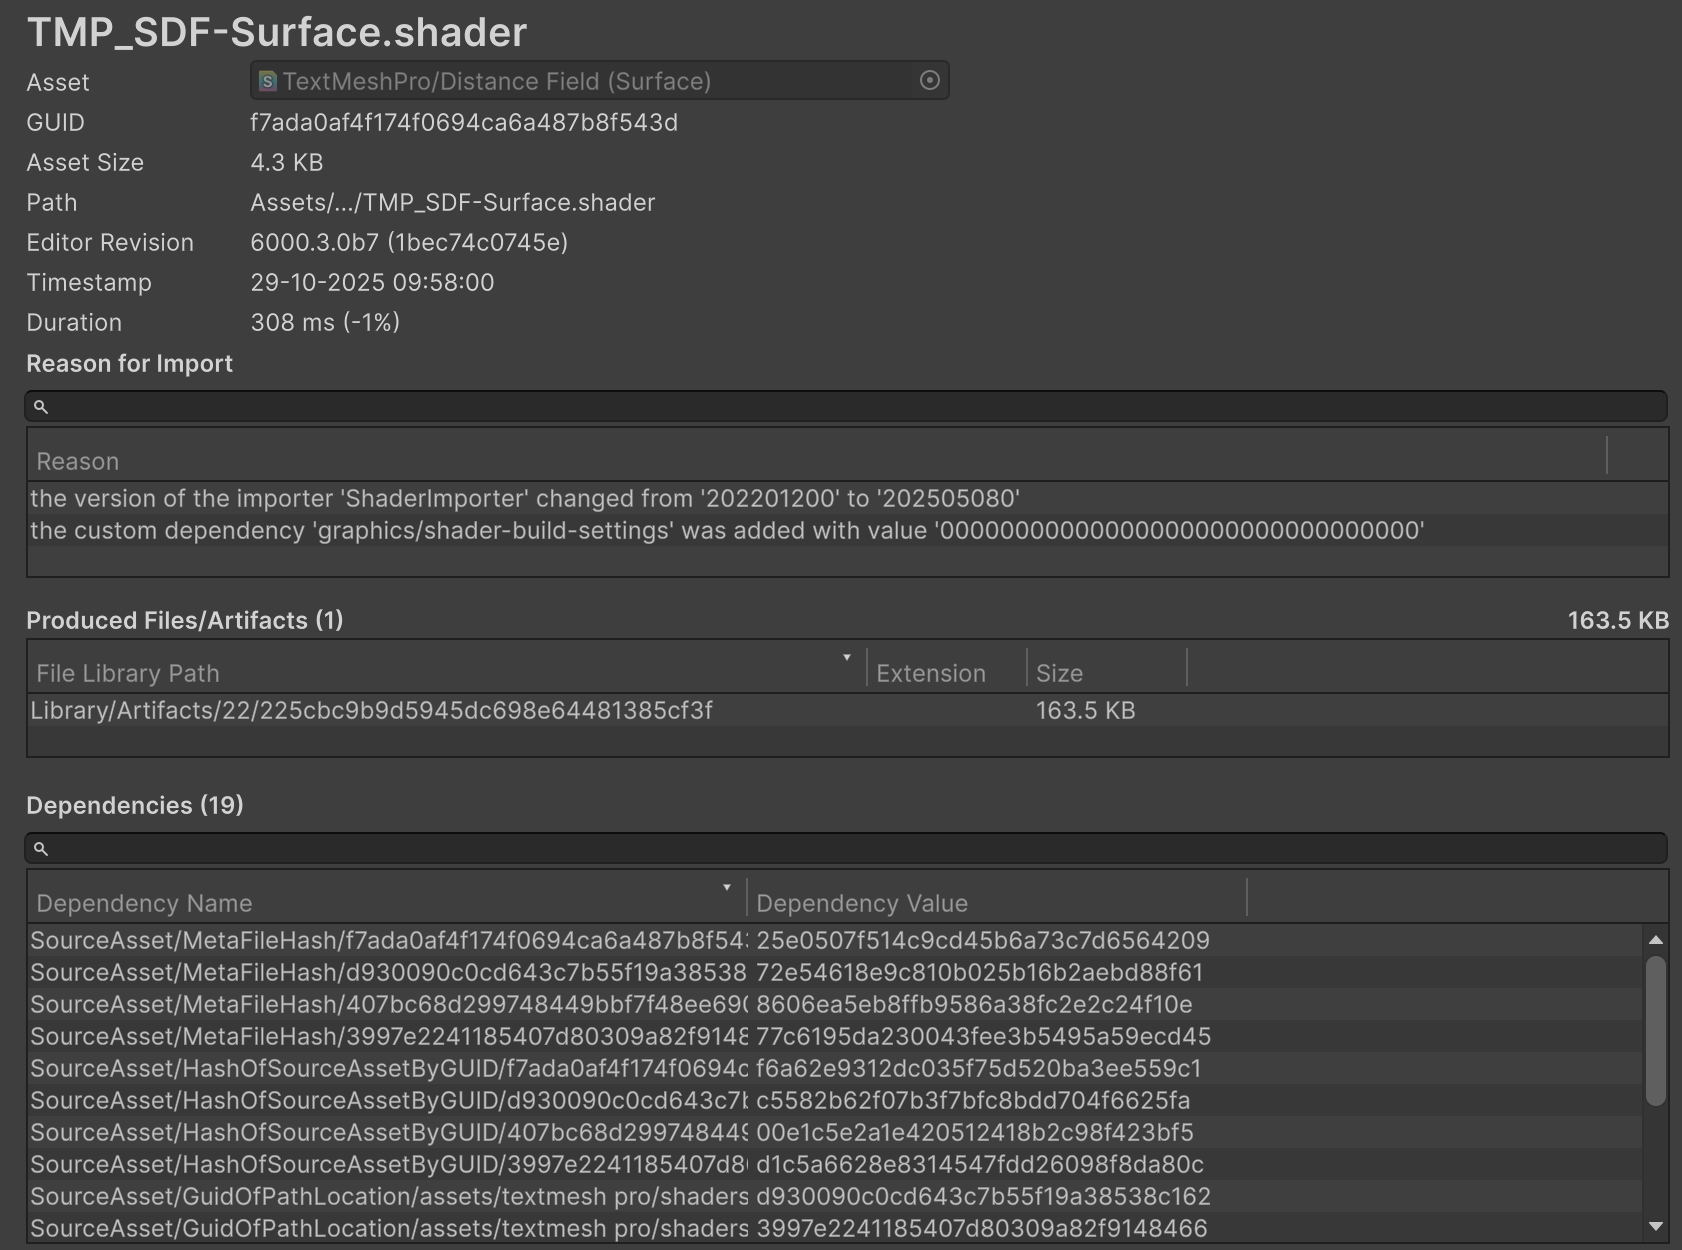
The window also points to the produced artifact(s) in the Library folder. A single source asset can generate multiple files (e.g., an .fbx model may produce separate material and animation files). These are shown in the Produced Files/Artifacts pane.
You can also right‑click an asset in the Project view and choose “View in Import Activity window” to jump directly to its latest import event.
Note: Re‑imports can also happen as a result of changes to asset dependencies—either static (e.g., asset name or build‑target change) or dynamic (assets referencing other assets). The dependency‑resolution logic was significantly overhauled from Unity 6.4 onward, resulting in fewer dependencies and faster import times. See the discussion here.
Search‑Indexing Importers
Sometimes the Import Activity window shows a reason like “ASIEI03”. These are Search Index Entry importers, used to support Unity Search.
- They are usually very fast and do not noticeably affect import times.
- If you prefer, you can disable them (Unity 6.3+): Preferences > Search > Indexing → toggle Index on Editor Startup.

Inspecting the Editor Logs
Whenever assets are imported, Unity writes diagnostic information to the Editor logs. This mirrors what you see in the Import Activity window, but in plain text.
Example log entries
[Worker7] Start importing Assets/Textures/hero.png using Guid(ae35ctf46db9fd442b94a73df0ec0f44) Importer(2089858483,0ecaa5967403d0e2aa24f35e1b516d23)
Done ondemand importing asset: 'Assets/Textures/hero.png' (artifact id: '4fead12a87251aa702d2e109bfb6181b')
Done importing asset: 'Assets/Textures/hero.png' (target hash: 'b6abac4492f6da0253684d7b2f48c6e3') in 0.076 seconds
Determining Why an Asset Is Marked as Changed
When an asset is modified—whether externally, inside the editor, or by a custom editor script—it is marked as dirty, meaning Unity will need to re‑import it to obtain an up‑to‑date representation.
The Import Activity window gives a high‑level reason for a re‑import, but sometimes you need more detail. Enabling the ObjectSetDirty diagnostic flag makes Unity print the call stack that caused the asset to become dirty.
How to enable
- Open Preferences > Diagnostics > Core.
- Check ObjectSetDirty.
- Restart the Editor for the change to take effect.
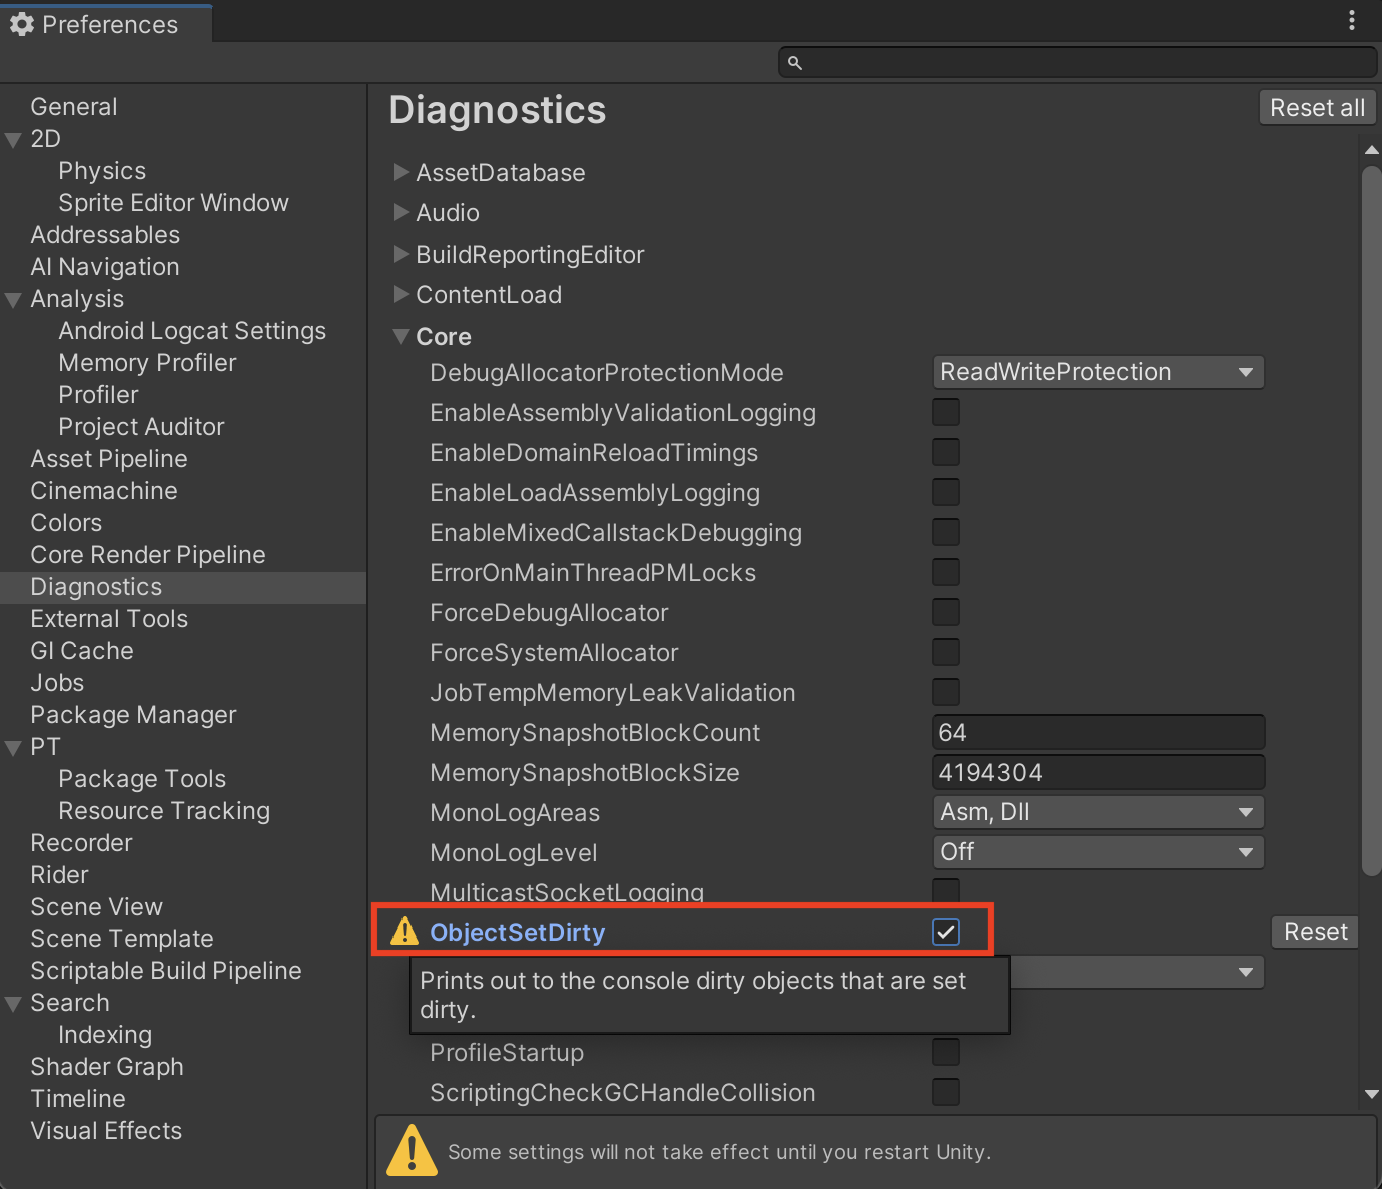
Now, when an asset is marked dirty, the Editor log will contain a stack trace that points you to the exact code path responsible for the change. This can be invaluable for tracking down unexpected re‑imports caused by scripts or third‑party tools.
Dirty Count Logging
When the Dirty Count flag is enabled, Unity will output logs each time an object’s dirty count changes. The log entry includes, in order:
- The dirty count change (
IncrementorClear) - The instance ID
- The object name
- The object type
Example – Increment
Increment Dirty(3) : [-3808] Sphere (GameObject)Example – Clear (usually after a re‑import)
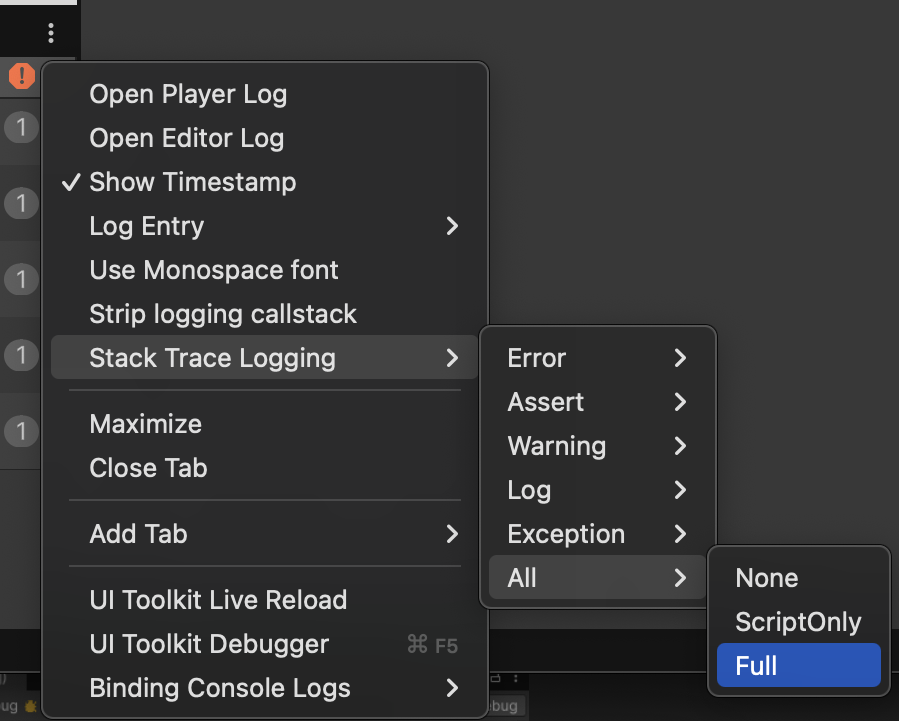
Clear Dirty(0) : [942] UIMask (Sprite)Tip: Set Stack Trace Logging to Full for All logs so you can see the complete stack trace that shows what is marking the object as dirty.
Interpreting a Log Entry
Increment Dirty(1) : [17448] HeroPrefab (GameObject)

#0 PlatformStacktrace::GetStacktrace(int)
#1 DebugStringToFile(DebugStringToFileData const&)
#2 Object::IncrementPersistentDirtyIndex()
#3 Object::SetDirty()
#4 GameObject::SetLayer(int)
#5 (Mono JIT Code) (wrapper managed-to-native) UnityEngine.GameObject:set_layer_Injected (intptr,int)
#6 (Mono JIT Code) UnityEngine.GameObject:set_layer (int)
#7 (Mono JIT Code) [SceneModeUtility.cs:311] UnityEditor.SceneModeUtility:SetLayer (System.ReadOnlySpan`1,string)
…
From the stack trace we can see that the asset was marked dirty because its layer was changed.
You can read more about this diagnostic flag here.
AssetDatabase API Operations Batching
Many editor API calls (e.g., AssetDatabase.CopyAsset, AssetDatabase.DeleteAsset) trigger a Database Refresh after each line, which can be costly when processing many assets.
Batch Editing
Wrap your asset‑modifying code between AssetDatabase.StartAssetEditing() and AssetDatabase.StopAssetEditing() to suspend automatic refreshes and perform a single refresh at the end.
try
{
    AssetDatabase.StartAssetEditing();

    AssetDatabase.MoveAsset("Assets/hero.png", "Assets/Textures/hero.png");
    AssetDatabase.DeleteAsset("Assets/Old/placeholder.png");
}
finally
{
    AssetDatabase.StopAssetEditing();
}
Note: Unity keeps an internal counter for these calls. Always match each
StartAssetEditingwith a correspondingStopAssetEditing; otherwise the AssetDatabase may remain disabled and become unresponsive.
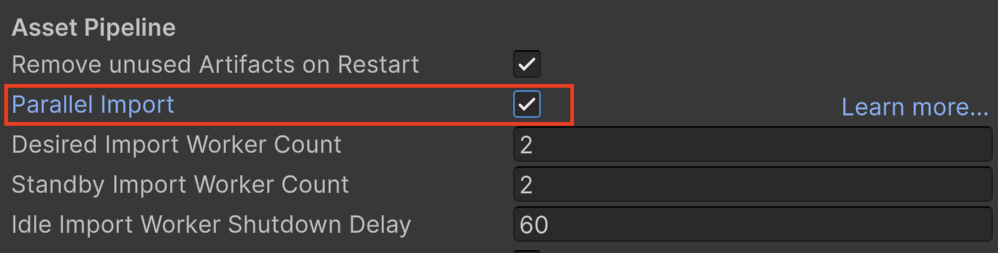
Parallel Importing
Starting with Unity 2022, you can enable parallel imports for supported asset types, dramatically speeding up the import process.
- Open Project Settings → Editor → Asset Pipeline.
- Tick Parallel Import.
| Asset Type | Parallel Import |
|---|---|
| Textures | ✅ |
| Models | ✅ |
| Audio | ✅ |
| Others | ❌ (imported sequentially) |
When enabled, Unity distributes the workload across multiple threads. You can optionally specify the number of worker threads and their standby behaviour in the same settings panel. Unity will try to honor these values, but the actual number of workers may vary based on system resources.
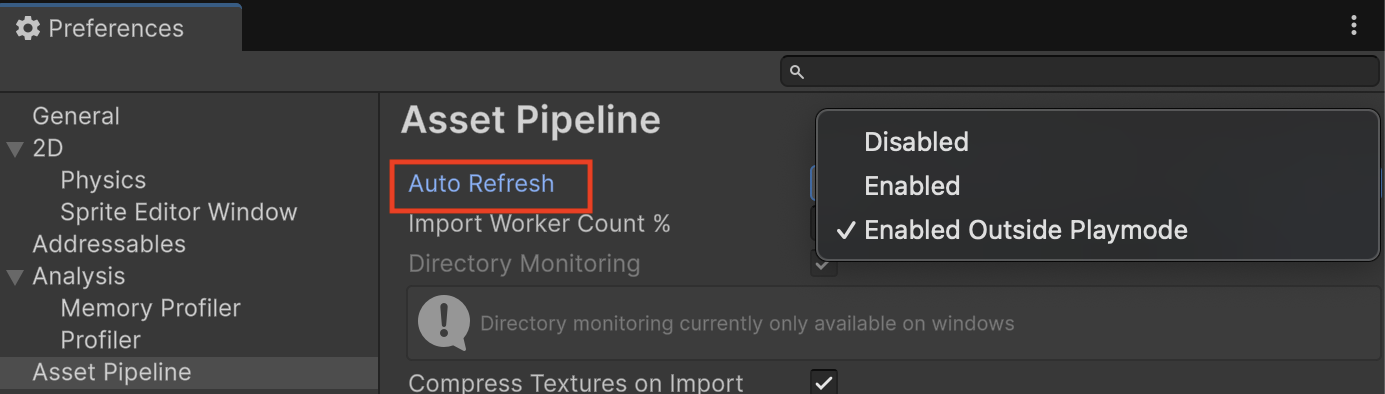
Disabling Assets Auto Refresh
By default, Unity refreshes the Asset Database automatically whenever the editor regains focus, re‑importing changed assets and detecting added or removed files.
Turn Off Auto Refresh
- Open Preferences → Asset Pipeline.
- Set Auto Refresh to Disabled.
When auto‑refresh is disabled you must manually refresh the Asset Database:
- Menu:
Assets → Refresh - API:
AssetDatabase.Refresh()
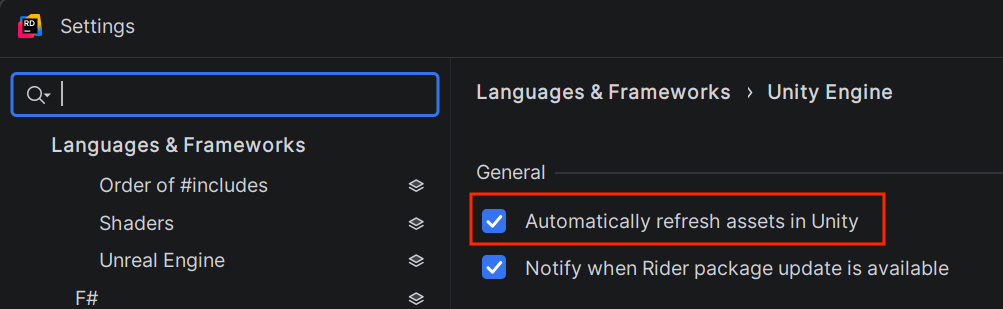
IDE Integration
Many IDEs (e.g., Rider) can trigger a refresh automatically. To prevent this:
- Rider:
Languages & Frameworks → Unity Engine → General → Automatically refresh assets in Unity(disable).
Compressing Textures on Import
Whenever you create a new project or add new texture assets, Unity automatically compresses those textures during import. This ensures optimal memory usage and performance at runtime.
Disabling Automatic Compression
- Open Preferences → Asset Pipeline → Compress Textures on Import.
- Toggle the option off.

- Effect: Reduces import times. Unity will keep textures uncompressed while you work in the editor.
- Build impact: Textures are compressed only when you create a build, which can lengthen the build process.
- When it matters: If you never make local builds (e.g., you rely on a CI/CD pipeline), the longer build time may be irrelevant.
Disabling Before Opening the Editor
To speed up the initial project import, edit the user settings file directly:
UserSettings/EditorUserSettings.assetSet the following property:
m_CompressAssetsOnImport: 0This prevents texture compression during the first import, making the editor start faster.