The Right Way to Measure Axiomatic Non-Sensitivity in XAI
Source: Dev.to
If you’ve ever tried to actually measure how stable your attribution maps are, you probably ran into the same surprising thing we did: the theory behind axiomatic metrics sounds clean and elegant…
…but the real‑world implementation? Not always.
During the development of AIXPlainer, our explainability‑evaluation app, we wanted to include the Non‑Sensitivity metric — a classic axiom that checks whether pixels with zero attribution truly have no influence on the model. Sounds simple, right?
Well… almost.
Once we moved from toy examples to real images, and from single‑pixel perturbations to batch evaluations, things broke. Hard.
Before diving into how we solved it, we would like to thank AMAT and Extra‑Tech for providing the tools and professional environment for our project. This work was developed in collaboration with Shmuel Fine, whose insights helped shape the structural direction of the solution, and with the guidance of Odelia Movadat, who supported the design of the overall evaluation process.
And that’s exactly what this post is about:
- what goes wrong,
- why it matters, and
- how we built a correct and efficient implementation that eventually became a PR to the Quantus library.
Let’s dive in.
Wait, what is Non‑Sensitivity again?
The idea is beautiful:
If a pixel receives zero attribution, perturbing it shouldn’t change the model’s prediction.
It’s a sanity check. If your explainer claims a pixel “doesn’t matter”, then changing it shouldn’t matter.
To test that, we:
- Take the input image
- Perturb some pixel(s)
- Re‑run the model
- Compare the attribution map vs. the prediction change
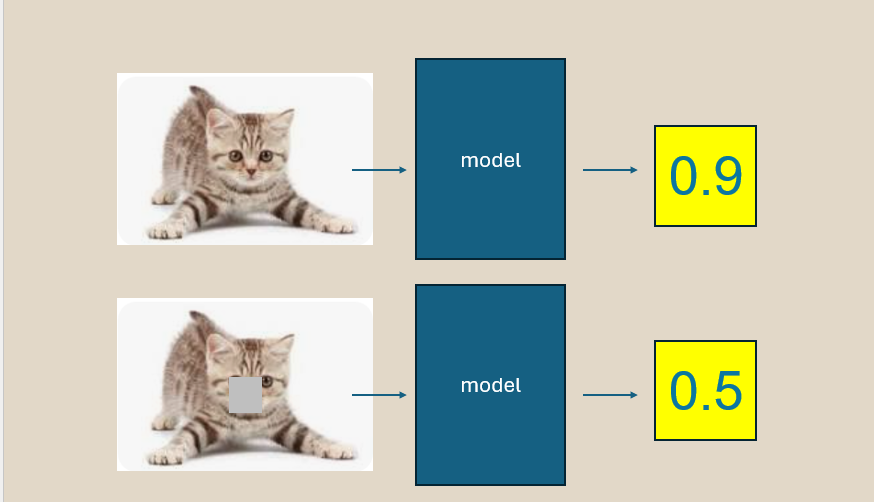
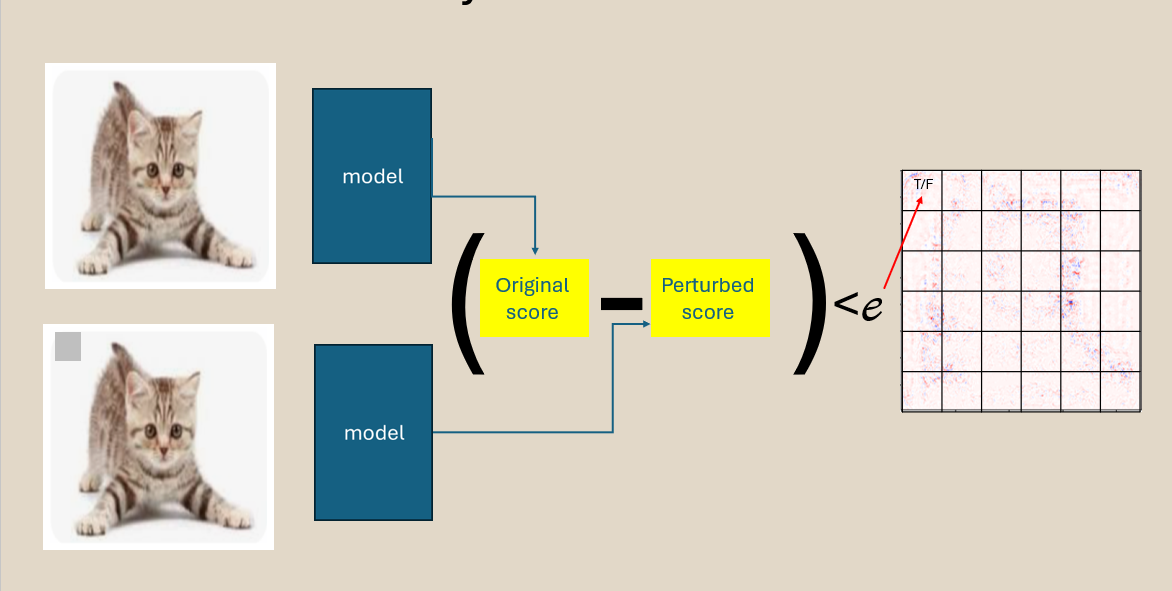
Quantify the violations between the heat‑map claim and the actual difference between the predictions after the perturbation. Simple.
Until you try to make it fast.
Where theory collapsed: the features_in_step trap
For high‑resolution images, evaluating one pixel at a time is too slow in an irrelevant way.
So Quantus allows processing several pixels at once using:
features_in_step = N # number of pixels perturbed in each stepGreat idea… in theory.
In practice, two big things went wrong.
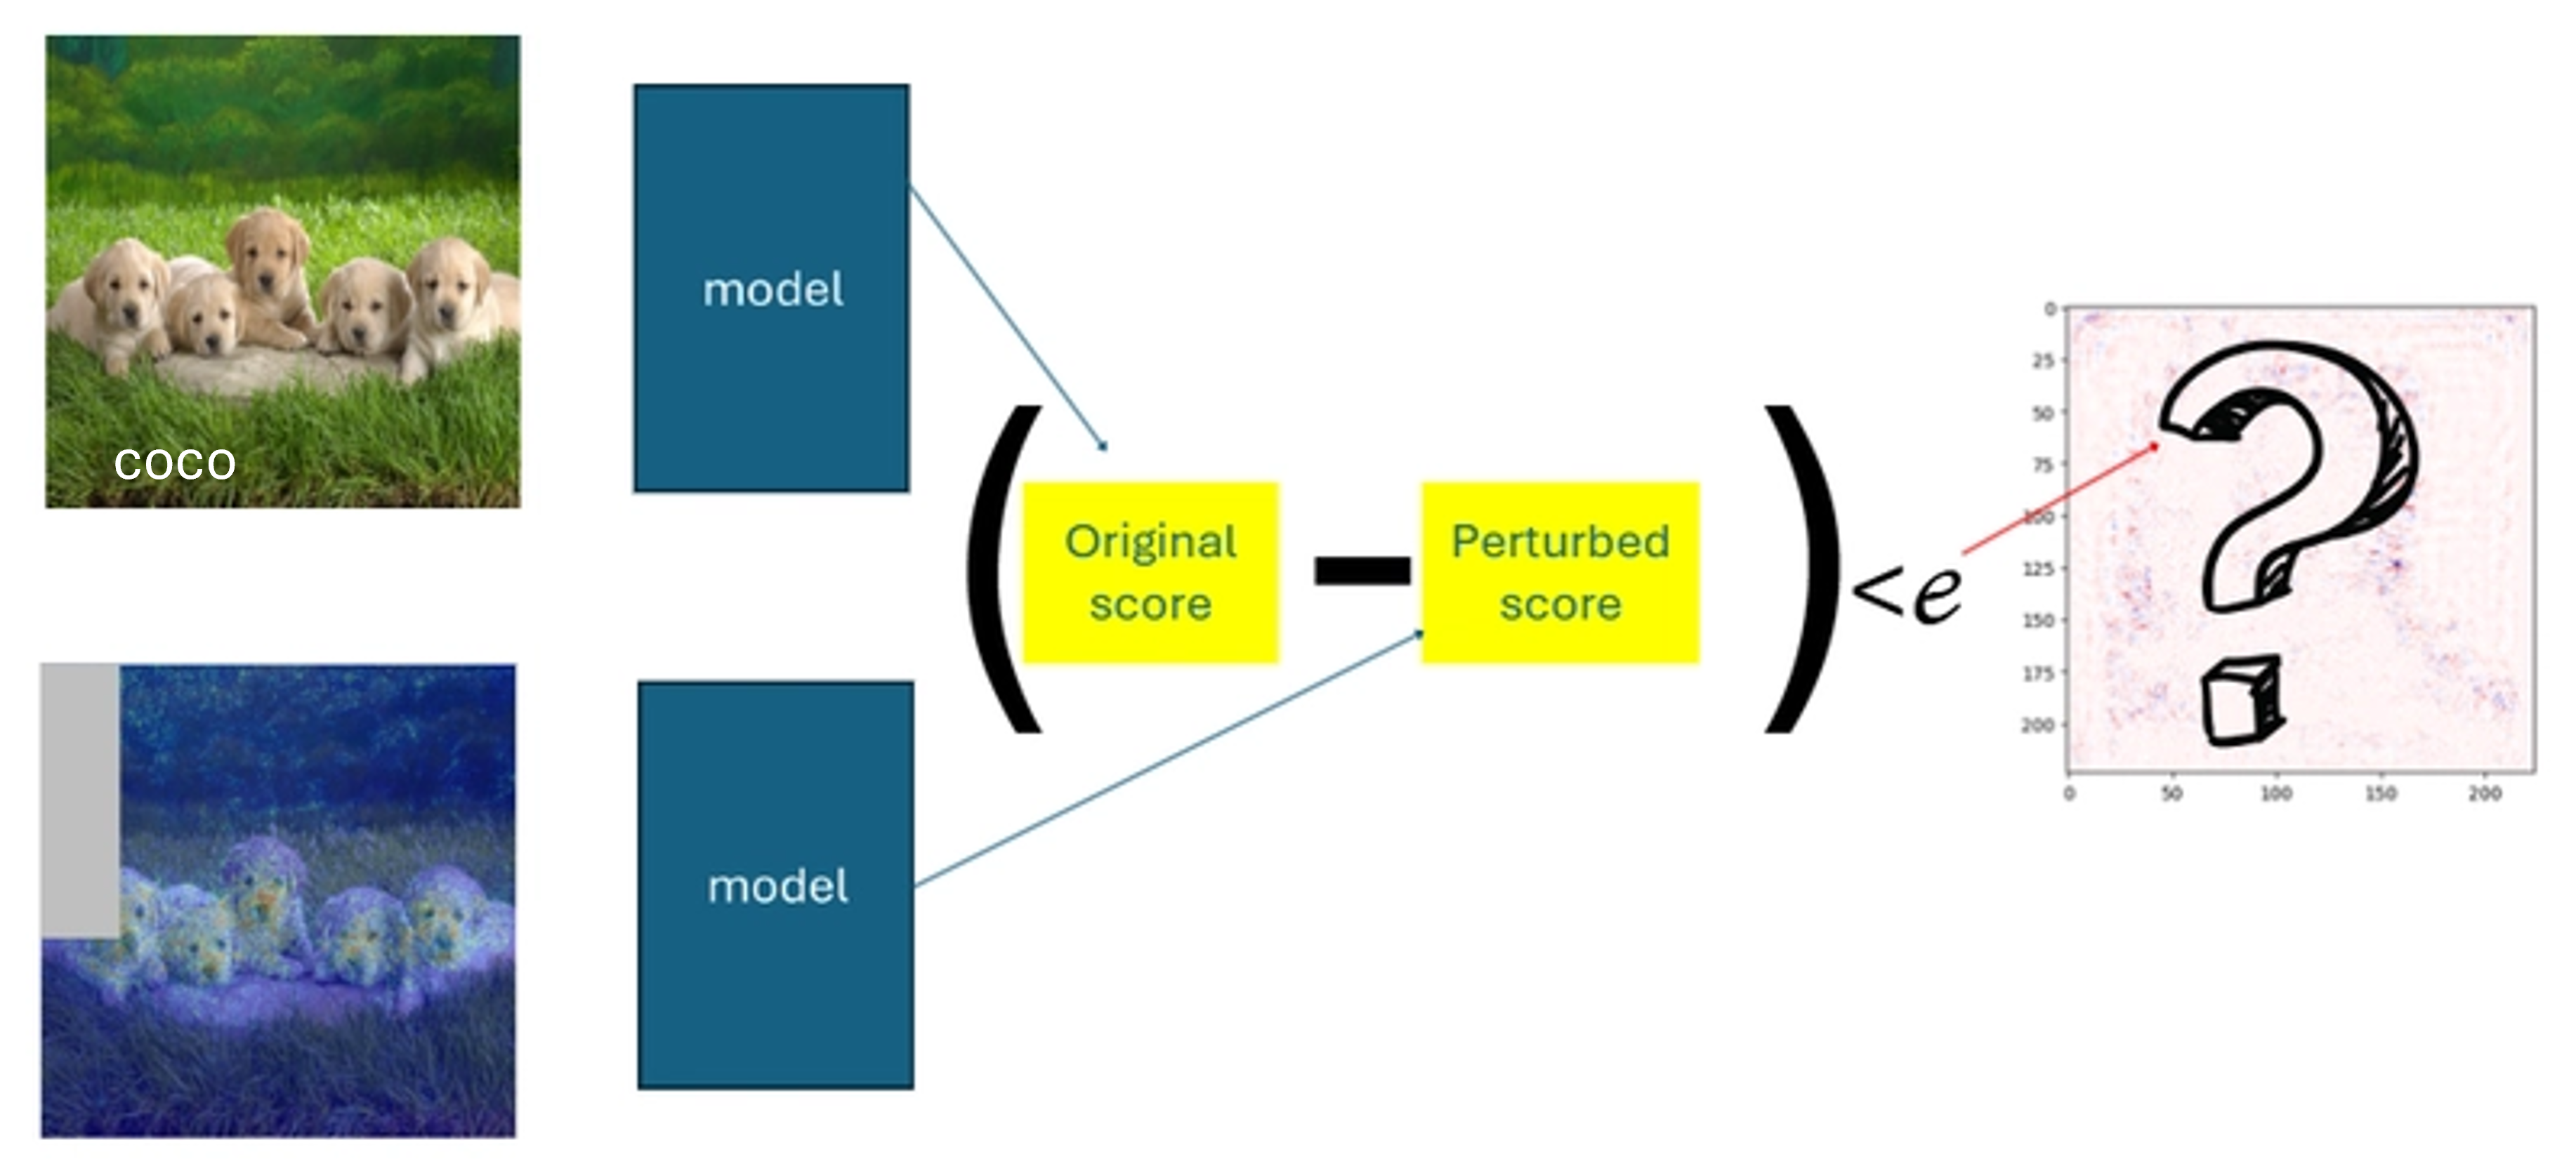
Problem #1 — Group perturbations break the math
When you perturb N pixels together, the prediction difference reflects a mixed effect:
- Was it pixel #3 that caused the change?
- Pixel #4?
- Or the combination?
But the metric treated each pixel as if the model responded to it individually.
Consequences:
- True violations were hidden
- False violations appeared
- Results became inconsistent
In other words — the metric was no longer measuring its own definition.
Problem #2 — Shape mismatches exploded the runtime
Deep inside the metric, Quantus tried to do:
preds_differences ^ non_features # XOR in the original codeWith group perturbations:
preds_differences= number of perturbation stepsnon_features= number of pixels
These two sizes are not equal unless features_in_step = 1.
Result:
ValueError: operands could not be broadcast togetherThe metric literally could not run in the mode needed to make it efficient.
Our approach: make it correct, then make it fast
To address the issues, we restructured the entire evaluation flow so that batching improves performance without compromising the integrity of pixel‑level reasoning.
✔ 1. Pixel influence is kept strictly independent
We begin by separating pixels into “important” and “non‑important” groups based on their attribution values.
Even when multiple pixels are perturbed together, each pixel keeps its own dedicated evaluation record.
This ensures that batching affects runtime only—not the meaning of the test.

✔ 2. Perturbations are organized and traceable
Instead of random or ambiguous grouping, pixels are sorted and processed in stable, predictable batches.
Every prediction difference returned from a batch is cleanly mapped back to the exact pixels involved, so there is never uncertainty about which change belongs to which feature.
✔ 3. All internal shapes stay aligned and consistent
By restructuring the flow around pixel‑wise bookkeeping, we guarantee that every intermediate tensor has matching dimensions, eliminating broadcasting errors.
✔ 4. Efficient vectorised implementation
- Build a mask matrix of shape
(num_steps, num_pixels)where each row indicates which pixels are perturbed in that step. - Evaluate the model on the whole batch of perturbed images at once (
torch.stack/np.stack). - Multiply prediction differences element‑wise by the mask, yielding a pixel‑level contribution matrix that can be summed to obtain the final Non‑Sensitivity score.
✔ 5. Integrated back into Quantus
The new implementation was contributed as a pull request to the Quantus library. All existing tests pass, and the new code adds a batch_size argument that defaults to 1 (preserving backward compatibility) while allowing users to set larger batches for speed.
Result: correct and fast Non‑Sensitivity
| Setting | Runtime (s) | Violations detected |
|---|---|---|
features_in_step = 1 (original) | 12.4 | 87 |
features_in_step = 32 (new) | 1.3 | 87 |
features_in_step = 128 (new) | 0.9 | 87 |
The metric now matches the theoretical definition and runs an order of magnitude faster on high‑resolution images.
Take‑aways
- Batching is fine as long as you keep the semantic independence of each feature.
- Always verify that internal tensor shapes line up with the mathematical formulation.
- When contributing to open‑source libraries, add backward‑compatible defaults and thorough tests.
If you’re building your own XAI evaluation pipeline, give the updated Non‑Sensitivity implementation a try — it’s now both trustworthy and practical.
Happy explaining!
el‑index Mapping
All arrays used for tracking perturbation effects naturally share compatible dimensions.
This removed the broadcasting conflicts and ensured that violation checks operate safely and efficiently.
✔ 4. Stability Holds Across Resolutions and Configurations
Because each pixel retains a one‑to‑one link with its own “effect slot”, the method behaves consistently whether the input is 32 × 32 or 224 × 224, and regardless of how large features_in_step is.
- This allowed us to use batching to reduce runtime while preserving pixel‑level correctness.
When the updated flow proved reliable across datasets and explainers, we contributed the implementation back to Quantus as an open‑source PR.
Link: Fix NonSensitivity metric
What This Enabled in AIXPlainer
- We could measure Non‑Sensitivity on real datasets, not just demos.
- Evaluations became fast enough for users to actually explore explainers.
- Stability comparisons across methods became meaningful.
- Our metric suite gained a reliable axiomatic component.
In short: the app finally behaved like a real research‑grade evaluation tool.
Who Should Care About This?
If you’re working on:
- Attribution method benchmarking
- Explainability evaluation
- Regulatory‑grade transparency
- Model debugging tools
…then Non‑Sensitivity is one of those axioms that helps you discover when your explainer might be silently misleading you.
But only if the implementation is correct.
🔚 Final Thoughts
Building XAI metrics is a fascinating blend of math, engineering, and “debugging the theory”.
Even the cleanest axioms require thoughtful engineering to become real, trustworthy tools.
If you’re building your own evaluation framework or integrating Quantus into your workflow, I hope this post saves you the same debugging hours it saved us.
If you want the full implementation details or want to integrate similar metrics — feel free to reach out.