Oracle Cloud에서 Godot 서버 호스팅
발행: (2025년 12월 15일 오후 07:42 GMT+9)
5 분 소요
원문: Dev.to
Source: Dev.to
소개
멀티플레이어 프로젝트를 작업할 때, 서버를 호스팅하는 것은 다른 사람과 공유할 수 있게 하는 핵심 요소입니다.
이 글에서는 Oracle Cloud 인스턴스에 Godot (4.5.1) 서버를 호스팅하는 방법을 다루며, 다음 내용을 포함합니다:
- Godot 프로젝트
- Godot 서버 Docker화
- Oracle 인스턴스에 Godot 서버 호스팅
- NGINX와 Let’s Encrypt를 이용한 HTTPS 설정
- itch.io에 클라이언트 호스팅
요구 사항
- Godot 4.5.1 –
- Docker와 Docker Hub 계정 –
- Oracle Cloud 계정 – (가장 가까운 지역을 선택하세요)
- itch.io 계정 –
- 등록된 도메인 (HTTPS에만 필요합니다; 예: GoDaddy – )
Godot 프로젝트 {#the-godot-project}
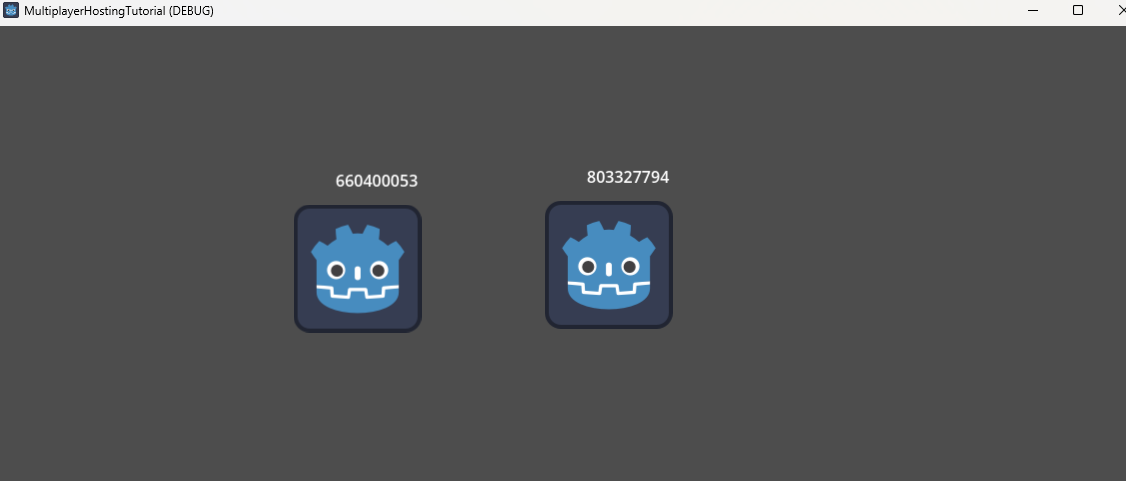
이 프로젝트는 호환 모드의 Godot 4.5.1과 Godot의 고수준 멀티플레이어 (WebSocketServer)를 사용하여 클라이언트가 웹 브라우저에서 실행될 수 있게 합니다. 플레이어는 2D 공간에 참여하고, 이동하며, 아바타 위에 자신의 연결 ID를 확인할 수 있습니다.
소스 코드:
Godot 서버 Docker화 {#dockerising-a-godot-server}
Dockerfile – 빌드 단계
# Build stage – download Godot and export the project
FROM ubuntu:focal AS build

# Install dependencies
RUN apt-get update && apt-get install -y --no-install-recommends \
    ca-certificates \
    unzip \
    wget

ENV GODOT_VERSION="4.5.1"

# Download Godot and export templates
RUN wget https://github.com/godotengine/godot/releases/download/${GODOT_VERSION}-stable/Godot_v${GODOT_VERSION}-stable_linux.x86_64.zip \
    && wget https://github.com/godotengine/godot/releases/download/${GODOT_VERSION}-stable/Godot_v${GODOT_VERSION}-stable_export_templates.tpz

# Install Godot
RUN mkdir -p ~/.cache ~/.config/godot ~/.local/share/godot/export_templates/${GODOT_VERSION}.stable \
    && unzip Godot_v${GODOT_VERSION}-stable_linux*.zip \
    && mv Godot_v${GODOT_VERSION}-stable_linux*64 /usr/local/bin/godot \
    && unzip Godot_v${GODOT_VERSION}-stable_export_templates.tpz \
    && mv templates/* ~/.local/share/godot/export_templates/${GODOT_VERSION}.stable \
    && rm Godot_v${GODOT_VERSION}-stable_export_templates.tpz Godot_v${GODOT_VERSION}-stable_linux*.zip
Linux 서버 빌드 내보내기
# Create a workspace for the export
RUN mkdir /godotbuildspace
WORKDIR /godotbuildspace

# Copy the project files
COPY . .

ARG EXECUTABLE_NAME
ENV EXPORT_NAME="LinuxServer"
ENV EXECUTABLE_NAME=$EXECUTABLE_NAME
ENV EXPORT_MODE="debug"   # use "release" for production

# Export the project (headless)
RUN godot --export-${EXPORT_MODE} ${EXPORT_NAME} ${EXECUTABLE_NAME} --headless
Note:
EXECUTABLE_NAME– 최종 바이너리 이름.EXPORT_NAME–export_presets.cfg에 정의된 Linux 내보내기 프리셋 이름.EXPORT_MODE–debug(print() 출력 표시) 또는release.
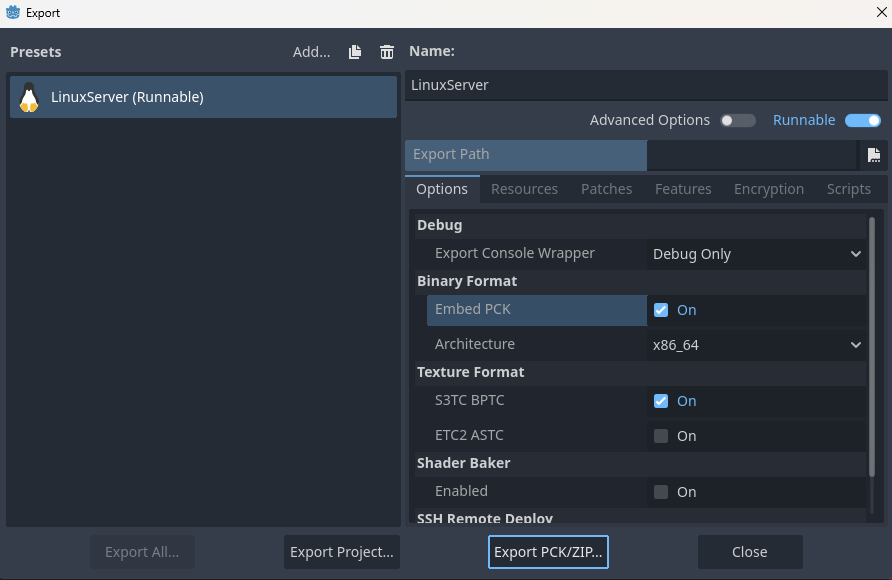
Godot 에디터에서 Linux 내보내기 프리셋을 생성합니다 (Project → Export → Add… → Linux) 그리고 Embed PCK와 Export Mode → Export as dedicated server를 활성화합니다.
Dockerfile – 런타임 단계
# Runtime stage – run the exported server binary
FROM ubuntu:focal

ARG EXECUTABLE_NAME
ENV EXECUTABLE_NAME=$EXECUTABLE_NAME

COPY --from=build /godotbuildspace/ ./

EXPOSE 6069/tcp
EXPOSE 6069/udp

CMD ["sh", "-c", "./${EXECUTABLE_NAME} --headless -s"]- 포트 6069는 TCP와 UDP 모두에 사용됩니다 (정확한 포트는 클라이언트 코드를 참조하세요).
--headless는 그래픽 인터페이스 없이 Godot를 실행합니다.-s는 프로젝트를 서버로 시작하도록 지정합니다 (자세한 내용은 소스를 확인하세요).
이미지 빌드 및 푸시
# Build locally
docker build -t multiplayer-hosting-tutorial-server .

# Run locally (optional)
docker run -d -p 6069:6069 -p 6069:6069/udp multiplayer-hosting-tutorial-server

# Push to Docker Hub for deployment
docker build -t /multiplayer-hosting-tutorial-server .
docker push /multiplayer-hosting-tutorial-server
Oracle 인스턴스에 Godot 서버 호스팅 {#hosting-a-godot-server-on-an-oracle-instance}
Oracle 인스턴스 생성
- Oracle Cloud에서 Instances 섹션을 엽니다.
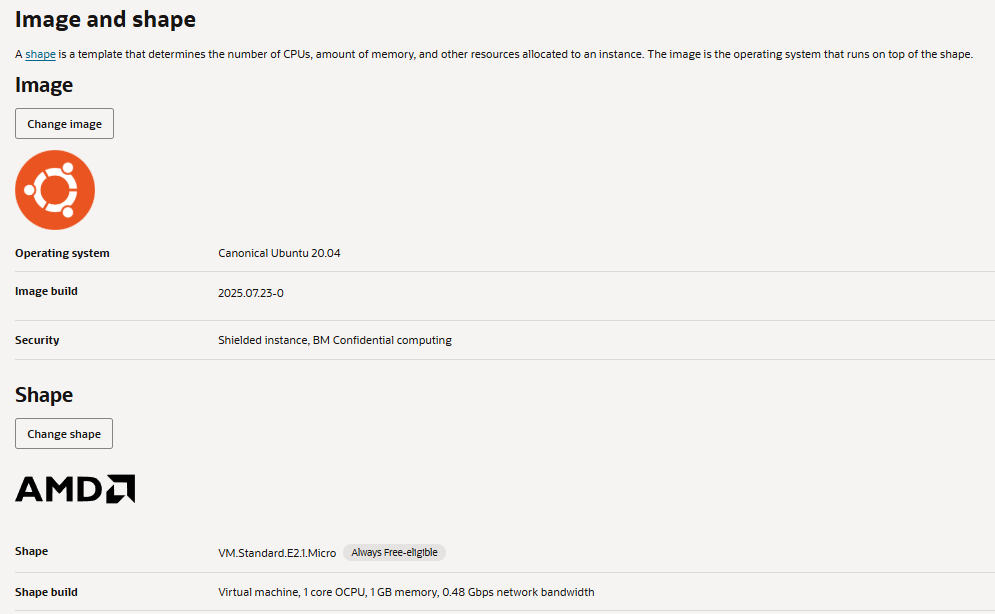
- 다음 옵션을 사용하여 새 인스턴스를 생성합니다:
- Image: Canonical Ubuntu 20.04
- Shape: VM.Standard.E2.1.Micro (무료 티어)
인스턴스 설정
# SSH into the instance (replace <IP> with your instance's IP)
ssh ubuntu@<IP>

# Update packages
sudo apt-get update && sudo apt-get upgrade -y

# Install Docker
sudo apt-get install -y docker.io
sudo systemctl enable --now docker

# (Optional) Add your user to the docker group
sudo usermod -aG docker $USER
newgrp docker
Docker 이미지 가져오기 및 실행
docker pull /multiplayer-hosting-tutorial-server
docker run -d -p 6069:6069 -p 6069:6069/udp /multiplayer-hosting-tutorial-server
컨테이너가 실행 중인지 확인합니다:
docker ps컨테이너가 포트 6069/tcp와 6069/udp를 노출하고 있는 것을 확인할 수 있습니다.
(선택 사항) systemd 서비스 설정
/etc/systemd/system/godot-server.service 파일을 생성합니다:
[Unit]
Description=Godot Multiplayer Server
After=network.target docker.service
Requires=docker.service

[Service]
Restart=always
ExecStart=/usr/bin/docker run --rm -p 6069:6069 -p 6069:6069/udp /multiplayer-hosting-tutorial-server
ExecStop=/usr/bin/docker stop $(/usr/bin/docker ps -q --filter "ancestor=/multiplayer-hosting-tutorial-server")

[Install]
WantedBy=multi-user.target
서비스를 활성화하고 시작합니다:
sudo systemctl daemon-reload
sudo systemctl enable --now godot-server
이제 서버가 재부팅 후 자동으로 시작됩니다.