Self-Hosted N8N on AWS ECS with AWS CDK Typescript
Source: Dev.to

📋 Abstract
This repository provides an Infrastructure as Code (IaC) solution for deploying a self‑hosted N8N workflow automation platform on AWS using the AWS Cloud Development Kit (CDK).
The solution implements a scalable, cost‑optimized, and highly available architecture leveraging:
- AWS ECS Fargate
- PostgreSQL RDS instance
- ElastiCache Redis for queue management
📑 Table of Contents
- 📋 Abstract
- 📑 Table of Contents
- 🏗️ Architecture Overview
- 🔍 Deep‑Dive the Solution
- 🚀 Deploy CDK Stack and Test
- 📋 Prerequisites
- ⚙️ Environment Setup
- 🚀 Deployment Steps
- ✅ Verify Deployment
- 🧪 Testing N8N Workflows
- 🧹 Cleanup Stack
- 🎉 Conclusion
- 📚 References
🏗️ Architecture Overview

Key Components
- VPC with Multi‑AZ Subnets – Isolated network with public, private, and isolated subnets across multiple Availability Zones.
- Network Load Balancer (NLB) – Distributes HTTPS traffic to N8N main‑service instances.
- ECS Fargate Cluster – Runs containerised N8N services with auto‑scaling capabilities.
- RDS PostgreSQL – Multi‑AZ managed database for workflow data persistence.
- ElastiCache Redis – In‑memory cache for BullMQ job‑queue management.
- AWS Cloud Map – Service discovery for internal service‑to‑service communication.
🔍 Deep‑Dive the Solution

🚀 Deploy CDK Stack and Test
📋 Prerequisites
Before deploying, ensure you have:
- AWS CLI installed and configured (
aws configure). - Node.js 16+ and pnpm installed.
- AWS CDK CLI installed (
npm install -g aws-cdk). - An AWS account with appropriate permissions.
- A Route 53 hosted zone (optional, for a custom domain).
⚙️ Environment Setup
1. Clone the repository
git clone
cd aws-cdk-self-hosted-n8n-infra
2. Install dependencies
pnpm install3. Configure environment variables
Create a .env file in the project root:
CDK_DEFAULT_ACCOUNT=your-aws-account-id
CDK_DEFAULT_REGION=your-aws-region
HOSTED_ZONE_NAME=example.com
HOSTED_ZONE_ID=Z1234567890ABC
🚀 Deployment Steps
1. Synthesize the CloudFormation template
pnpm run synth2. Review the changes
pnpm run diff3. Deploy the stack
pnpm run deploy✅ Verify Deployment
After a successful deployment, verify the resources in the AWS Console.
1. ECS Cluster

The ECS cluster shows both N8N services running with the configured task definitions and capacity providers.
2. Main Service

The N8N main service displays running tasks, auto‑scaling configuration, and health status.
3. Worker Service

The worker service shows active workers processing queued jobs with concurrency settings.
4. Network Load Balancer

Further verification steps (Testing N8N Workflows, Cleanup Stack, Conclusion, References) follow the same pattern and are left unchanged.
NLB Listener & DNS
The NLB shows the listener configuration and DNS name which is used to create an alias record in Route 53.
5. Target Group
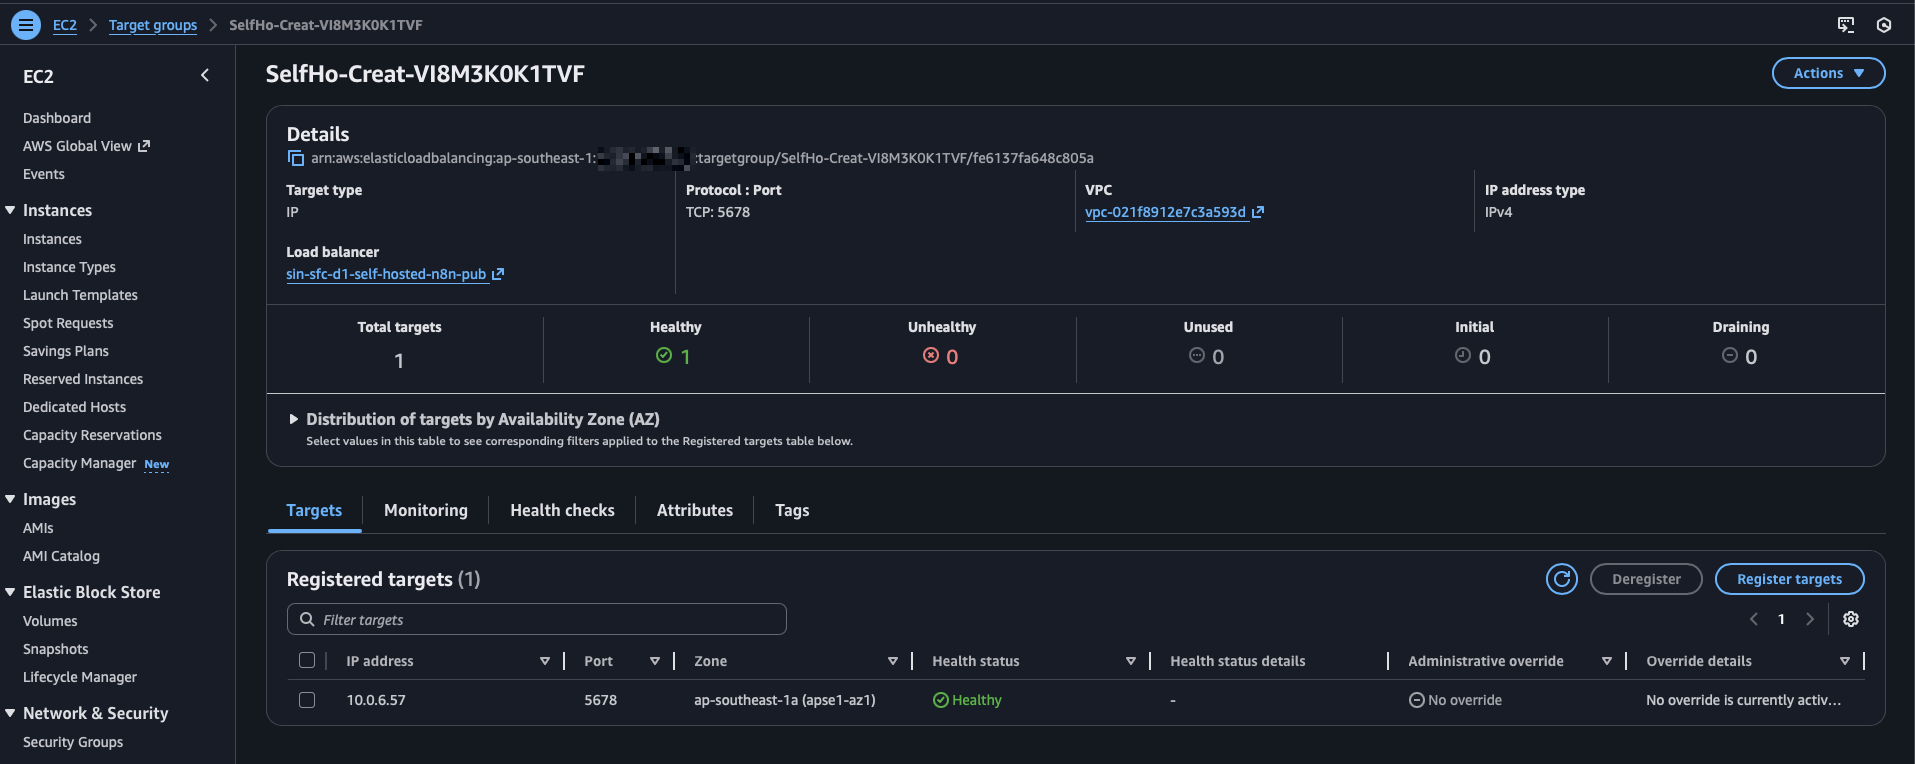
The target group displays registered ECS tasks with health‑check status and routing configuration.
🧪 Testing N8N Workflows
1. Access N8N UI
Navigate to your NLB DNS name or custom domain (if configured):
https://n8n.simflexcloud.com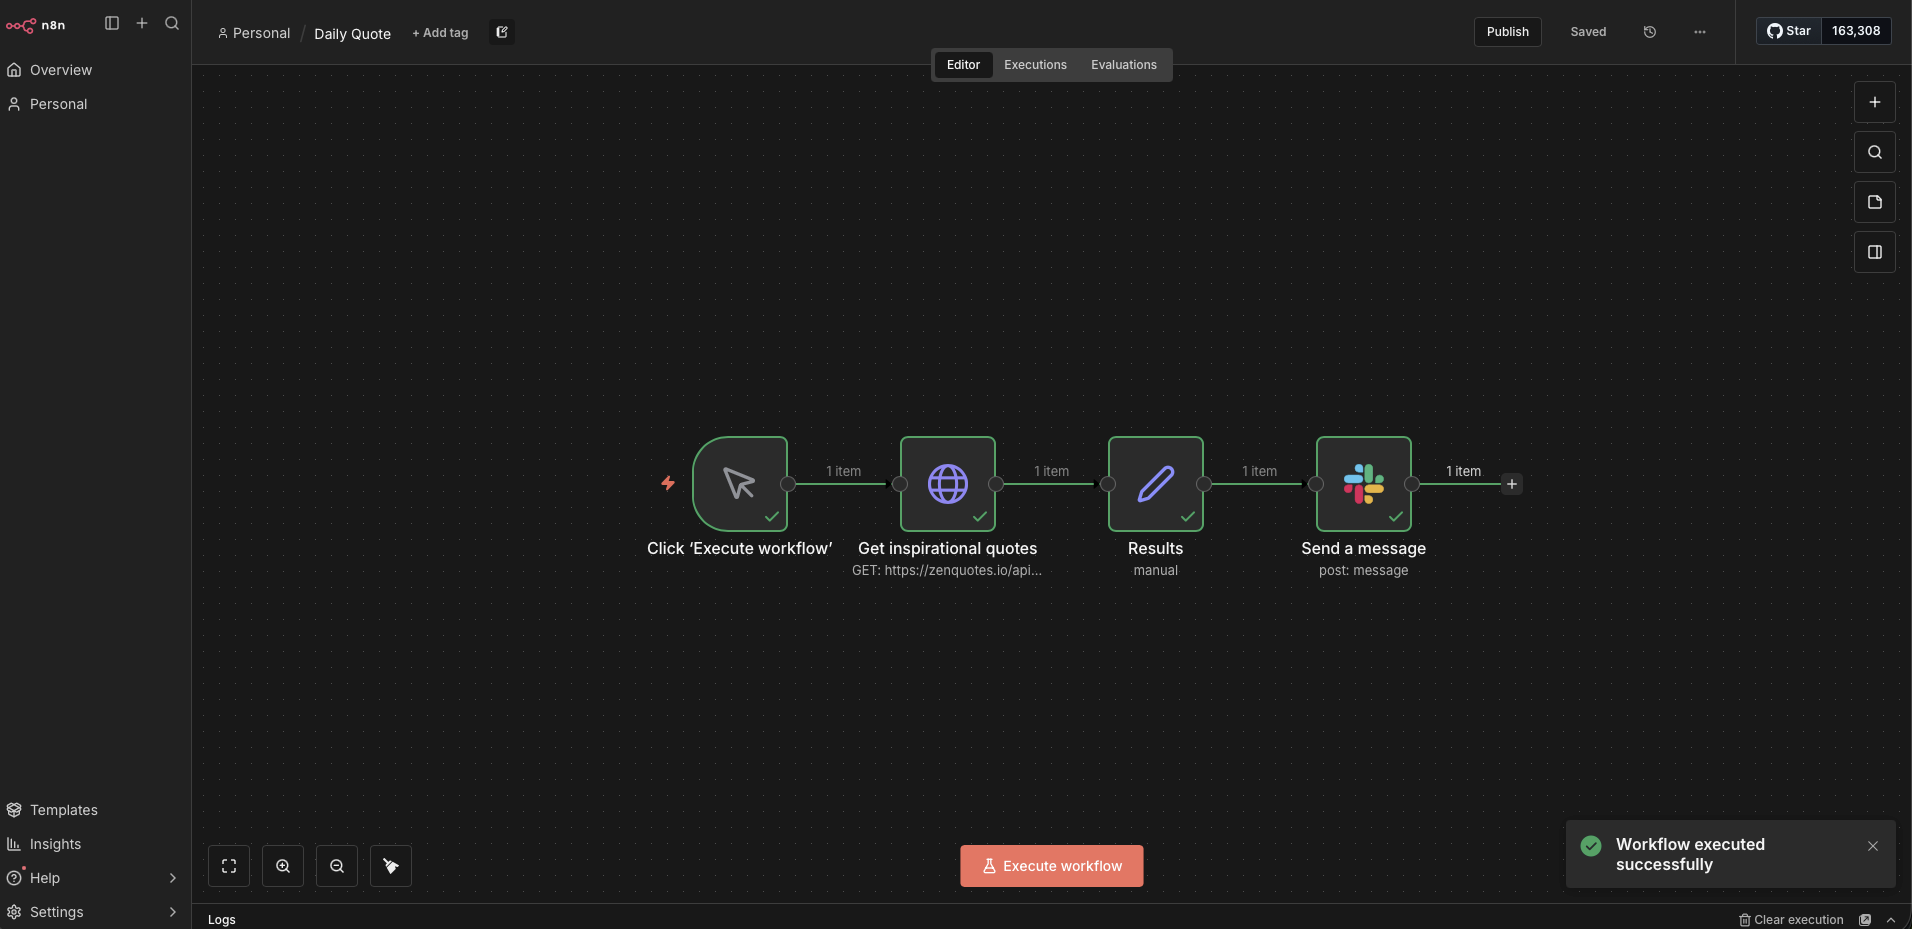
The N8N interface shows the workflow editor where you can create, test, and monitor automation workflows.
2. Create a Test Workflow
Example workflow: Send an inspirational quote from the internet to Slack daily.
3. Verify Execution
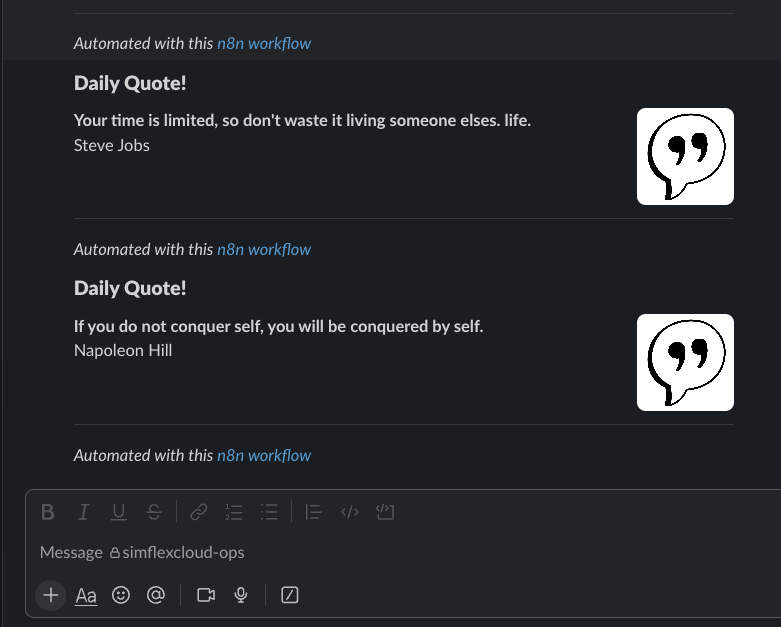
The Slack integration demonstrates successful workflow execution with the message being delivered to the configured Slack channel.
🧹 Cleanup Stack
To avoid ongoing AWS charges, destroy all resources:
# Destroy the CDK stack
pnpm run destroy
🎉 Conclusion
This CDK solution provides a scalable and cost‑optimized infrastructure‑as‑code (AWS CDK) for running N8N on AWS ECS.