Deploying a 2048 Game on Kubernetes using Amazon EKS — End-to-End DevOps Project
Source: Dev.to
Project Goal
- Containerize the application
- Deploy it on a Kubernetes cluster
- Expose it to the Internet
- Understand how Kubernetes workloads run in a real cloud environment
GitHub Repository:
👉
Project Architecture Overview
The workflow follows a typical Kubernetes deployment lifecycle:
- Containerize the application with Docker
- Create an Amazon EKS cluster
- Configure IAM roles and worker nodes
- Deploy the application using Kubernetes manifests
- Expose the application with a
LoadBalancerservice - Access the application from the Internet
Prerequisites
Before starting, install and configure the following tools:
| Tool | Purpose |
|---|---|
| kubectl | CLI for interacting with Kubernetes clusters (deploy apps, inspect resources, manage the cluster). |
| eksctl | Simplifies creation and management of Amazon EKS clusters (automates many AWS resources). |
| AWS CLI | Allows direct interaction with AWS services; used to authenticate with EKS and update the kubeconfig file. |
Once these tools are ready, you can begin building the Kubernetes environment.
Step 1 – Create an Amazon EKS Cluster
An EKS cluster consists of two main components:
- Control Plane – Managed by AWS
- Worker Nodes – EC2 instances where pods run
When creating the cluster, configure:
- Default VPC
- 2–3 subnets
- Security groups
- Public cluster endpoint access
Cluster creation typically takes 10–12 minutes. When the status becomes Active, proceed to the next step.
Step 2 – Create IAM Roles
AWS services rely heavily on IAM roles and permissions. Two roles are required:
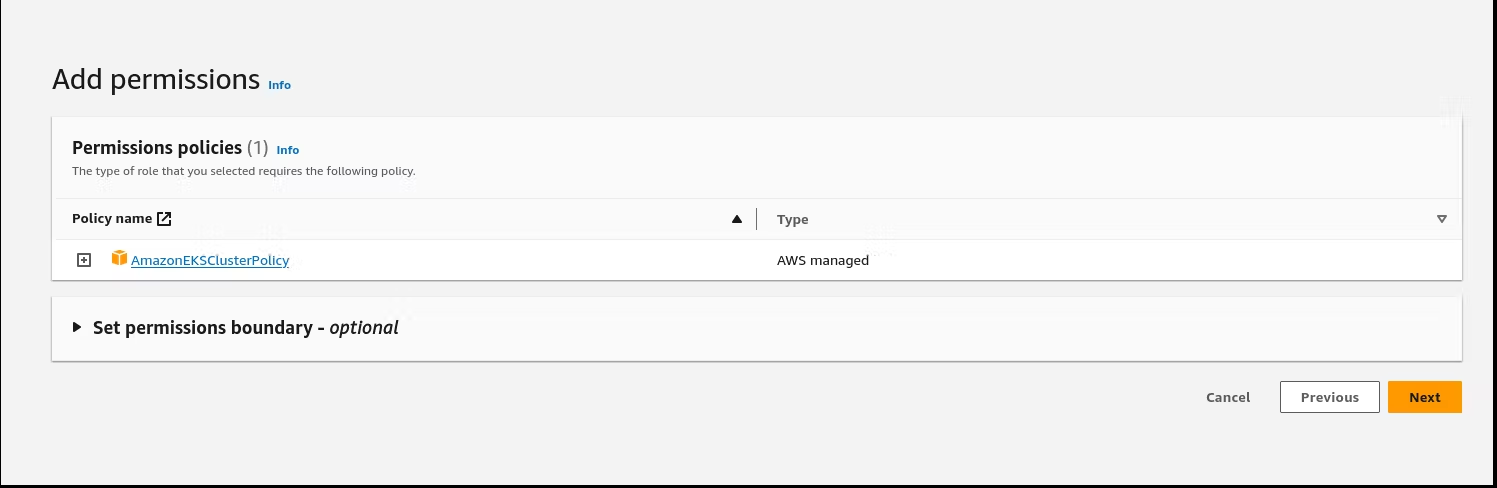
1. EKS Cluster Role
Allows the Kubernetes control plane to interact with other AWS services.
Policy attached: AmazonEKSClusterPolicy
2. Node Group Role
Provides worker nodes permission to communicate with AWS services.
Policies attached:
AmazonEKSWorkerNodePolicy
AmazonEC2ContainerRegistryReadOnly
AmazonEKS_CNI_Policy
These permissions enable nodes to:
- Pull container images from ECR
- Communicate with the control plane
- Manage networking via the CNI plugin
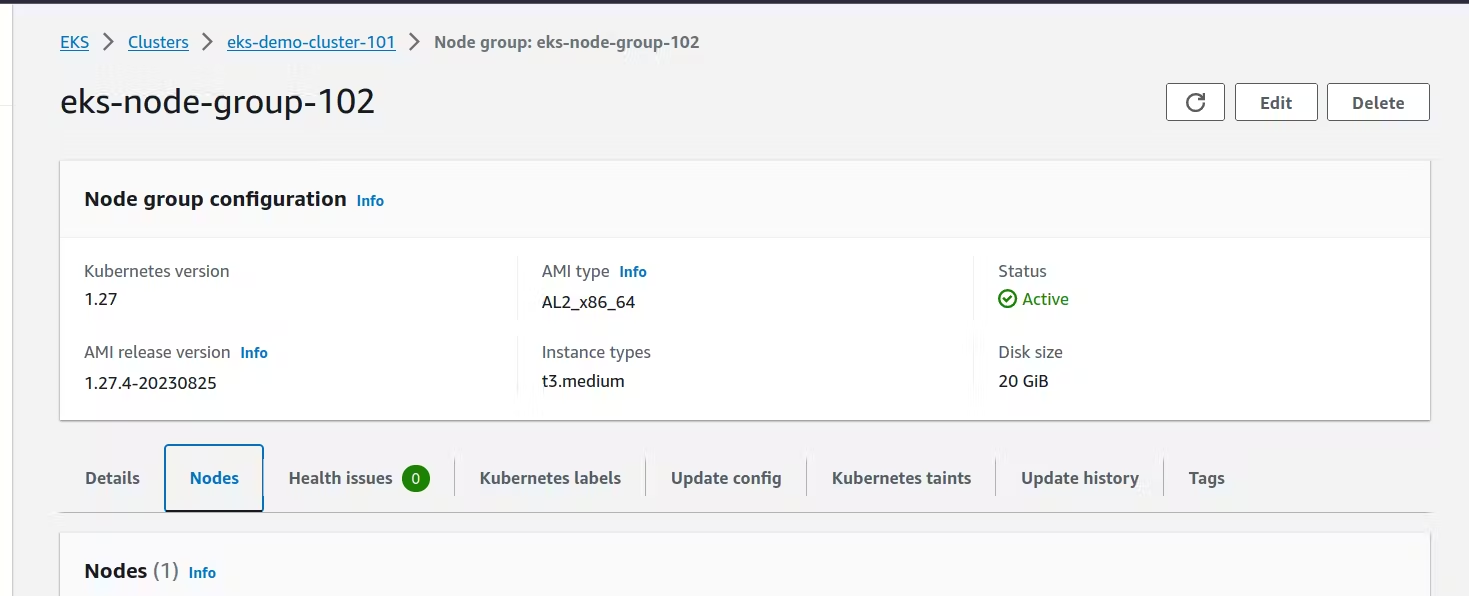
Step 3 – Add Worker Nodes
Create a Node Group to host the pods.
| Setting | Value |
|---|---|
| AMI | Amazon Linux 2 |
| Desired nodes | 1 (can be scaled later) |
| Security group ports | 22, 80, 8080 |
| SSH access | Enabled |
After a few minutes the node group becomes Active and ready for workloads.
Step 4 – Authenticate with the Cluster
Update your local kubeconfig so kubectl can talk to the cluster:
aws eks update-kubeconfig --region us-east-1 --name my-clusterThis command stores the cluster credentials locally.
Verify the connection
kubectl get nodesIf the nodes are listed, the cluster is correctly configured.
Step 5 – Deploy the 2048 Game Pod
Create a pod definition for the 2048 game:
apiVersion: v1
kind: Pod
metadata:
  name: 2048-pod
  labels:
    app: 2048-ws
spec:
  containers:
  - name: 2048-container
    image: blackicebird/2048
    ports:
    - containerPort: 80
Apply the manifest:
kubectl apply -f 2048-pod.yamlCheck the pod status:
kubectl get podsWhen the pod shows Running, the application is successfully deployed inside the cluster.
Step 6 – Expose the Application
Create a LoadBalancer service to make the game reachable from the Internet:
apiVersion: v1
kind: Service
metadata:
  name: 2048-service
spec:
  type: LoadBalancer
  selector:
    app: 2048-ws
  ports:
  - protocol: TCP
    port: 80
    targetPort: 80
Apply the service:
kubectl apply -f 2048-service.yamlAfter a few moments AWS provisions an ELB. Retrieve its DNS name:
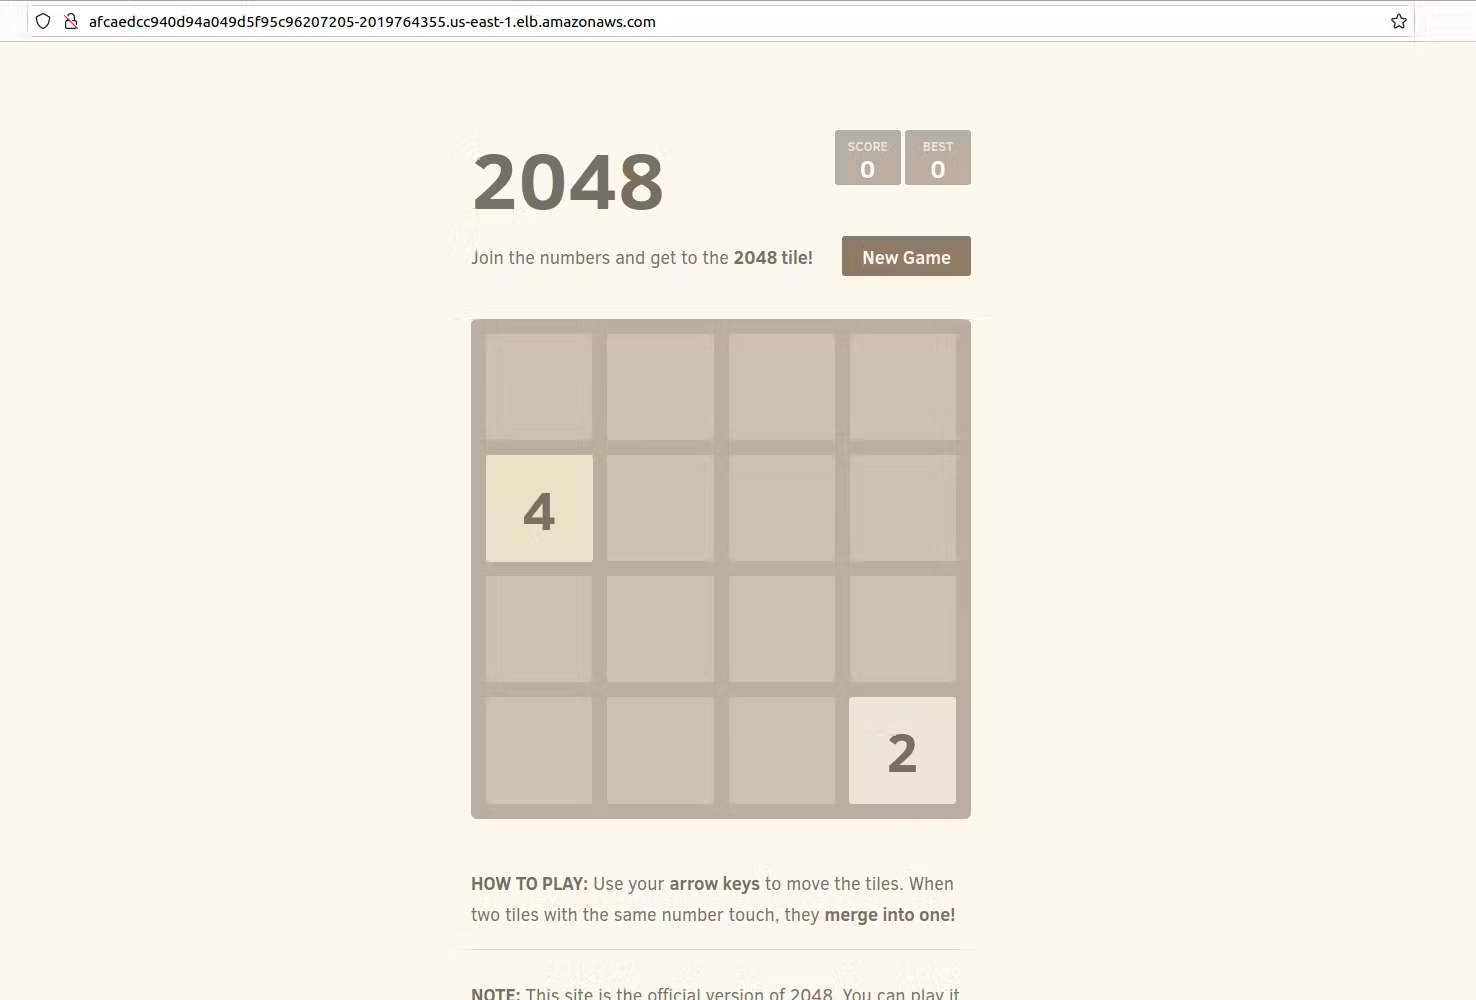
kubectl get svc 2048-serviceOpen the DNS name in a browser – the 2048 game should be fully functional.
Additional Details for Exposing the Application
Although the pod is running, it is not yet accessible from outside the cluster. To solve this, we create a Kubernetes Service:
apiVersion: v1
kind: Service
metadata:
  name: mygame-svc
spec:
  selector:
    app: 2048-ws
  ports:
    - protocol: TCP
      port: 80
      targetPort: 80
  type: LoadBalancer
Deploy the service:
kubectl apply -f mygame-svc.yamlCheck the service details:
kubectl describe svc mygame-svcKubernetes will automatically provision a public LoadBalancer.
Step 7 — Accessing the Application
After the LoadBalancer is created, AWS generates a public DNS endpoint. Open that DNS name in a browser – the 2048 game interface appears and the application becomes publicly accessible.
Scaling the Application
One of the biggest advantages of Kubernetes is horizontal scaling. If traffic increases, additional replicas can be created:
kubectl scale deployment my-app --replicas=3Kubernetes will automatically distribute traffic across the pods, ensuring high availability and improved performance.
What I Learned from This Project
- Kubernetes Workloads – How pods run containerized applications inside a cluster.
- Managed Kubernetes – How Amazon EKS simplifies cluster management by handling the control plane.
- Networking in Kubernetes – How services and load balancers expose applications externally.
- Cloud Infrastructure – How AWS integrates networking, compute, and container orchestration together.
Possible Improvements
- Using Deployments instead of standalone pods.
- Implementing Ingress controllers.
- Adding CI/CD pipelines.
- Monitoring with Prometheus and Grafana.
- Infrastructure automation using Terraform.
These additions would bring the project closer to a production‑grade Kubernetes deployment.
Final Thoughts
Kubernetes can seem overwhelming at first, but projects like this make it much easier to understand how everything fits together. By deploying a simple application like the 2048 game, we can clearly see how:
- Containers run inside pods.
- Pods run on worker nodes.
- Services expose applications.
- Load balancers provide external access.
If you are learning DevOps, Kubernetes, or Cloud Engineering, building projects like this is one of the best ways to gain practical experience.
Project Repository
Explore the code, YAML manifests, and setup steps in the complete project repository: