第9部分:使用 Rust 生成 Simba Network
I’m happy to translate the article for you, but I’ll need the full text of the post (the content you’d like translated) in order to do so. Please paste the article’s body here, and I’ll provide a Simplified‑Chinese translation while preserving the source link, formatting, markdown, and any code blocks.
图像 → CSV 编码器 / 解码器
我找到了一幅黑白的狮子幼崽画作,并使用以下脚本将像素转换为 CSV 数字(并再转换回去):
Image to CSV Encoder / Decoder
生成 CSV 后,我将其输入到神经网络中,使用我平时的 Python 训练脚本。
帮助机器绘画
脚本在几个地方出现了困难,所以我添加了一些修复,以帮助网络学习如何绘制辛巴。
大图像问题
- 原始尺寸: 474 × 474 px – 导致训练速度极慢,难以忍受。
- 调整后尺寸: 200 × 200 px – 保持训练时间在合理范围内。
机器崩溃与重启
偶尔的过热导致机器崩溃,训练每次都会从头重新开始——这极大地浪费了时间和资源。
解决方案: 添加了 保存/加载检查点 机制,使训练可以从上一次保存的模型继续。
错误振荡问题
无论学习率多么小,损失都会陷入振荡循环。我尝试了极小的学习率(例如 0.000001),但训练速度变得不可接受地慢。
于是,我实现了 余弦退火 来逐步降低学习率:
# Cosine annealing learning‑rate schedule
decay_factor = 0.5 * (1 + math.cos(math.pi * i / (epochs + epoch_offset)))
current_lr   = lr_min + (lr_max - lr_min) * decay_factor
这产生了平滑、稳定的学习效果。
结果:通过数学创作艺术
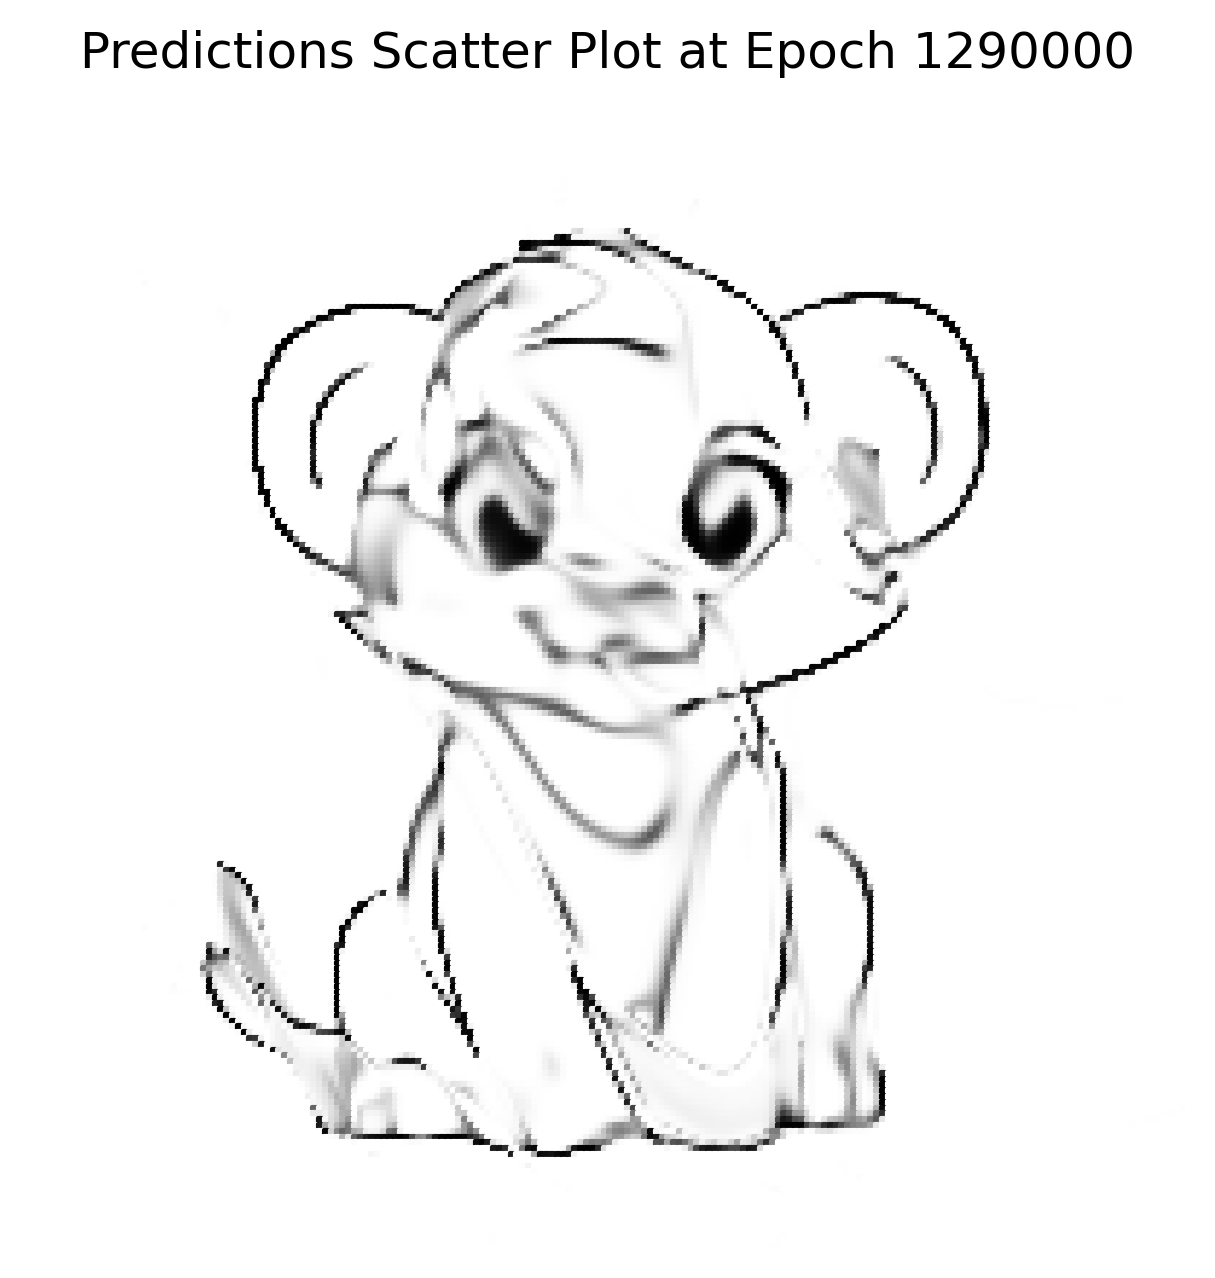
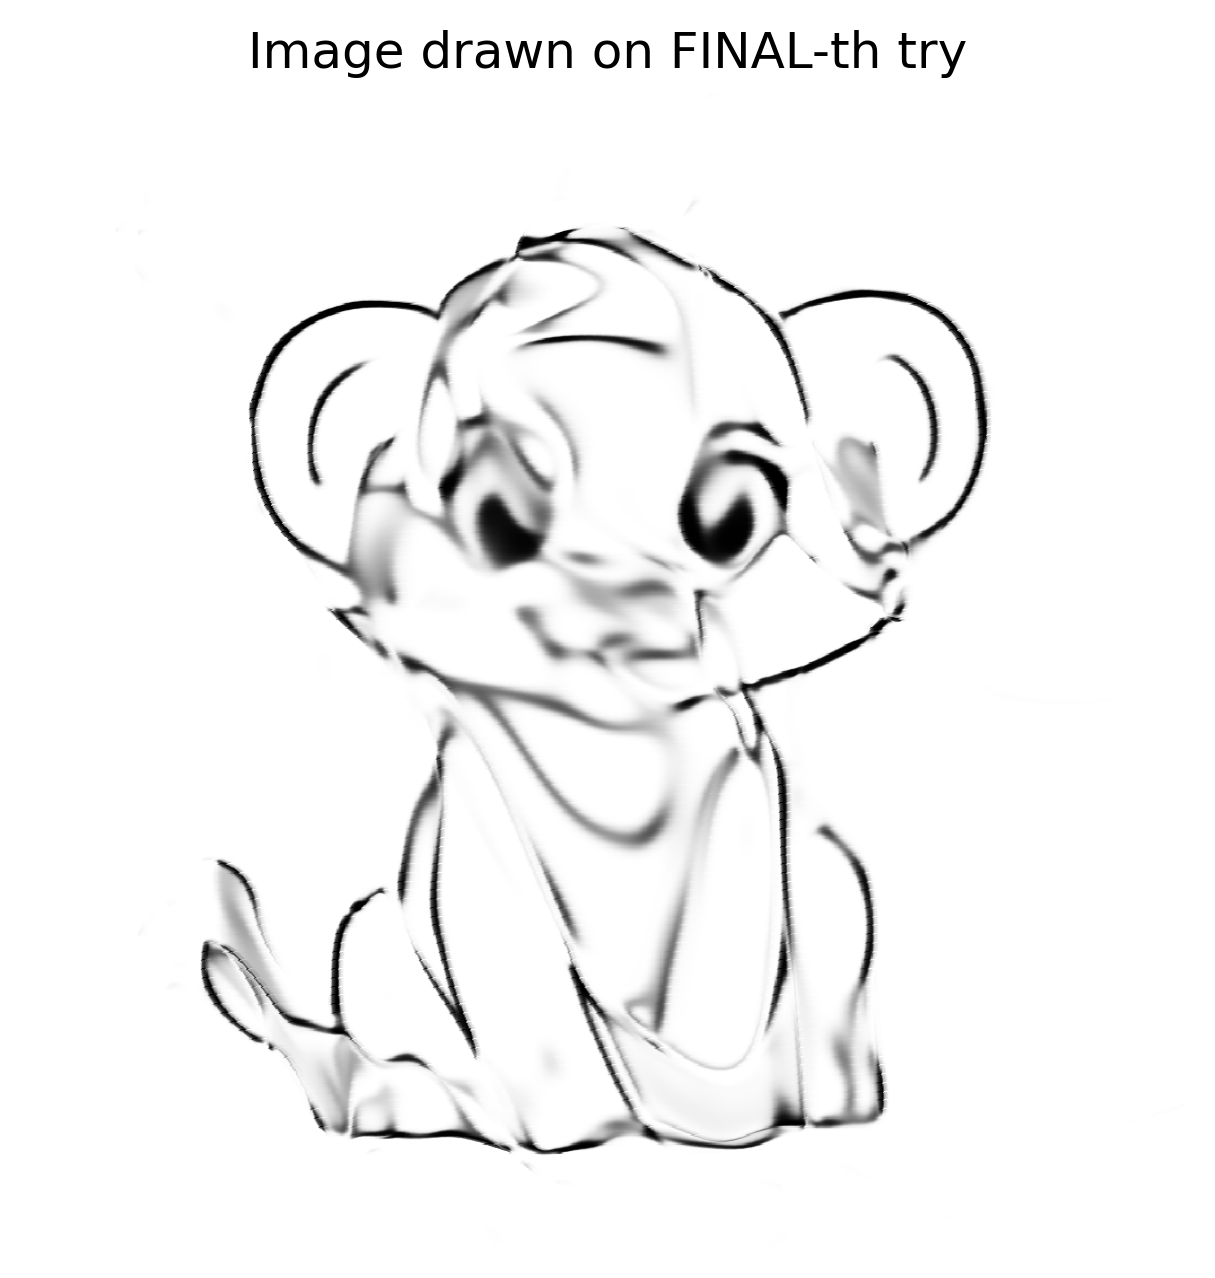
在修复问题并运行网络约 1.2 M 次迭代(在我的机器上大约 4 小时)后,生成的输出与输入图像非常接近。
输入代表一个高度复杂的高维函数——远远超出简单的 XOR 门或逻辑回归数据集。此实验展示了 Universal Approximation Theorem:神经网络可以表示(几乎)任何连续函数。
原始图像

初始噪声(随机权重)

最终重建(200 × 200)
在更高分辨率上的重建
使用学习到的权重,网络在不同画布尺寸(50 × 50、512 × 512、1024 × 1024 等)上进行测试。它始终能够重现图像,表明它学习的是底层函数,而不是记忆单个像素。
1024 × 1024 重建
由于网络学习了线条的 数学概念,1024 × 1024 版本并不像普通放大那样出现像素化;它看起来像是网络在更大的画布上重新绘制了这幅杰作。
验证与后续步骤
我构建了一个高度复杂、低效且昂贵的图像缩放器。结果令人满意,但并不完美——它证明了概念,但我希望有更高的保真度。
在 Reddit 上发布结果后,有用户建议尝试 SIREN(正弦表示网络)。
- SIREN 使用正弦激活函数,而非 ReLU/Tanh。
- 它在 隐式神经表示 方面表现出色,这是一种与我尝试的技术非常相似的方法。
我已经在 Python 中实现了 SIREN,希望能够实现更好的重建。敬请期待下一篇帖子!
Rust 的复兴
Python 原型取得了丰硕的成果,重新点燃了我用 Rust 解决该问题的热情。短暂的停顿后,我又花了一周时间准备 Rust 实现:
- 创建了一个
Tensortrait 并将所有已定义的方法移入其中。 - 实现了一个带有
Tensortrait 的CpuTensor结构体。 - 实现了一个带有
Tensortrait 的GpuTensor结构体。
Source: …
初始冲击
GPU 张量用了 90 + 秒 来运行同一个在 Python 中只用了 8 秒 的网络。使用 Nsight Systems(nsys)进行分析后发现,大部分运行时间花在了内存分配和释放上,而不是 CUDA kernel 上。
CuPy 通过使用自定义的 内存池 实现来避免这种开销。我需要在 Rust 中实现类似的方案。cust crate 并未直接暴露池 API,但 CUDA 驱动提供了相应功能,并在 cust::sys 中重新导出。经过大量的试错,我集成了一个可工作的内存池助手。
内存池助手(Rust)
pub fn get_mem_pool() -> CudaMemoryPool {
    // Get the first CUDA device
    let device = Device::get_device(0).unwrap();

    // Create a memory pool for the device
    let mut pool = std::ptr::null_mut();
    let pool_props = CUmemPoolProps {
        allocType: cust::sys::CUmemAllocationType::CU_MEM_ALLOCATION_TYPE_PINNED,
        handleTypes: cust::sys::CUmemAllocationHandleType::CU_MEM_HANDLE_TYPE_NONE,
        location: cust::sys::CUmemLocation {
            type_: cust::sys::CUmemLocationType_enum::CU_MEM_LOCATION_TYPE_DEVICE,
            id: 0,
        },
        win32SecurityAttributes: std::ptr::null_mut(),
        reserved: [0u8; 64],
    };

    // Create the pool (unsafe because it calls the CUDA driver API)
    unsafe { cuMemPoolCreate(&mut pool, &pool_props) };

    // Reserve a large chunk of memory once, then return it to the pool.
    let reserve_size: usize = 2048 * 1024 * 1024; // 2 GiB
    let mut reserve_ptr: CUdeviceptr = 0;
    unsafe {
        // Allocate from the pool (synchronous the first time)
        cuMemAllocFromPoolAsync(
            &mut reserve_ptr,
            reserve_size,
            pool,
            std::ptr::null_mut(),
        );
        cuStreamSynchronize(std::ptr::null_mut());

        // Immediately free it back to the pool for reuse
        cuMemFreeAsync(reserve_ptr, std::ptr::null_mut());
        cuStreamSynchronize(std::ptr::null_mut());
    }

    println!("Memory pool created for device {}", device.name().unwrap());

    CudaMemoryPool {
        pool: Arc::new(Mutex::new(UnsafeCudaMemPoolHandle(pool))),
    }
}
在一个简单的 main 程序中运行该助手后,看到成千上万的内存块在毫秒级别内被分配和释放。一次性的池创建成本相对于后续分配带来的速度提升来说可以忽略不计。
在 GpuTensor 中的集成
在添加了辅助函数后,我使用 Arc<…> 保持池的存活,并将所有设备分配都包装成通过它进行。最初性能问题仍然存在,于是我进一步调查。
复制、粘贴…以及…编译错误
池需要像 CUDA 上下文一样全局存储,以在程序整个生命周期内存活。我还发现 CUDA 包装器本身仍在使用默认分配器,因此必须将这些调用替换为基于池的分配。
处理原始指针变得必要。下面是一个精简的自定义设备缓冲区示例,它将主机内存和设备内存关联起来:
impl Drop for CustomDeviceBuffer {
    fn drop(&mut self) {
        let pool = match &GPU_CONTEXT.get() {
            // …
        };
        // …
    }
}
(为简洁起见,省略了实现细节。)
反思
- SIREN vs. Sigmoid – 将激活函数切换为 sine 使重建更锐利,但需要陡峭的学习曲线。
- Python → Rust – Python 原型建立了信心;Rust 暴露了性能陷阱,尤其是内存管理方面,促使我们深入研究 CUDA 内部实现。
- Memory Pools – 通过
cust::sys使用 CUDA 的内存池 API 大幅降低了分配开销。保持池的存活(Arc<…>)并让 所有 设备分配走该池是关键。 - Raw Pointers – 通过仔细的
Drop实现和适当的同步,可以安全地处理原始指针。
示例:从全局上下文获取 CUDA 池(Rust)
// Retrieve the pool (panics if the context or pool is missing)
let pool = GPU_CONTEXT
    .get()
    .expect("No GPU context set")
    .pool
    .as_ref()
    .expect("CUDA not initialized or GPU pool not set");
示例:释放设备指针(Rust)
// `pool` is the `Arc<MemoryPool>` obtained above
let _ = pool.free(self.as_device_ptr().as_raw());
示例:通过内存池分配自定义设备缓冲区(Rust)
use cust::{
    memory::{DeviceBuffer, DevicePointer},
    prelude::*,
};
use std::{
    mem::size_of,
    sync::Arc,
};

/// Wrapper around a `DeviceBuffer` that is always allocated from the CUDA memory pool.
pub struct CustomDeviceBuffer<T> {
    pub device_buffer: DeviceBuffer<T>,
}

impl<T> CustomDeviceBuffer<T> {
    /// Allocate a buffer of `size` elements using the global CUDA memory pool.
    pub fn get_device_buffer(size: usize) -> Self {
        // 1️⃣ Grab the pool (panic if it isn’t available)
        let pool: Arc<cust::memory::MemoryPool> = GPU_CONTEXT
            .get()
            .expect("No GPU context set")
            .pool
            .as_ref()
            .expect("CUDA not initialized or GPU pool not set")
            .clone();

        // 2️⃣ Compute the byte size, checking for overflow
        let byte_size = size
            .checked_mul(size_of::<T>())
            .expect("Requested allocation size overflowed");

        if byte_size == 0 {
            panic!("Attempted to allocate a zero‑size buffer");
        }

        // 3️⃣ Allocate raw memory from the pool
        let raw_ptr = pool
            .allocate(byte_size)
            .expect("CUDA memory‑pool allocation failed");

        // 4️⃣ Turn the raw pointer into a `DevicePointer<T>`
        let dev_ptr = unsafe { DevicePointer::from_raw(raw_ptr as *mut T) };

        // 5️⃣ Build a `DeviceBuffer<T>` from the raw parts (unsafe but safe here)
        let device_buffer = unsafe { DeviceBuffer::from_raw_parts(dev_ptr, size) };

        // 6️⃣ Return the wrapped buffer
        Self { device_buffer }
    }
}
关键点
- 安全性 – 唯一的
unsafe块是将原始指针转换为DevicePointer以及将原始部件转换为DeviceBuffer的操作。所有前置条件(非零大小、正确对齐、分配成功)均在此之前已被验证。 - 内存池使用 – 分配通过
pool.allocate完成,确保缓冲区参与内存池的复用策略。 - 错误处理 – 为了简洁使用了
expect;在生产代码中应返回Result<_, cust::error::CudaError>而不是 panic。
原始指针大小问题
发生了什么
- 我仅根据数组的 长度 分配内存。
- 我忘记乘以元素类型的 字节宽度。
对于长度为 1 的 f32 数组,我只分配了 1 字节,而实际需要 4 字节。
修复
// Incorrect allocation (length only)
let size = length; // → 1 byte for f32[1]

// Correct allocation (length × element size)
let size = length * std::mem::size_of::<f32>(); // → 4 bytes for f32[1]
在纠正分配后,代码成功编译并运行,尽管执行时间没有提升。
隐藏的错误
Tensor::ones 在 每个 epoch 都会重新创建一个全为 1 的 Vec,并将其复制到设备上。我用一个直接在 GPU 上填充内存的 kernel 替代了它:
extern "C" __global__ void fill_value(float *out, int n, float value)
{
    int idx = blockIdx.x * blockDim.x + threadIdx.x;
    if (idx < n) {
        out[idx] = value;
    }
}
cuBLAS 包装器(Rust)
Result {
    let m = self.shape[0] as i32;
    let k = self.shape[1] as i32;
    let n = rhs.shape[1] as i32;

    let total_elements = (m * n) as usize;
    let result = get_device_buffer(total_elements);

    let alpha = T::one();
    let beta  = T::zero();

    unsafe {
        cublasSgemm_v2(
            Self::_get_cublas_handle(),
            cublasOperation_t::CUBLAS_OP_N,
            cublasOperation_t::CUBLAS_OP_N,
            n,
            m,
            k,
            &alpha.f32(),
            rhs.device_buffer.as_device_ptr().as_raw() as *const f32,
            n,
            self.device_buffer.as_device_ptr().as_raw() as *const f32,
            k,
            &beta.f32(),
            result.as_device_ptr().as_raw() as *mut f32,
            n,
        );
    }

    let result_shape = vec![self.shape[0], rhs.shape[1]];
    Ok(Self::_with_device_buffer(result_shape, result))
}
cuBLAS 版本并未带来加速,因为矩阵规模相对较小;cuBLAS 在处理非常大的矩阵时才能发挥优势。
结论
这段旅程漫长且充满挫折,但每个障碍都让我在神经网络设计和 Rust 低层 GPU 编程方面学到了宝贵的经验。我现在拥有一个功能完整的 Rust Tensor 库,利用 CUDA 内存池、自定义设备缓冲区,以及(可选的)SIREN 网络,实现高质量的图像重建。
注意: XOR 测试数据集在这里不是问题;解决方案可行,当我着手更大规模的图像重建任务时,肯定会受益。