노트북을 서버로 바꾸기: Coolify와 Cloudflare Tunnels로 로컬에서 웹 앱 호스팅
Source: Dev.to
Note – 만약 ISP가 일반 포트 포워딩을 허용한다면, 터널 부분을 건너뛰어도 됩니다.
하지만 많은 ISP는 CGNAT(Carrier‑Grade NAT)를 사용합니다. 이 경우 라우터에서 포트 포워딩을 설정하더라도 외부에서 귀하의 공인 IP/포트에 접근할 수 없습니다.
CGNAT 뒤에 있는지 확인하는 방법
- 라우터 관리 페이지에 표시된 WAN/Internet IP를 확인하세요.
- . 와 같은 사이트를 방문하세요.
- 두 IP가 다르면 CGNAT 뒤에 있는 것입니다.
Typical CGNAT range: 100.64.0.0 – 100.127.255.255.
CGNAT 뒤에 있다면 Cloudflare Tunnels가 문제를 해결해 줍니다.
Coolify는 여러 프로젝트를 관리하고 배포할 수 있는 아름다운 UI를 제공합니다.
Step 1 – Coolify 설치
Run the installer (it also installs Docker if needed):
curl -fsSL https://cdn.coollabs.io/coolify/install.sh | sudo bash설치 후
- Local machine – 브라우저에서
http://localhost:8000을 열고 루트 사용자를 생성합니다. - VPS –
http://:8000을 엽니다.
이제 Coolify 대시보드가 표시되며, Node.js, Next.js, Python, WordPress, 데이터베이스 등을 배포할 준비가 됩니다.
Step 2 – Deploy a Demo Project
-
Coolify에서 Public Repository를 클릭합니다.
-
저장소 URL을 붙여넣습니다 (예시):
https://github.com/vimal-verma/vimalverma.in -
Docker를 Build Pack으로 선택하고 Continue를 클릭합니다.
-
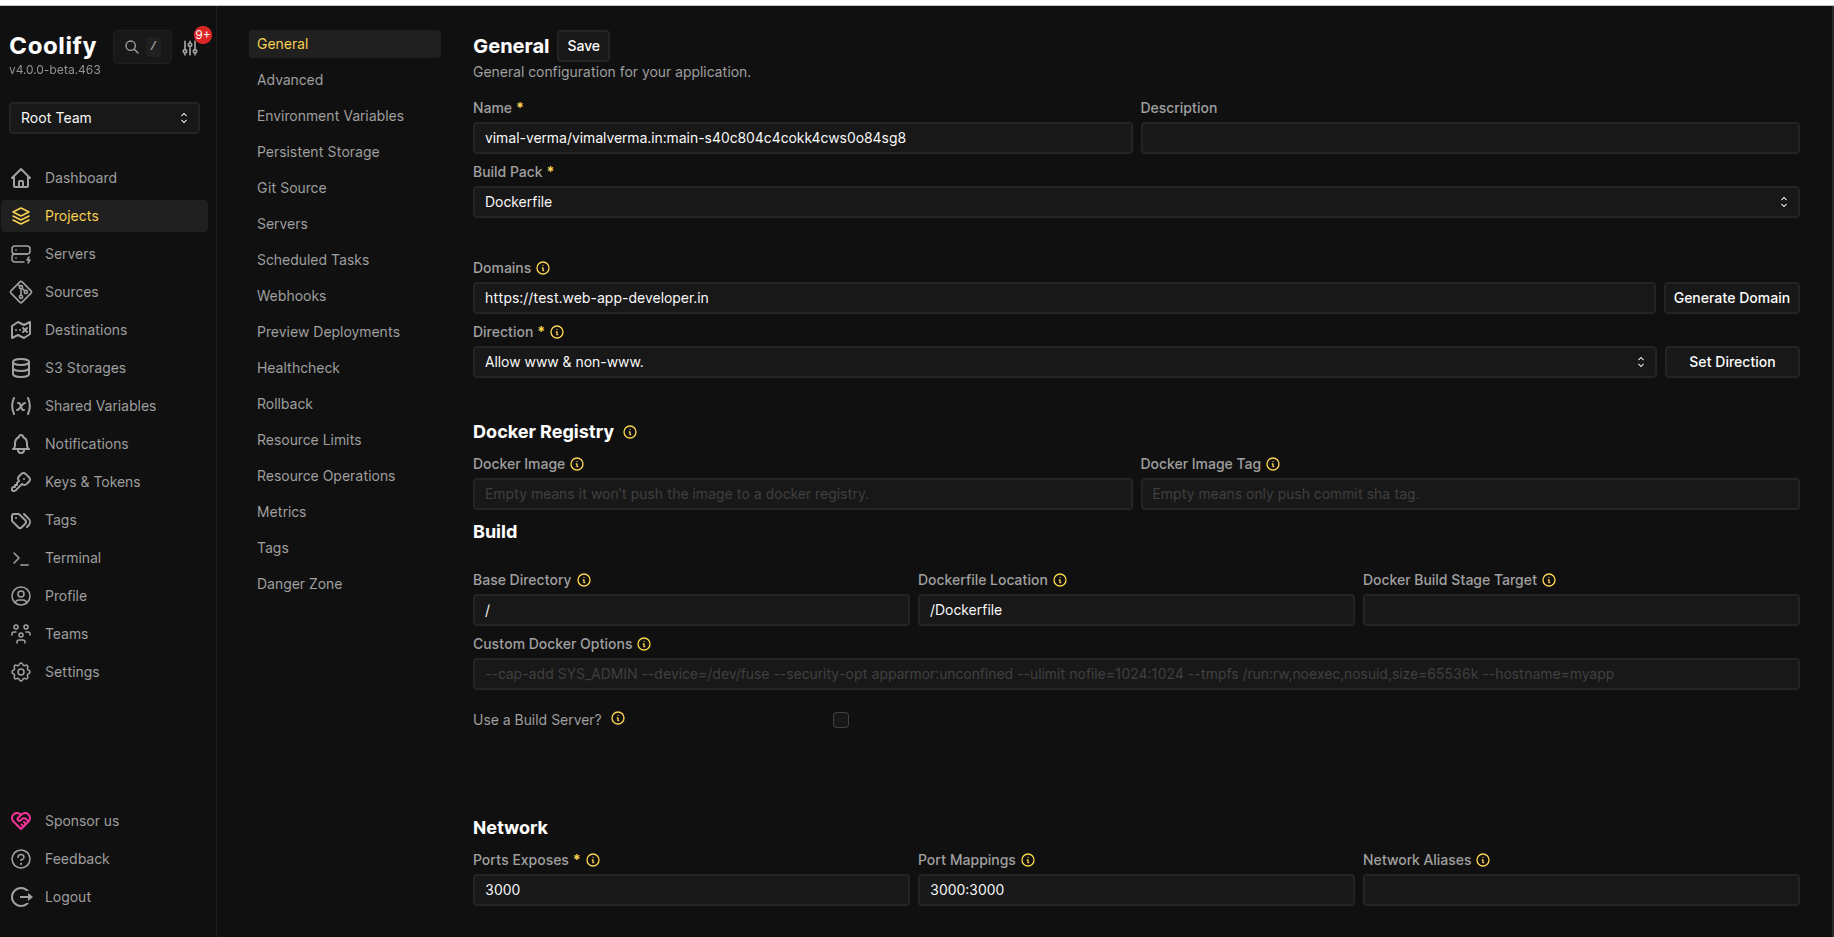
Network settings (나중에 커스텀 도메인 연결에 중요합니다):
- Ports Exposed:
3000 - Port Mappings:
3000:3000
- Ports Exposed:
-
Deploy를 클릭합니다.
Coolify는 다음과 같은 임시 URL을 생성합니다:
http://xo0gcogkks04ks4sgkk84oww..sslip.io배포 테스트
- VPS를 사용 중이거나 ISP가 CGNAT을 사용하지 않는 경우, 링크가 바로 작동합니다.
- 로컬에서는
http://:3000/(예:http://10.0.0.1:3000/) 로 앱에 접근할 수 있습니다.
선택 사항 – 커스텀 도메인 연결
- 도메인의 A 레코드를 공인 IP 주소를 가리키도록 추가합니다.
- Coolify 대시보드에서 Domain 필드에 도메인을 입력하고 저장한 뒤, 다시 배포합니다.
Step 3 – Cloudflare 터널로 CGNAT 우회
Step 2에서 얻은 공개 링크에 접근할 수 없는 경우(CGNAT 때문일 가능성이 높음), Cloudflare 터널을 사용해 대시보드를 노출합니다.
1. cloudflared 설치
공식 문서에서 바이너리를 다운로드합니다.
2. 인증
cloudflared tunnel login3. 터널 생성
cloudflared tunnel create <NAME>이 명령은 UUID를 반환합니다 – 복사해 두세요; 구성 파일에 필요합니다.
4. 구성 파일 만들기
# ~/.cloudflared/config.yml
url: http://localhost:8000
tunnel: <UUID>
credentials-file: /root/.cloudflared/<UUID>.json
5. DNS 서브도메인 라우팅
도메인이 이미 Cloudflare에 추가되어 있는지 확인하세요.
cloudflared tunnel route dns <NAME> <subdomain.example.com>6. 터널 실행
cloudflared tunnel run <NAME>여러 개의 터널이 있는 경우, 구성 파일 경로를 지정하세요:
cloudflared tunnel --config /path/to/config.yml run <NAME>7. 확인
cloudflared tunnel info <NAME>이제 https://subdomain.example.com이 CGNAT 뒤에서도 안전하게 Coolify 대시보드를 제공합니다. Step 1에서 만든 동일한 이메일/비밀번호로 로그인하세요.
🎉 완료되었습니다!
- Local deployment 은
http://localhost:8000(또는 LAN IP)에서 작동합니다. - Public access 은 Cloudflare Tunnel URL 또는 터널에 연결한 맞춤 도메인에서 작동합니다.
자신의 하드웨어에서 완전한 자체 호스팅 Vercel‑유사 플랫폼을 즐기세요! 🚀
Step 4 – Routing Your Custom Domain to Your App
Now that the tunnel is active, you’ll probably want to route traffic directly to your published app (running on port 3000) instead of the Coolify dashboard.

How to add a custom link to your sub‑domain
-
Open Cloudflare
- Go to Dashboard → Networking → Tunnels.
-
Select your local tunnel
- Click the tunnel you just created.
-
Add a route
- In the Routes section, click Add routes.
- Choose Published application.
-
Configure the route
Field Value Sub‑domain wwwService URL http://localhost:3000Click Add route to save.
-
Update Coolify configuration
- In the Coolify dashboard, go to Projects → your project → Configuration → General.
- Change Domains to
www.example.com. - Save the changes and Redeploy the project.
Your locally hosted application is now live and reachable at www.example.com.
Happy self‑hosting!