Git 쉽게
Source: Dev.to


개발자들이 작업의 다양한 버전을 저장하고, 변경 사항을 추적하며, 업데이트를 하고, 협업하는 것은 정상적인 일이며; 이것이 Git의 역할입니다.
Git이란?
Git은 버전 관리 시스템으로, 다음을 할 수 있습니다:
- 변경 사항 추적
- 이전 코드 버전으로 이동
- 협업
- GitHub에 코드를 온라인으로 저장
Steps
Step 1: Installing Git Bash
- Go to the Git Bash download page.
- Select your operating system (Windows, macOS, or Linux).

- Install Git Bash.
- Open Git Bash – you’ll see a terminal that looks like this:
username@computer MINGW64 ~Step 2: Create (or Log Into) a GitHub Account
- Go to GitHub.
- Create an account or log in if you already have one.
Step 3: Connect Git Bash to GitHub
Set up your name
git config --global user.name "Your Name"Set up your email
git config --global user.email "youremail@example.com"Note: Make sure the email matches the one on your GitHub account.
Check your configuration
git config --listStep 4: Create a New Project or Repository
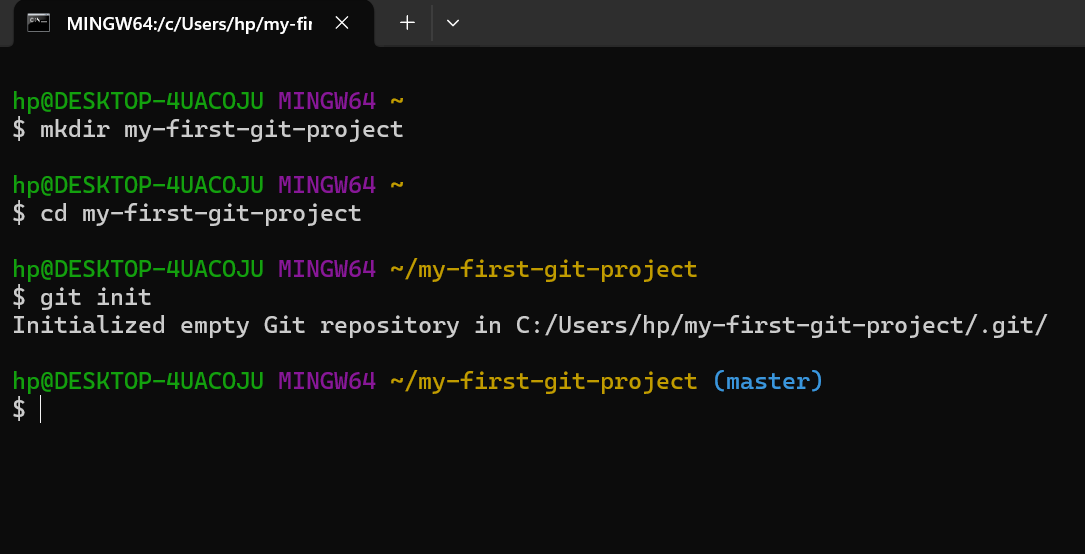
Create a folder
mkdir my-first-git-projectNavigate to the folder
cd my-first-git-project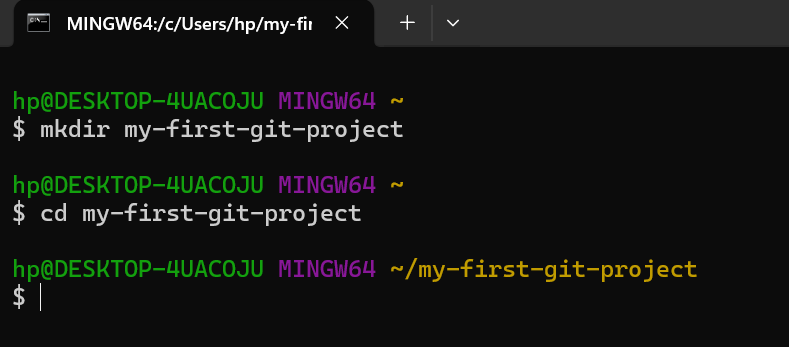
Initialize Git
git initNow Git is watching this project.
Step 5: Track Changes with Git
Create a file
touch index.htmlOpen the folder directly from Git Bash
code .The command opens VS Code; the dot (.) means “the current folder”.
Step 6: Create the First Code in VS Code
Open index.html and add the following HTML:
<!DOCTYPE html>
<html>
  <head>
    <title>My First Git Project</title>
  </head>
  <body>
    <h2>Hello World!</h2>
  </body>
</html>
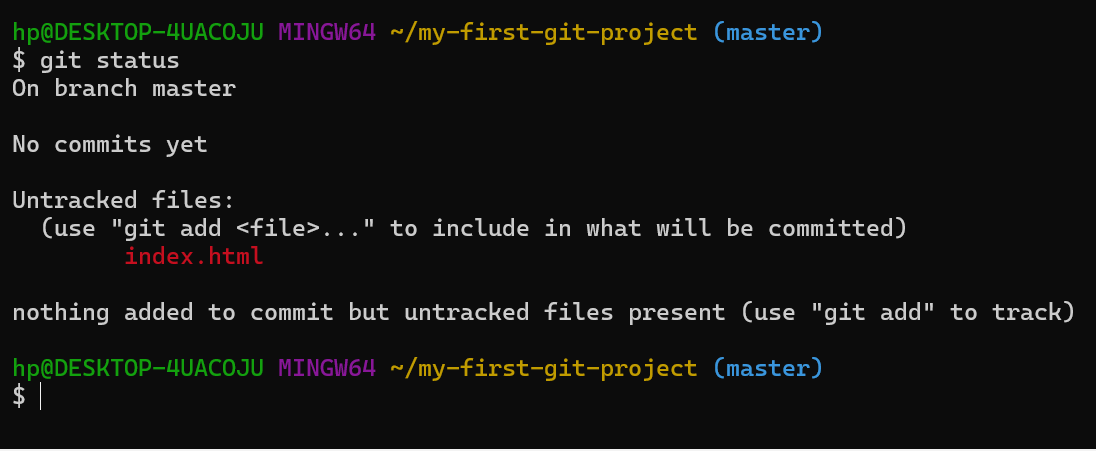
Step 7: Check Git Status in Git Bash
Return to Git Bash and run:
git statusGit will show index.html as untracked, meaning Git sees the file but isn’t tracking it yet.
Step 8: Add the File to Git Tracking
Track index.html:
git add index.htmlOr add everything:
git add .Step 9: Commit Your Changes
git commit -m "Initial HTML file commit"The -m flag adds a commit message.
Step 10: Create a Repository on GitHub (Online)
Now that your project exists locally, create an online repository on GitHub.
- Make sure you’re logged in to GitHub.
- Click the + icon in the top‑right corner and select New repository.
- Enter a Repository name (use the same name as your folder, e.g.,
my-first-git-project). - Choose Public (or Private, if you prefer).
- Scroll down and click Cre
GitHub은 이제 로컬 저장소를 원격 저장소에 푸시하기 위한 명령어들을 표시합니다.

여기서 표시된 지침(예: git remote add origin …, git push -u origin master)을 따라 로컬 커밋을 GitHub에 푸시할 수 있습니다.
11단계: 로컬 프로젝트를 GitHub에 연결하기
Git Bash로 돌아가 다음을 실행하세요:
git remote add origin https://github.com/YOUR-USERNAME/my-first-git-project.gitYOUR-USERNAME을 실제 GitHub 사용자 이름으로 교체하세요.
12단계: 기본 브랜치 이름 바꾸기
git branch -M main13단계: 코드를 GitHub에 푸시하기
git push -u origin main참고
git push– 코드를 온라인에 전송origin– GitHub 저장소main– 브랜치 이름-u– 이후 푸시 시 이 대상 저장소를 기억

14단계: GitHub에서 확인하기
GitHub 저장소 페이지로 돌아가 새로 고침하세요. 이제 index.html 파일과 커밋 메시지가 표시됩니다.
15단계: GitHub에서 코드 가져오기
최신 코드를 로컬 머신으로 다운로드하려면 다음을 실행하세요:
git pull origin main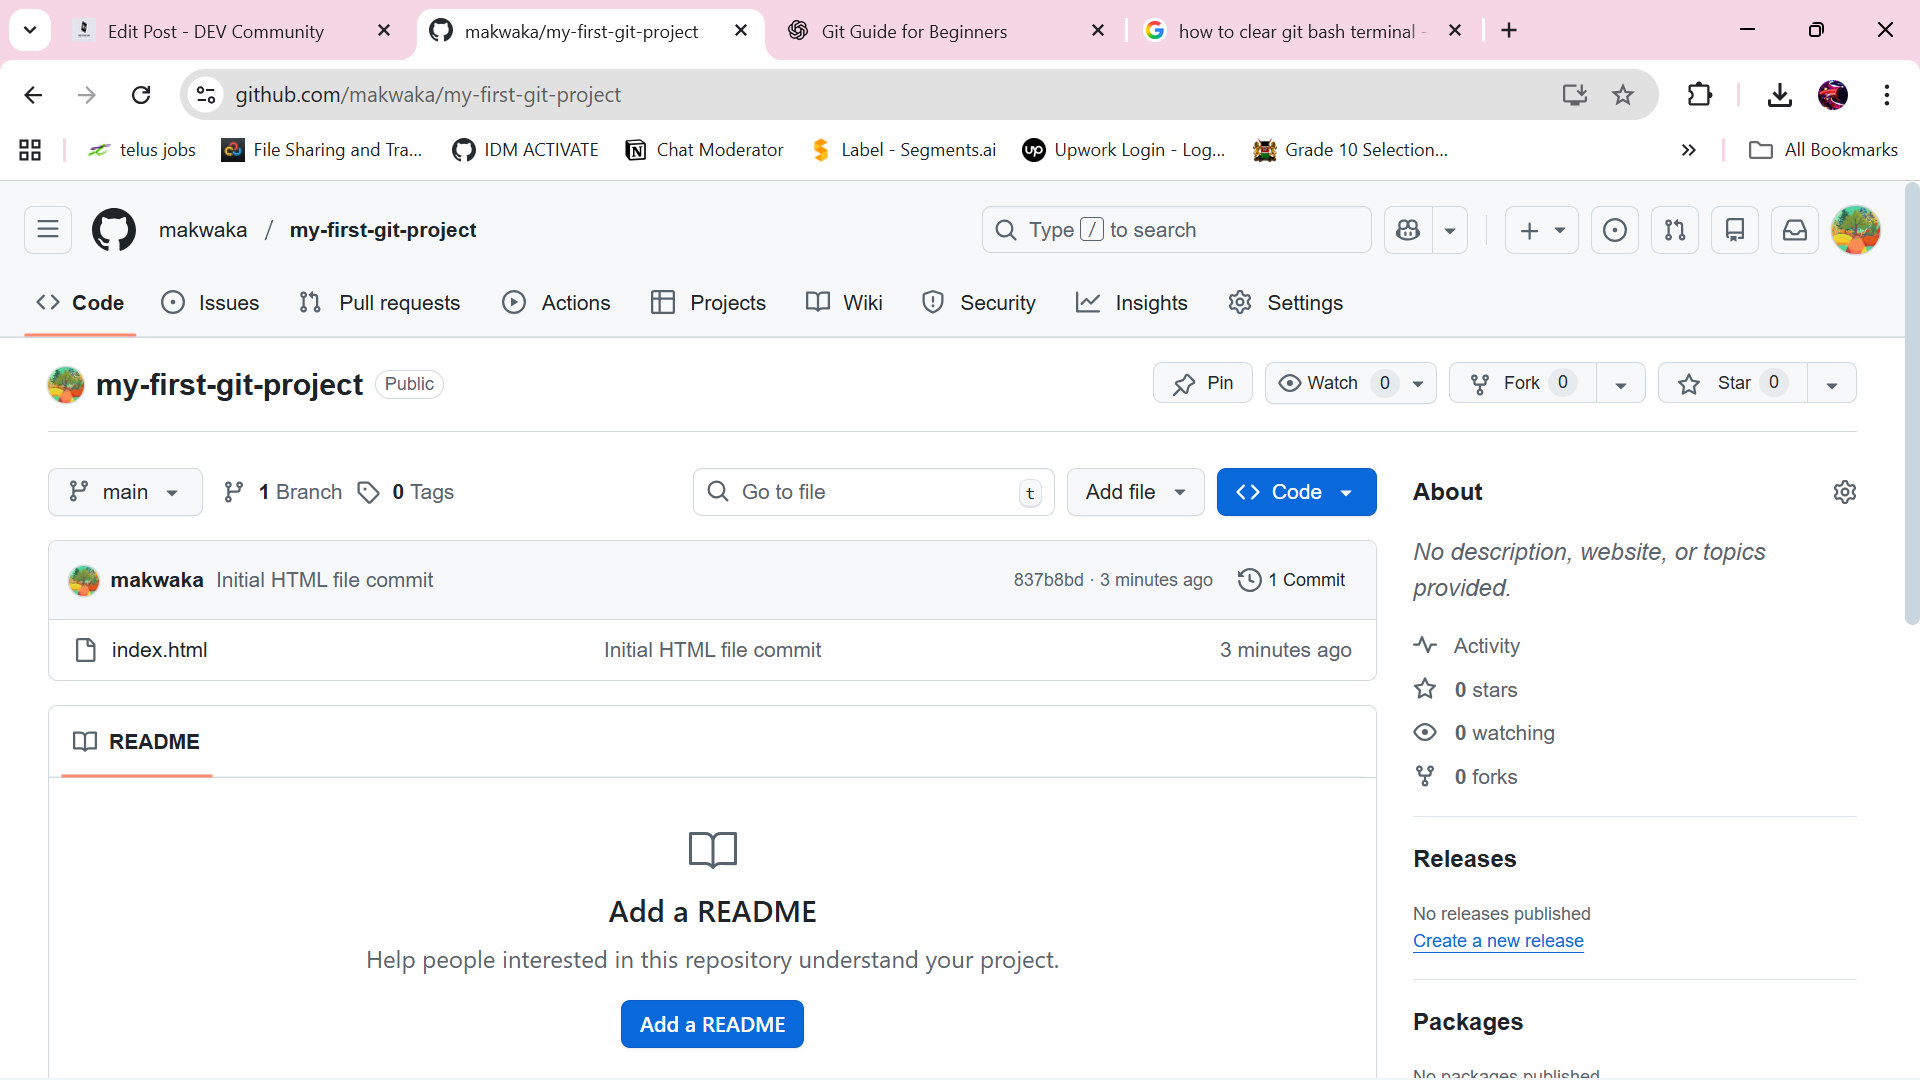
요약된 Git 워크플로우
