Unlocking the Hidden Power of Your Laptop’s GPU
Source: Dev.to
Overview
Most modern laptops come equipped with powerful GPUs that are often under‑utilized. Whether you are a software engineer running local LLMs, a data scientist processing large datasets, a developer compiling GPU‑accelerated code, or an engineer running simulations, your system may not be using its full graphical and computational potential.
Many professionals purchase machines with dedicated GPUs (NVIDIA, AMD, etc.) assuming applications will automatically use them. In reality, Windows often defaults to the power‑efficient integrated graphics unless you explicitly tell it otherwise, leaving expensive hardware idle while the CPU struggles.
Step 1 – Confirm Your System Has Multiple GPUs
Before changing any settings, verify that your laptop actually has both an integrated and a dedicated GPU.
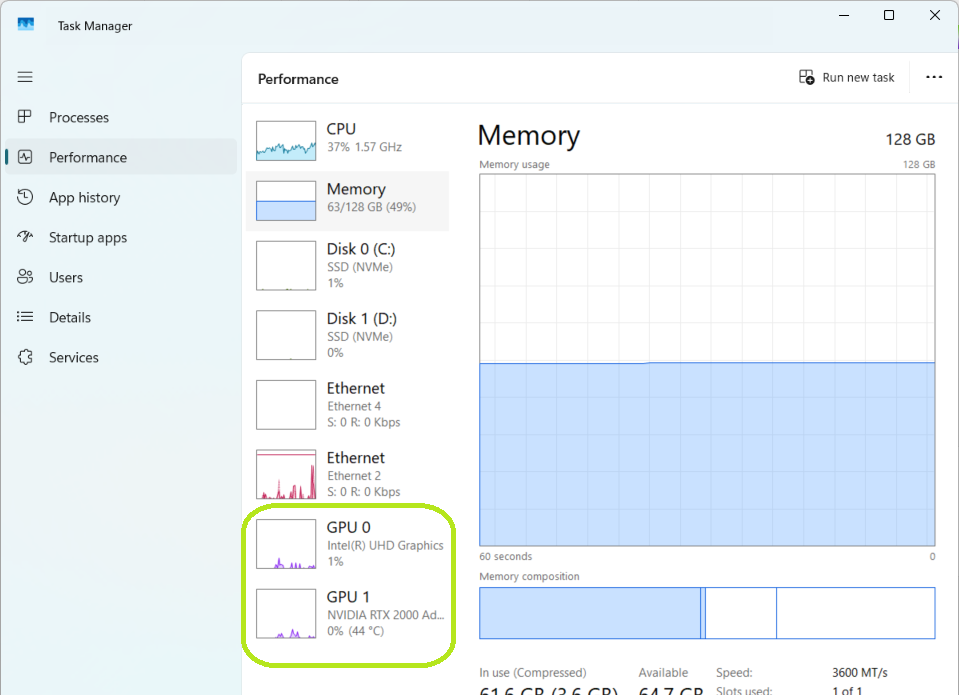
Open: Task Manager → Performance tab
In the left panel you should see something like:
- GPU 0 – Integrated Graphics (e.g., Intel UHD)
- GPU 1 – Dedicated GPU (e.g., NVIDIA RTX 2000 Ada)
If two GPUs are listed, your laptop supports GPU switching.
Step 2 – Check Whether Your Application Is Using the GPU
Even with a powerful GPU, an application may still be running on the integrated graphics.
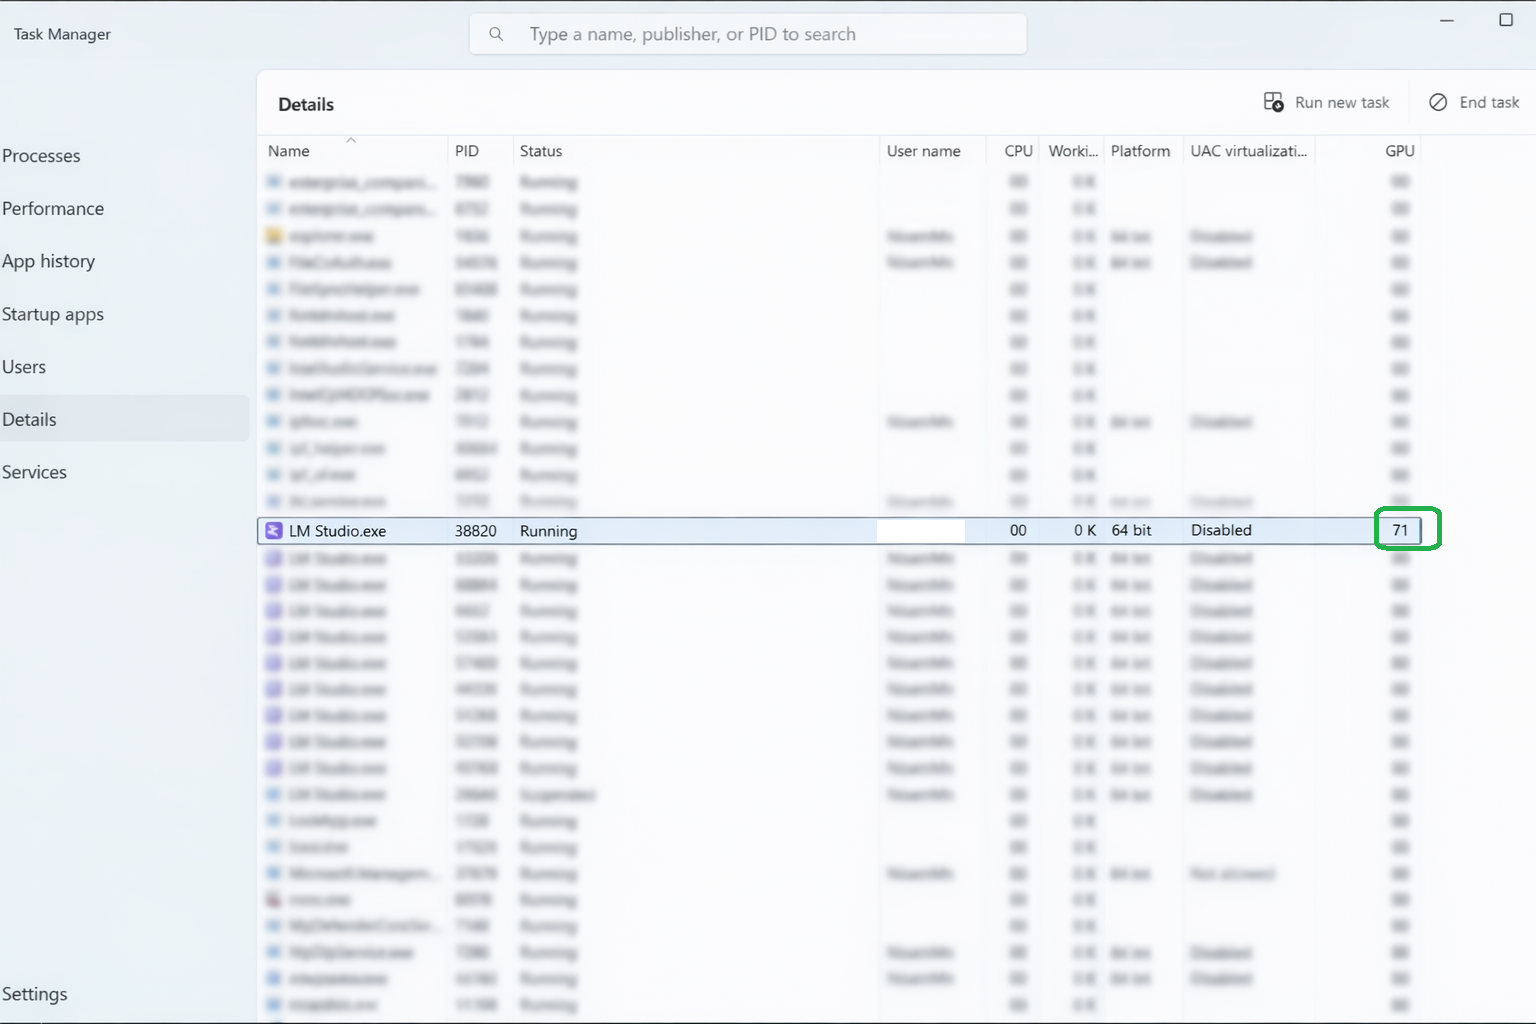
Open: Task Manager → Details tab
- Right‑click the column header → Select columns.
- Enable GPU and GPU Engine (if they aren’t already visible).
In the screenshot below, the process LM Studio.exe shows a GPU column value of 71, confirming it is actively using the GPU.
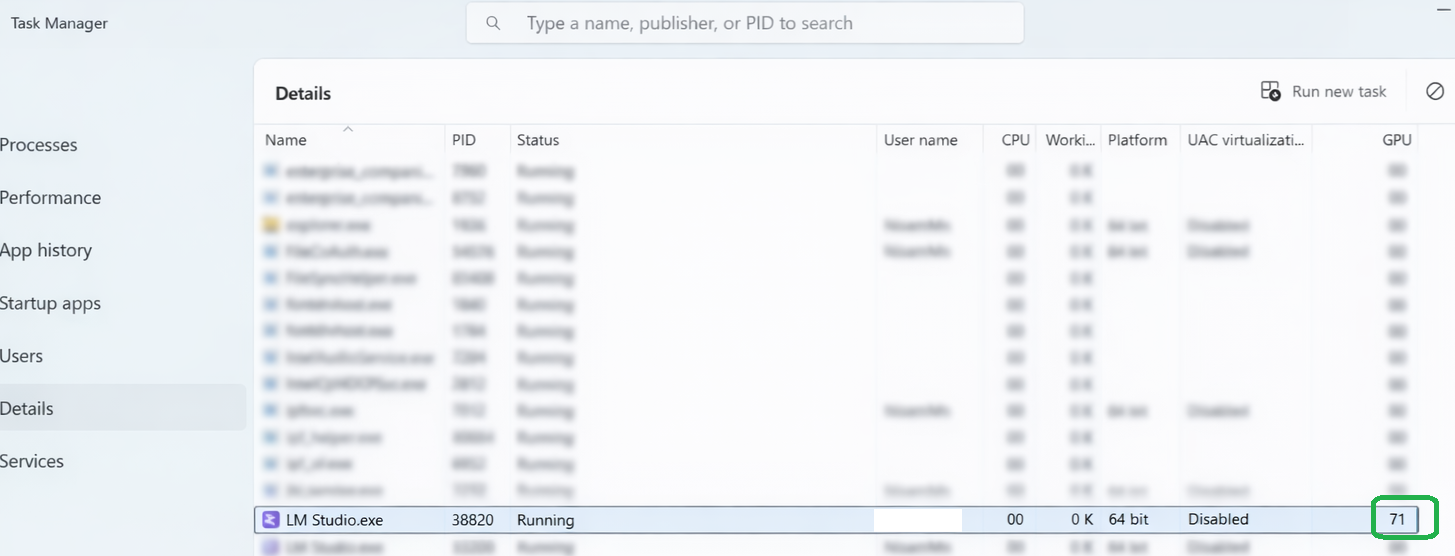
If GPU usage shows 0 % consistently, or it only uses GPU 0 (integrated graphics), the dedicated GPU is not being used.
Why Windows Doesn’t Automatically Use Your Dedicated GPU
Windows prioritises:
- Battery life
- Thermal efficiency
- Power savings
Unless an app is classified as “high‑performance” (e.g., most games), Windows may default to the integrated GPU. Developer tools, ML runtimes, simulation software, rendering engines, and scientific tools often don’t trigger high‑performance GPU usage automatically, so manual configuration is required.
Step 3 – Assign a Dedicated GPU to a Desktop Application
- Navigate to:
Settings → System → Display → Graphics. - Under Custom settings for applications, click Add desktop app (or Add Microsoft Store app).
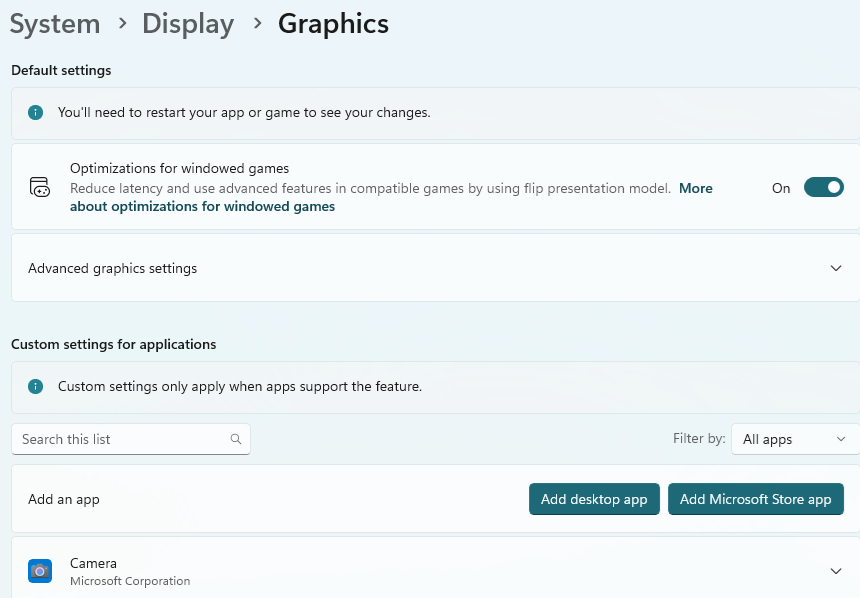
- Browse to the application’s .exe file and add it.
- In the list, click the newly added app, then choose the desired GPU from the GPU preference dropdown.
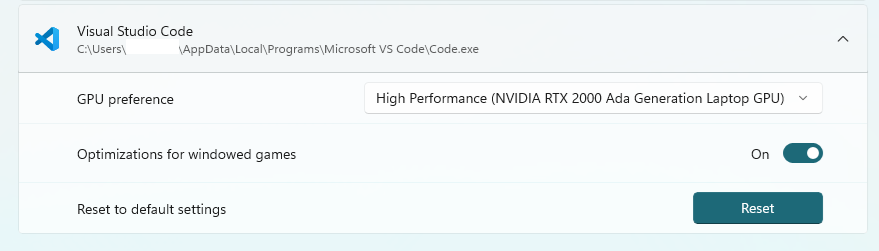
Important: All running instances of the application must be completely closed and then restarted for the change to take effect.
How to Verify It’s Working
- Re‑open Task Manager → Details tab.
- Run the application and watch the GPU column.
- Confirm that GPU usage increases and the GPU Engine column shows GPU 1 (the dedicated GPU).
You can also monitor the Performance tab to see activity on GPU 1.
Recommendation
Enable High‑Performance mode only for applications that are designed to use GPU acceleration, such as:
- Local LLM inference engines
- CUDA‑based tools
- Video‑editing software
- Game engines
- Scientific simulations
Applications that are primarily CPU‑bound (e.g., Microsoft Excel, web browsers, office utilities, lightweight tools) will not benefit significantly from forcing the dedicated GPU.
In short: If the software explicitly supports GPU compute technologies like CUDA, enabling High‑Performance mode can unlock the full potential of your dedicated GPU.
improve results; otherwise, it is best to leave the default settings unchanged.

**Nisam**

*Curiosity | Passion | Fearlessness*