Turn Your Laptop into a Server: Host Web Apps Locally with Coolify and Cloudflare Tunnels
Source: Dev.to
Note – If your ISP allows normal port‑forwarding, you can skip the tunnel part.
Many ISPs, however, use CGNAT (Carrier‑Grade NAT). In that case your public IP/ports are not reachable from the outside, even if you configure port forwarding on your router.
How to know you’re behind CGNAT
- Check the WAN/Internet IP shown in your router’s admin page.
- Visit a site like .
- If the two IPs differ, you’re behind CGNAT.
Typical CGNAT range: 100.64.0.0 – 100.127.255.255.
If you’re behind CGNAT, Cloudflare Tunnels will solve the problem.
Coolify gives you a beautiful UI to manage and deploy multiple projects.
Step 1 – Install Coolify
Run the installer (it also installs Docker if needed):
curl -fsSL https://cdn.coollabs.io/coolify/install.sh | sudo bashAfter installation
- Local machine – Open
http://localhost:8000in a browser and create the root user. - VPS – Open
http://:8000.
You’ll now see the Coolify dashboard, ready to deploy Node.js, Next.js, Python, WordPress, databases, etc.
Step 2 – Deploy a Demo Project
In Coolify click Public Repository.
Paste the repo URL (example):
https://github.com/vimal-verma/vimalverma.inChoose Docker as the Build Pack and click Continue.
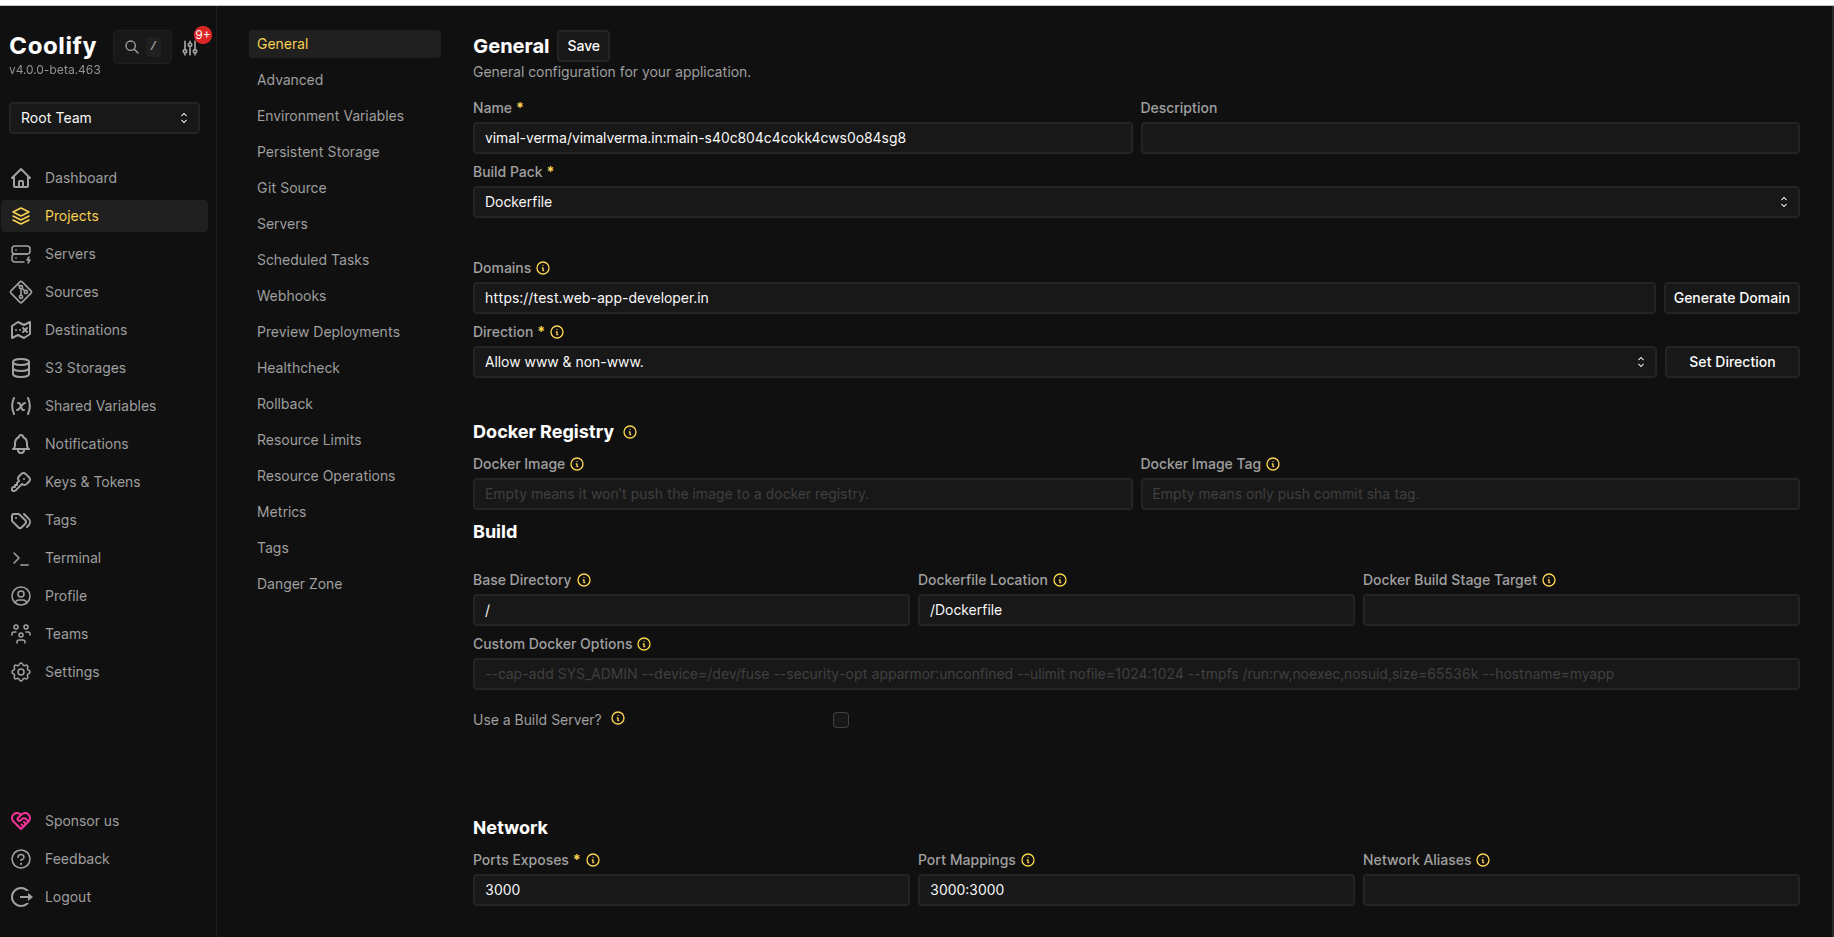
Network settings (important for later custom‑domain linking):
- Ports Exposed:
3000 - Port Mappings:
3000:3000
- Ports Exposed:
Click Deploy.
Coolify will generate a temporary URL that looks like:
http://xo0gcogkks04ks4sgkk84oww..sslip.ioTest the deployment
- If you’re on a VPS or your ISP isn’t using CGNAT, the link works immediately.
- Locally you can reach the app at
http://:3000/(e.g.,http://10.0.0.1:3000/).
Optional – Attach a custom domain
- Add an A record for your domain pointing to your public IP.
- In the Coolify dashboard, set the Domain field to your domain, save, and redeploy.
Step 3 – Bypass CGNAT with Cloudflare Tunnels
If the public link from Step 2 isn’t reachable (likely because of CGNAT), expose the dashboard via a Cloudflare Tunnel.
1. Install cloudflared
Download the binary from the official docs.
2. Authenticate
cloudflared tunnel login3. Create a tunnel
cloudflared tunnel create <NAME>The command returns a UUID – copy it; you’ll need it for the config file.
4. Create a configuration file
# ~/.cloudflared/config.yml
url: http://localhost:8000
tunnel: <UUID>
credentials-file: /root/.cloudflared/<UUID>.json
5. Route a DNS sub‑domain
Make sure your domain is already added to Cloudflare.
cloudflared tunnel route dns <NAME> <subdomain.example.com>6. Run the tunnel
cloudflared tunnel run <NAME>If you have multiple tunnels, specify the config path:
cloudflared tunnel --config /path/to/config.yml run <NAME>7. Verify
cloudflared tunnel info <NAME>Now https://subdomain.example.com securely serves your Coolify dashboard, even from behind CGNAT. Log in with the same email/password you created in Step 1.
🎉 You’re done!
- Local deployment works via
http://localhost:8000(or your LAN IP). - Public access works via the Cloudflare Tunnel URL or a custom domain you pointed to the tunnel.
Enjoy a fully self‑hosted, Vercel‑like platform on your own hardware! 🚀
Step 4 – Routing Your Custom Domain to Your App
Now that the tunnel is active, you’ll probably want to route traffic directly to your published app (running on port 3000) instead of the Coolify dashboard.

How to add a custom link to your sub‑domain
Open Cloudflare
- Go to Dashboard → Networking → Tunnels.
Select your local tunnel
- Click the tunnel you just created.
Add a route
- In the Routes section, click Add routes.
- Choose Published application.
Configure the route
Field Value Sub‑domain wwwService URL http://localhost:3000Click Add route to save.
Update Coolify configuration
- In the Coolify dashboard, go to Projects → your project → Configuration → General.
- Change Domains to
www.example.com. - Save the changes and Redeploy the project.
Your locally hosted application is now live and reachable at www.example.com.
Happy self‑hosting!