Quick Start: Build a Ready-to-Use AWS VPC in Minutes
Source: Dev.to
Introduction
In this hands‑on guide you’ll build a ready‑to‑use AWS networking environment in just a few minutes. You will create a fully functional VPC with public and private subnets, internet access, routing, and security controls, then launch an EC2 instance to verify that everything works as expected. This is one of the fastest ways to get a working VPC layout, especially if you’re just starting to explore AWS networking and want something reliable to build on.
Step 1: Create the VPC
- Open the VPC Console.
- Select Create VPC → VPC and more.
- Set:
- Name:
my-quickstart-vpc - Number of AZs: 2 or 3 (default is fine)
- Customize subnets: optional (leave other defaults as‑is)
- Name:
- Click Create VPC.
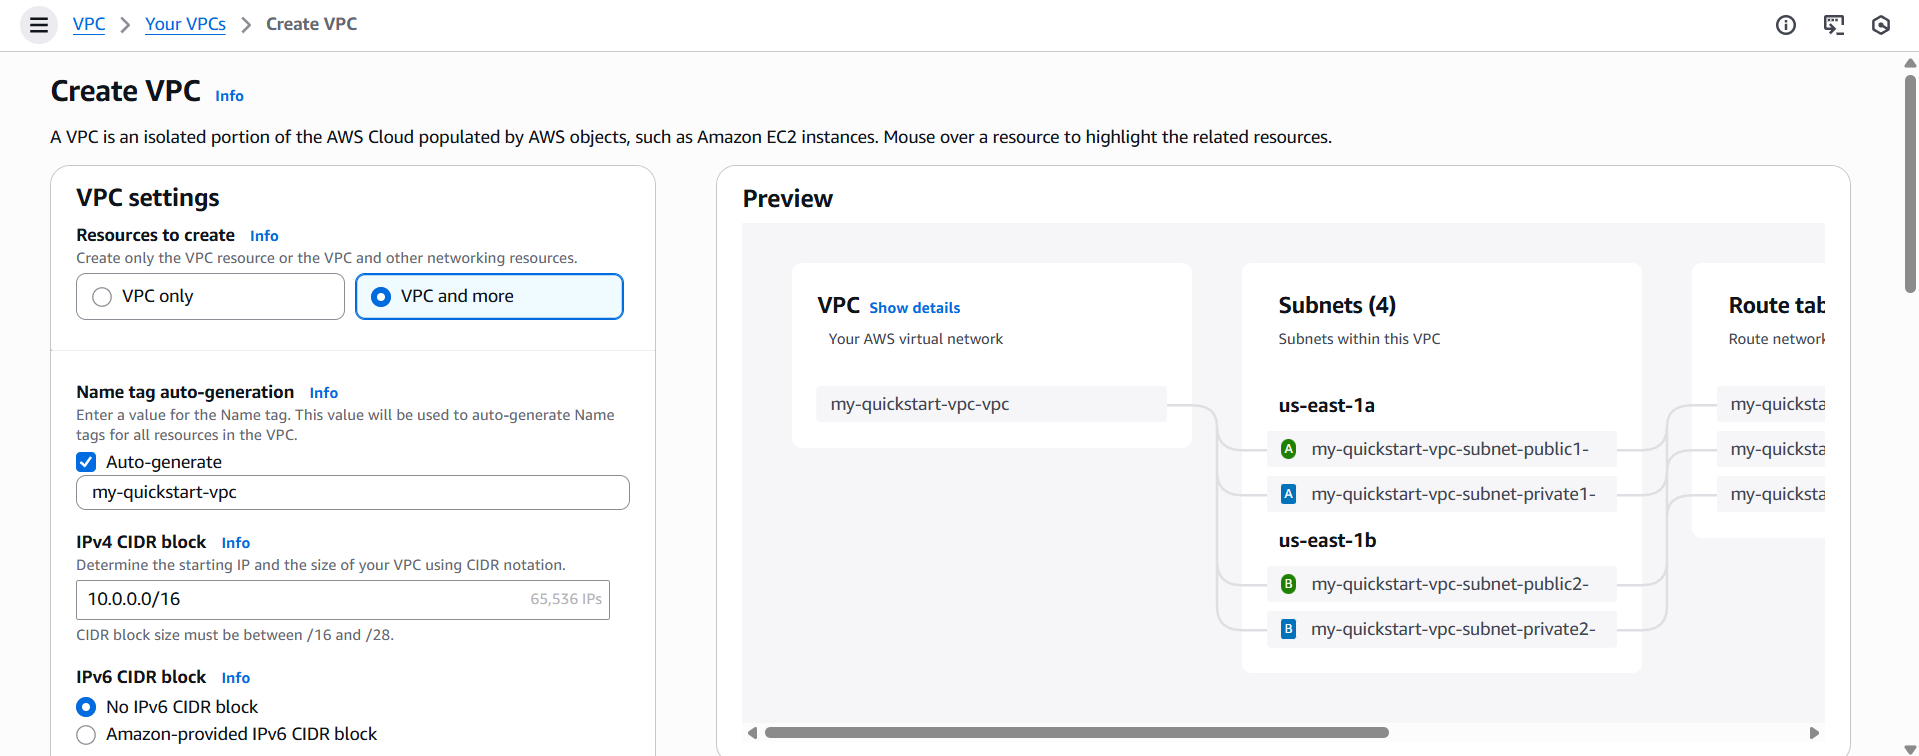
AWS will automatically provision all required networking components.
Step 2: Review Your Subnets
After creation, go to Subnets. You’ll see:
- Public subnets (routed to the Internet Gateway)
- Private subnets (routed through the S3 Gateway Endpoint)
- Subnets distributed across two Availability Zones (e.g.,
us-east-1aandus-east-1b)
This gives you a practical multi‑AZ layout without manual planning.

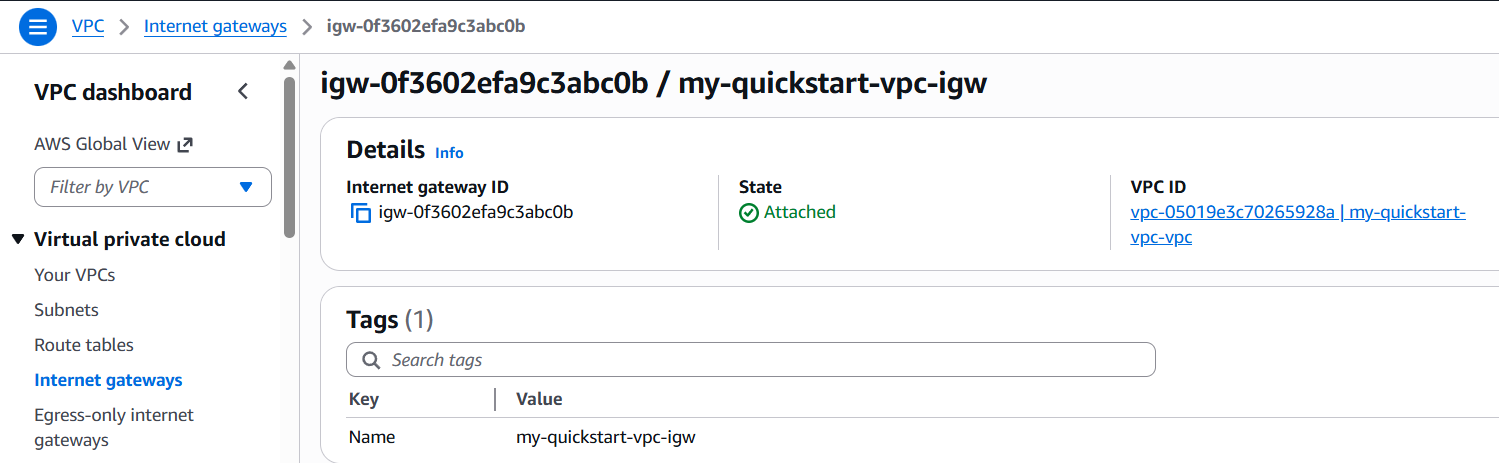
Step 3: Check the Internet‑Enabled Path
Open Internet Gateways. You should see the IGW attached to your new VPC. This attachment provides outbound internet access for the public subnets.
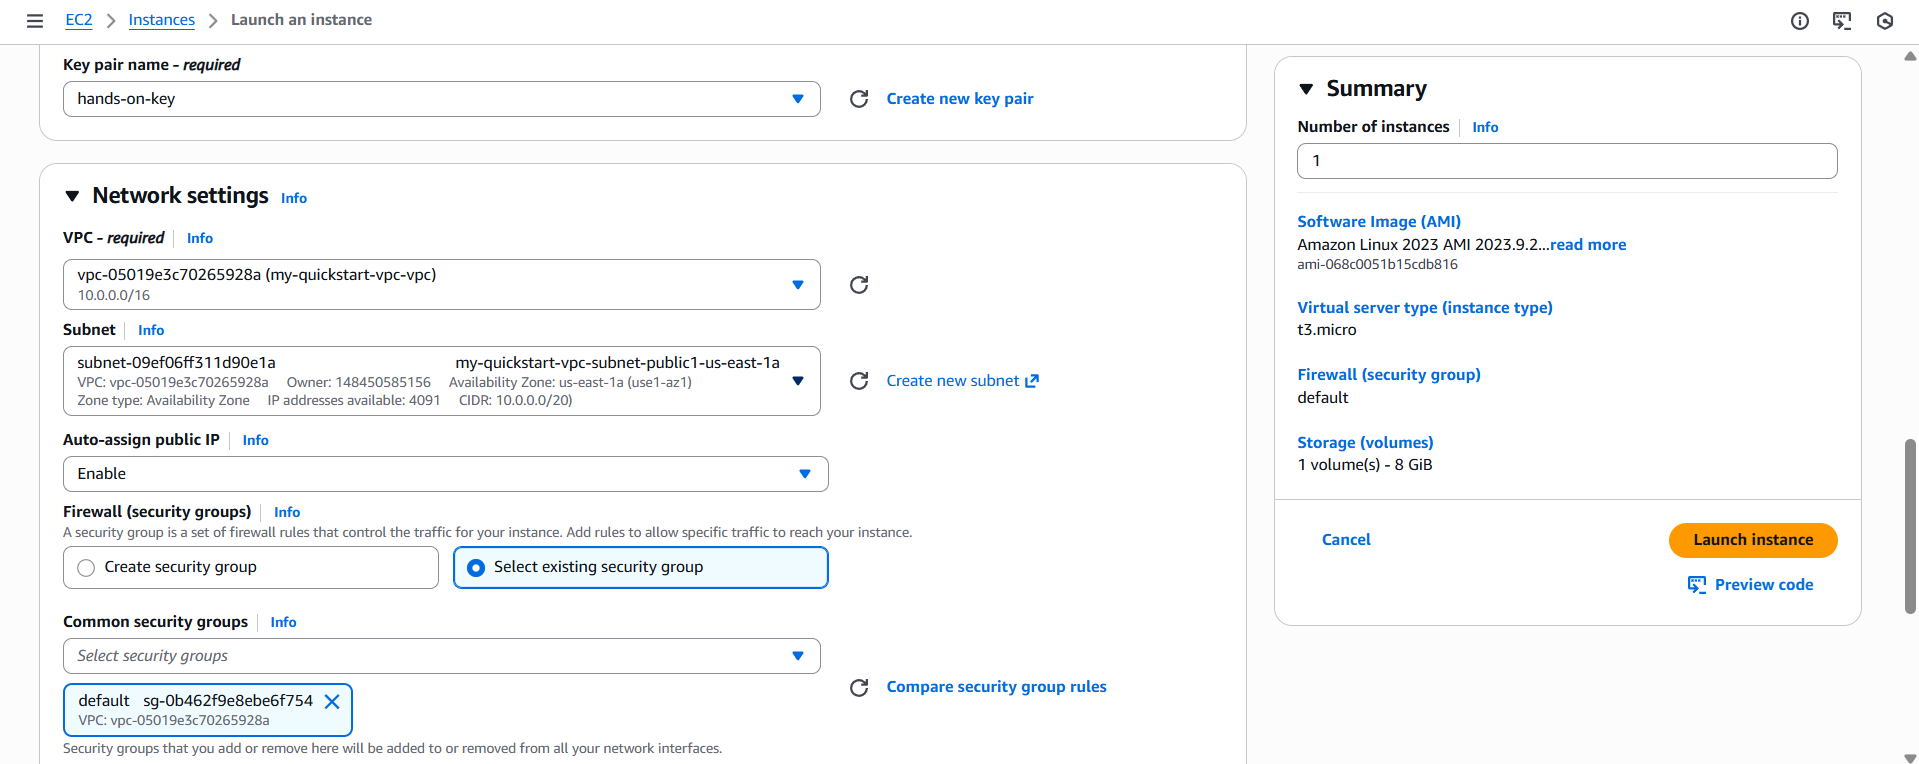
Step 4: Launch an EC2 Instance
- Go to EC2 Console → Launch instance.
- Configure:
- AMI: Amazon Linux 2
- Instance type:
t3.micro(free‑tier eligible) - Key pair: create a new key pair named
hands-on-key(RSA,.pem) - Network:
my-quickstart-vpc - Subnet: select one of the public subnets
- Auto‑assign public IP: Enabled
- Security Group: use the default SG or create one allowing SSH (port 22)
- Click Launch instance.
Step 5: Connect and Test Connectivity
SSH into the instance
ssh -i hands-on-key.pem ec2-user@A successful connection confirms that:
- The instance has a public IP
- The route table is correctly configured
- Port 22 is allowed by the Security Group
- Outbound internet access is functional
Test outbound connectivity
curl https://www.google.comA successful response confirms outbound internet connectivity from the instance.
Troubleshooting
- No public IP – Ensure the selected subnet is public and “Auto‑assign public IP” is enabled.
- SSH blocked – Verify the Security Group inbound rule allows port 22 from your IP range.
curlfails – Confirm the route table for the subnet points to the Internet Gateway.
Tips for Using This VPC Setup
- Use clear, consistent naming for VPCs, subnets, and route tables.
- Place internet‑facing resources (e.g., bastion hosts, load balancers) in public subnets only.
- Keep backend workloads in private subnets to reduce exposure.
- Treat this VPC as a baseline that can be extended as your architecture grows.
Conclusion
You now have a functional multi‑AZ VPC with clearly separated public and private subnets and internet connectivity through an Internet Gateway. This setup illustrates how AWS networking components work together to manage traffic flow and resource isolation, providing a solid foundation for future architectural extensions.