My Cybersecurity Homelab: A Hands-On Journey into Defensive and Offensive Operations
Source: Dev.to

As an aspiring cybersecurity professional, I believe that practical experience is just as crucial as theoretical knowledge. That’s why I’ve dedicated time to building and continuously evolving my own homelab – a personal sandbox where I can experiment, learn, and sharpen my skills in both defensive and offensive security operations.
This post will walk you through my current homelab setup, highlighting the tools and technologies I’m using to simulate real‑world scenarios, monitor my infrastructure, and hone my penetration‑testing abilities.
The Foundation: Hardware and Network
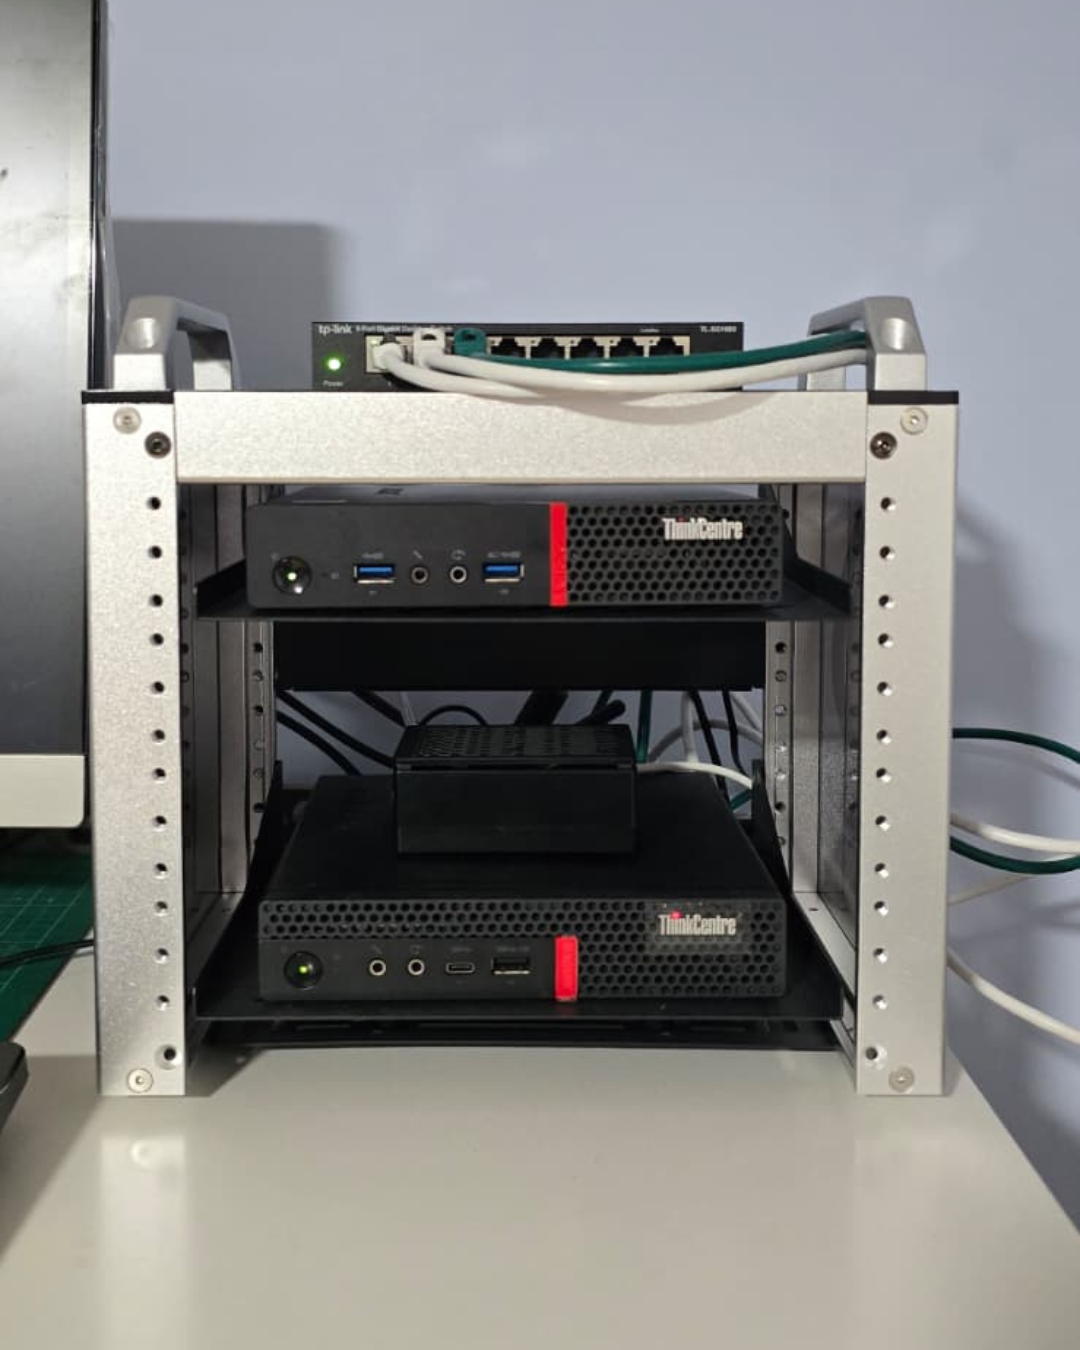
My homelab is built upon a foundation of readily available hardware, proving that you don’t need enterprise‑grade equipment to gain valuable experience.
Hardware Components
- Two Mini PCs – These serve as the workhorses of my lab, hosting various virtual machines and services.
- Raspberry Pi – A versatile single‑board computer, perfect for lightweight services.
- Network Switch – The central nervous system, connecting all components and allowing for network‑segmentation experiments.

Defensive Operations: Monitoring, SIEM, and Threat Detection
A significant part of my homelab focuses on defensive security. I want to understand how to monitor systems, detect anomalies, and respond to potential threats.
Raspberry Pi – Jellyfin Media Server
While primarily for personal media consumption, running Jellyfin on my Raspberry Pi provides a practical environment for practicing service hardening, network segmentation, and monitoring a publicly accessible (within my home network) application. It’s a great “live target” for practicing security controls.
Mini PC 1 – Wazuh for Endpoint and Container Monitoring
On my first Mini PC, I’ve deployed Wazuh, an open‑source security platform that unifies XDR and SIEM capabilities.
- Endpoint Security – Wazuh agents are installed on my other lab machines and VMs, providing crucial security visibility.
- Container Monitoring – Wazuh monitors the status and security of my Docker containers, delivering real‑time alerts on container events, file‑integrity changes, and potential vulnerabilities. The custom dashboard gives a centralized view of my containerized environment’s health and security posture.
Key learning areas
- Log Management – Collecting and analyzing logs from diverse sources.
- File Integrity Monitoring (FIM) – Detecting unauthorised changes to critical system files.
- Vulnerability Detection – Identifying known vulnerabilities in my systems and applications.
- Real‑time Alerting – Setting up rules and alerts for suspicious activities.
Offensive Operations: Penetration Testing and Threat Simulation
On the other side of the coin, my homelab provides a safe and isolated environment to practice offensive security techniques. This helps me understand the attacker’s mindset, which is crucial for building stronger defenses.
Mini PC 2 – Proxmox Virtualization Host
Proxmox VE (Virtual Environment) allows me to run multiple virtual machines, creating isolated environments for different offensive and defensive tools.
VMs Hosted on Proxmox
- Splunk (SIEM) – Another powerful SIEM solution. Learning both Wazuh and Splunk gives me a broader understanding of log aggregation, correlation, and threat hunting across platforms. This VM ingests logs from various sources within my lab for in‑depth analysis.
- Pi‑hole – A network‑wide ad blocker and DNS sinkhole. It’s an excellent tool for understanding DNS traffic, network filtering, and can even be used to block malicious domains in a lab environment.
- Local LLM for Red‑Team Testing – I’m experimenting with a local Large Language Model to explore its potential in red‑team operations (e.g., generating phishing email drafts, crafting social‑engineering scenarios, or assisting with code analysis for exploit development). All activities stay confined to my lab.
- Kali Linux – The go‑to distribution for penetration testing. This VM is my primary offensive workstation, equipped with a vast array of tools.
- Metasploit – Integrated within Kali, the Metasploit Framework is essential for exploit development, payload generation, and post‑exploitation. I use it to test vulnerabilities against intentionally vulnerable target machines within my lab.

What’s Next?
My homelab is a living, breathing project that I continuously expand and refine. Future plans include:
- Network Segmentation – Implementing VLANs to create more isolated environments for different trust levels.
- Active Directory Environment – Setting up a Windows Server with Active Directory to practice domain‑based attacks and defenses.
- Cloud Integration – Exploring hybrid cloud scenarios by integrating cloud‑based services (e.g., AWS, Azure) into my lab.
- Automation – Scripting common tasks and deployments using Ansible or Terraform.
- Container Orchestration Security – Delving deeper into Kubernetes security.
This homelab is more than just a collection of hardware and software; it’s a testament to my passion for cybersecurity and my commitment to continuous learning. I believe this practical experience will be invaluable as I transition into a professional cybersecurity role.
Feel free to ask questions or share your own setups in the comments below!