Kubernetes GitOps with Flux
Published: (December 22, 2025 at 02:45 PM EST)
2 min read
Source: Dev.to
Source: Dev.to
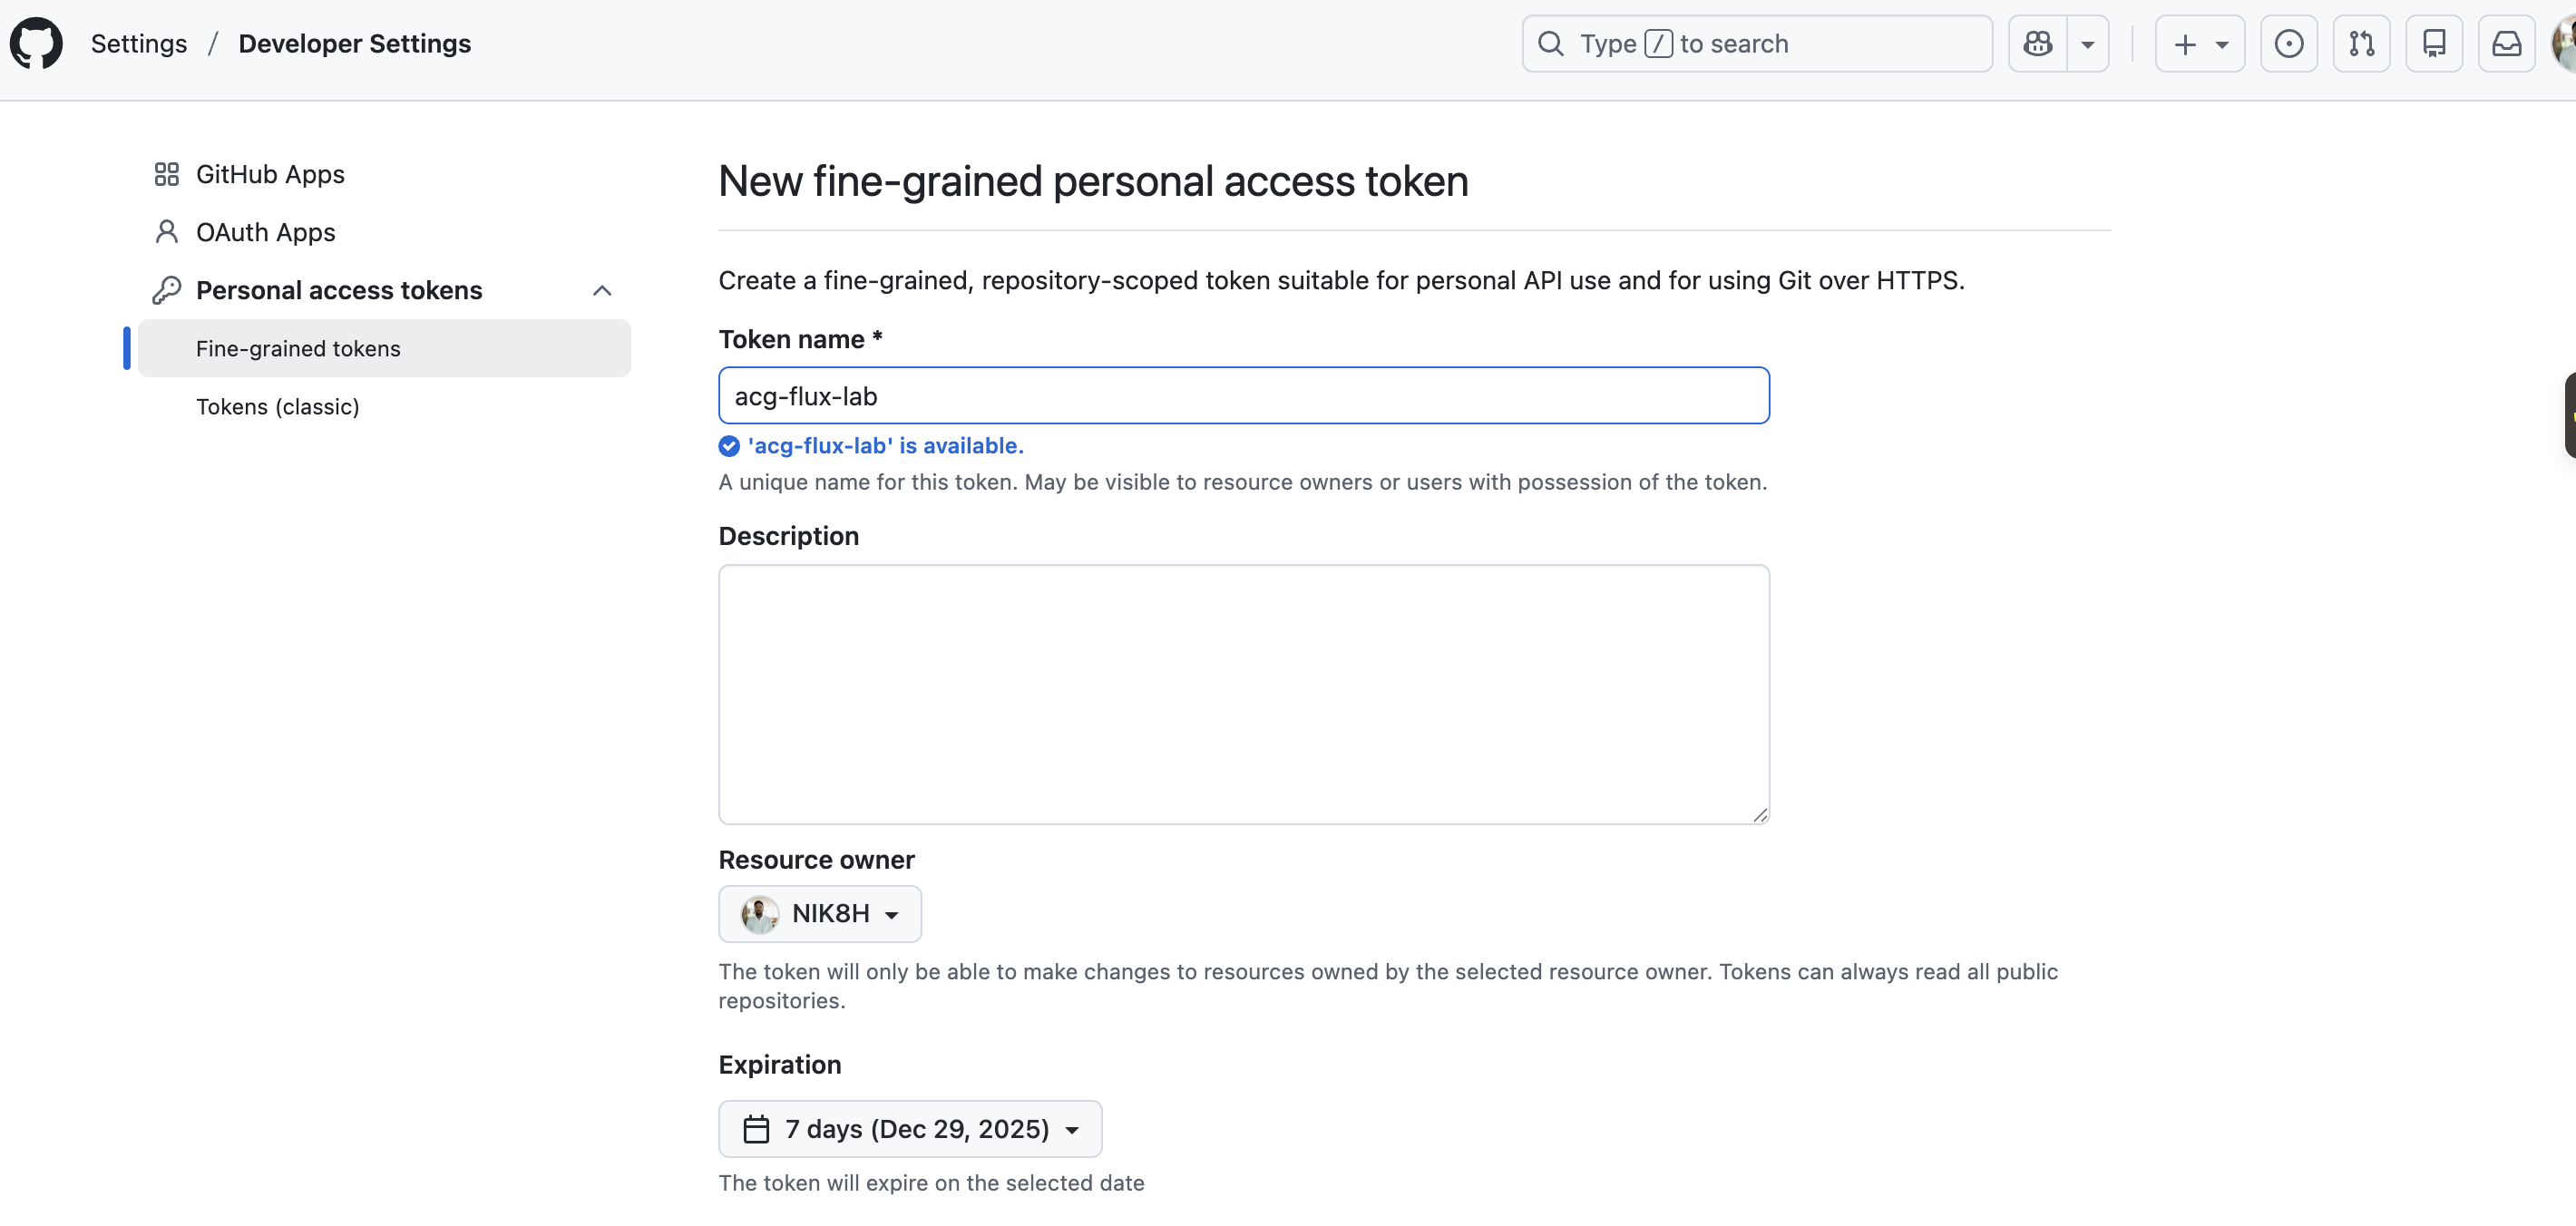
Create a GitHub Personal Access Token
- Open a new browser tab and go to github.com.
- Sign in (or create a new account).
- Click your avatar in the upper‑right corner → Settings.
- In the left‑hand menu select Developer settings → Personal access tokens.
- Click Generate a personal access token.
- If prompted, re‑enter your password and confirm.
- Under Note, enter a descriptive name (e.g.,
acg-flux-lab). - Under Select scopes, check the repo box.
- Click Generate token and copy the generated token.
Bootstrap the Git Repository
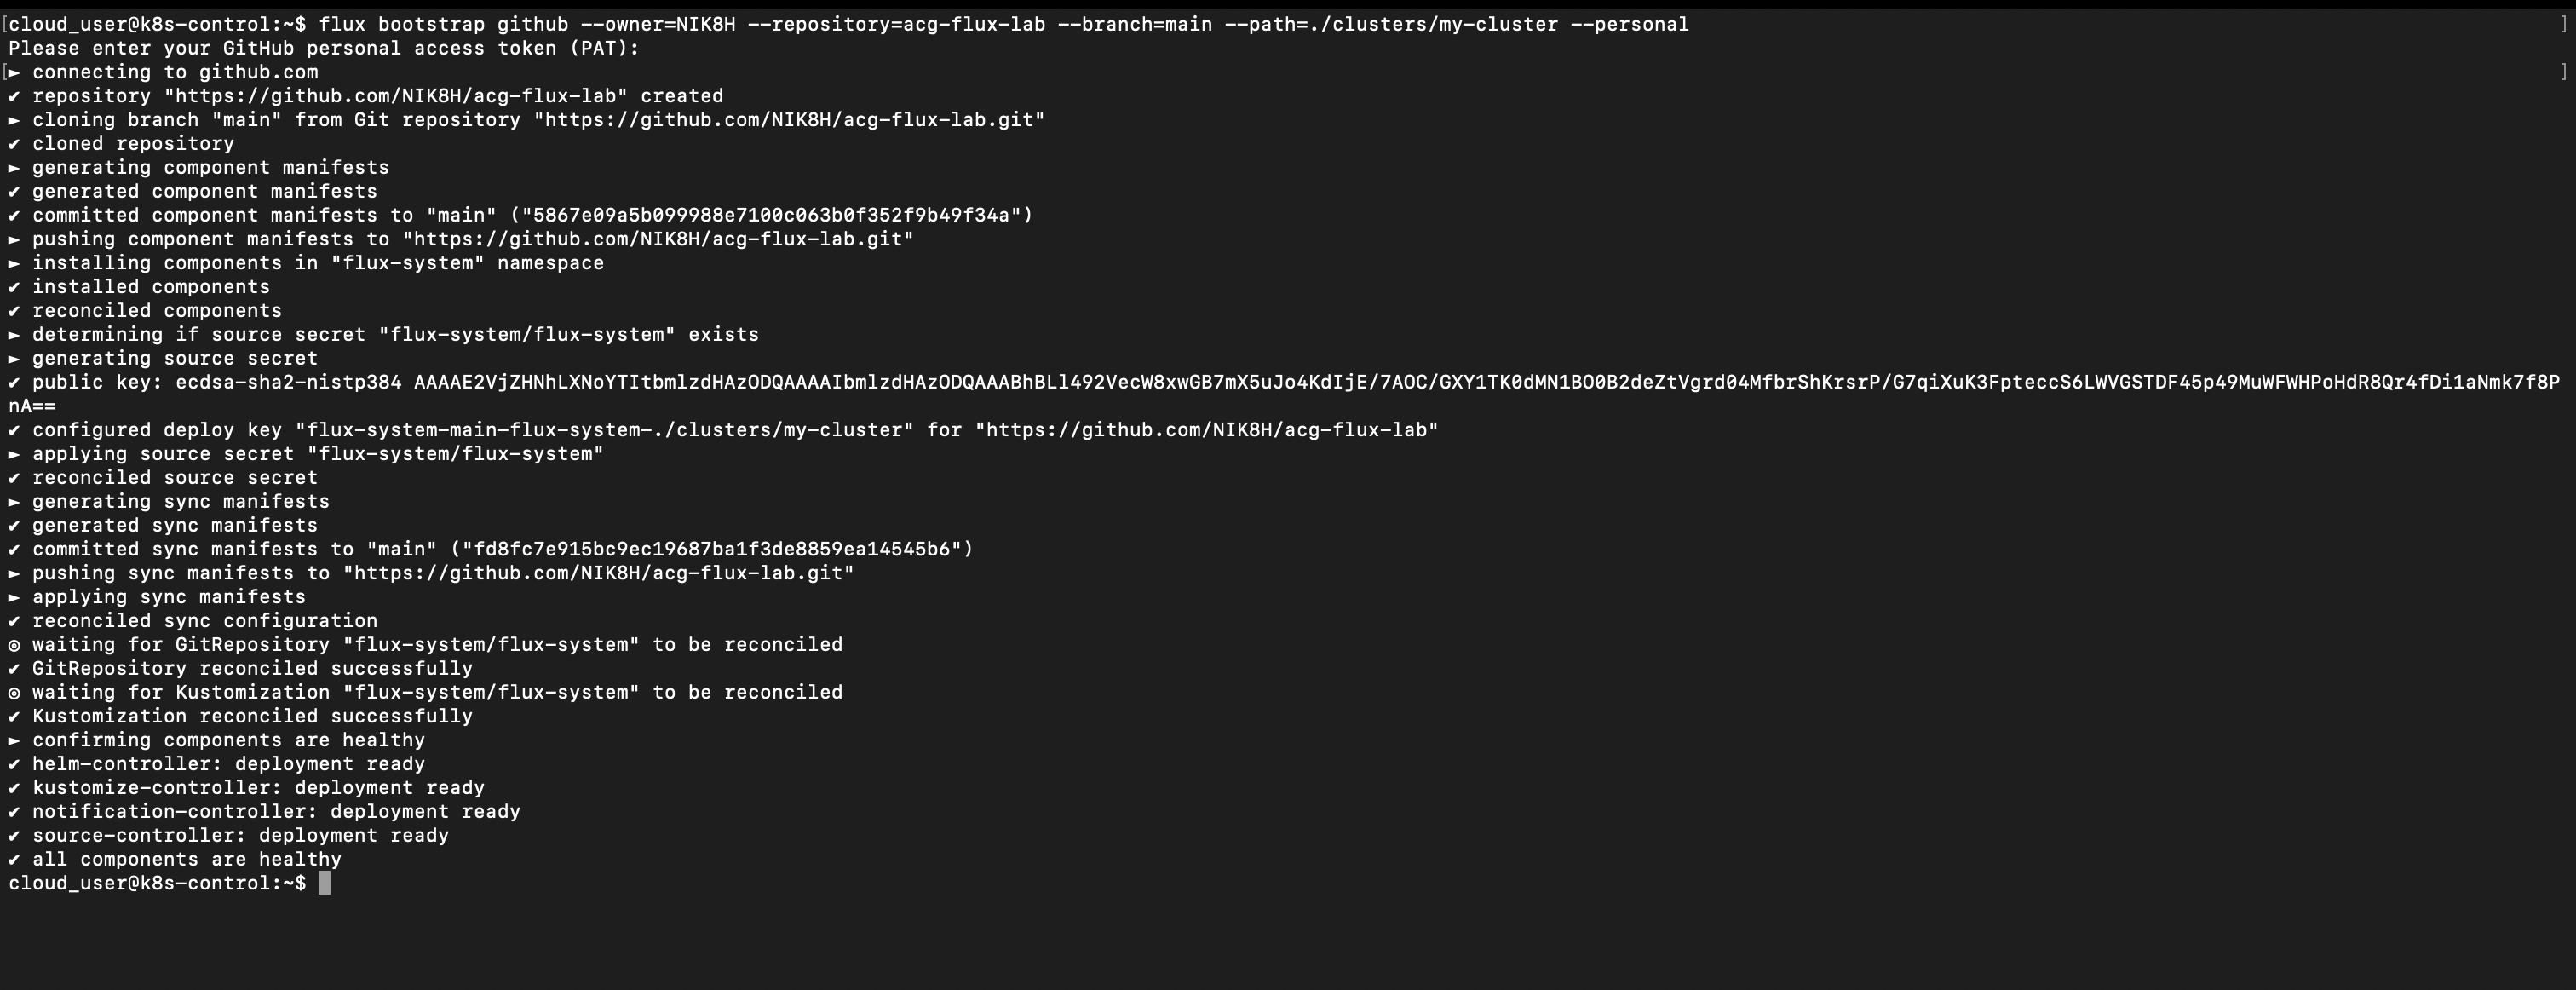
On the lab server, run the following command, replacing “ with your GitHub username:
flux bootstrap github \
  --owner= \
  --repository=acg-flux-lab \
  --branch=main \
  --path=./clusters/my-cluster \
--personal- This creates a new GitHub repository named acg-flux-lab.
- When prompted, paste the personal access token you generated earlier.
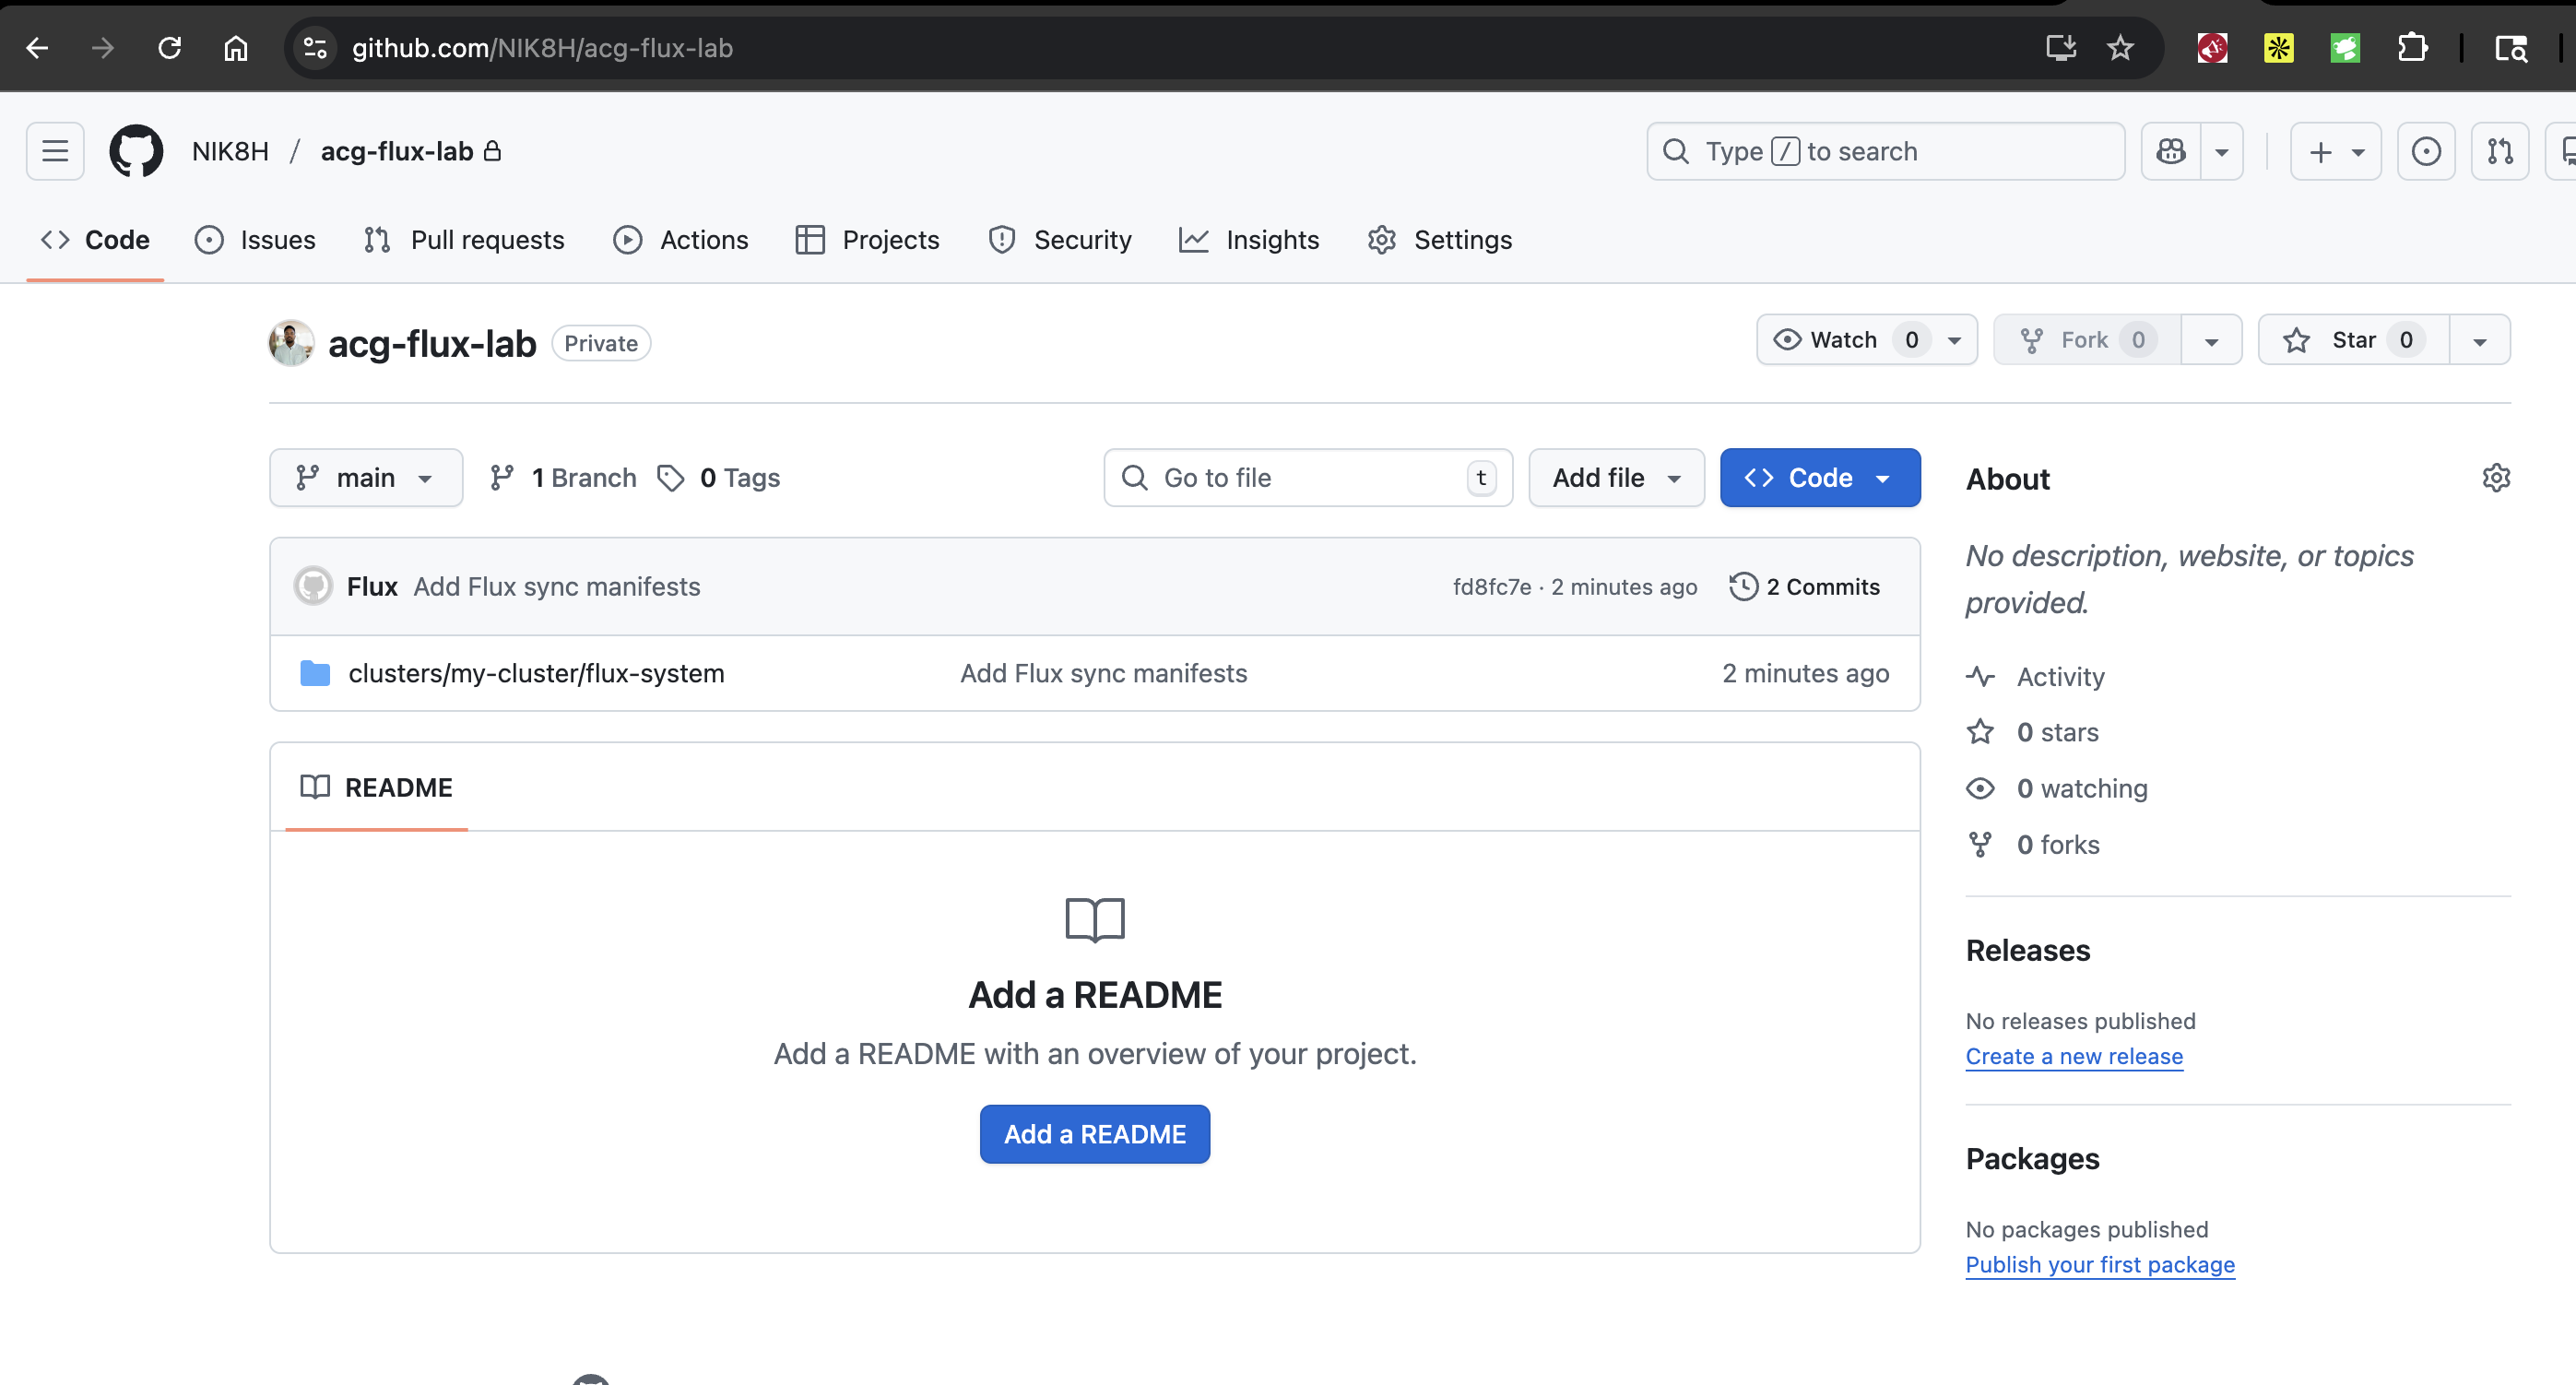
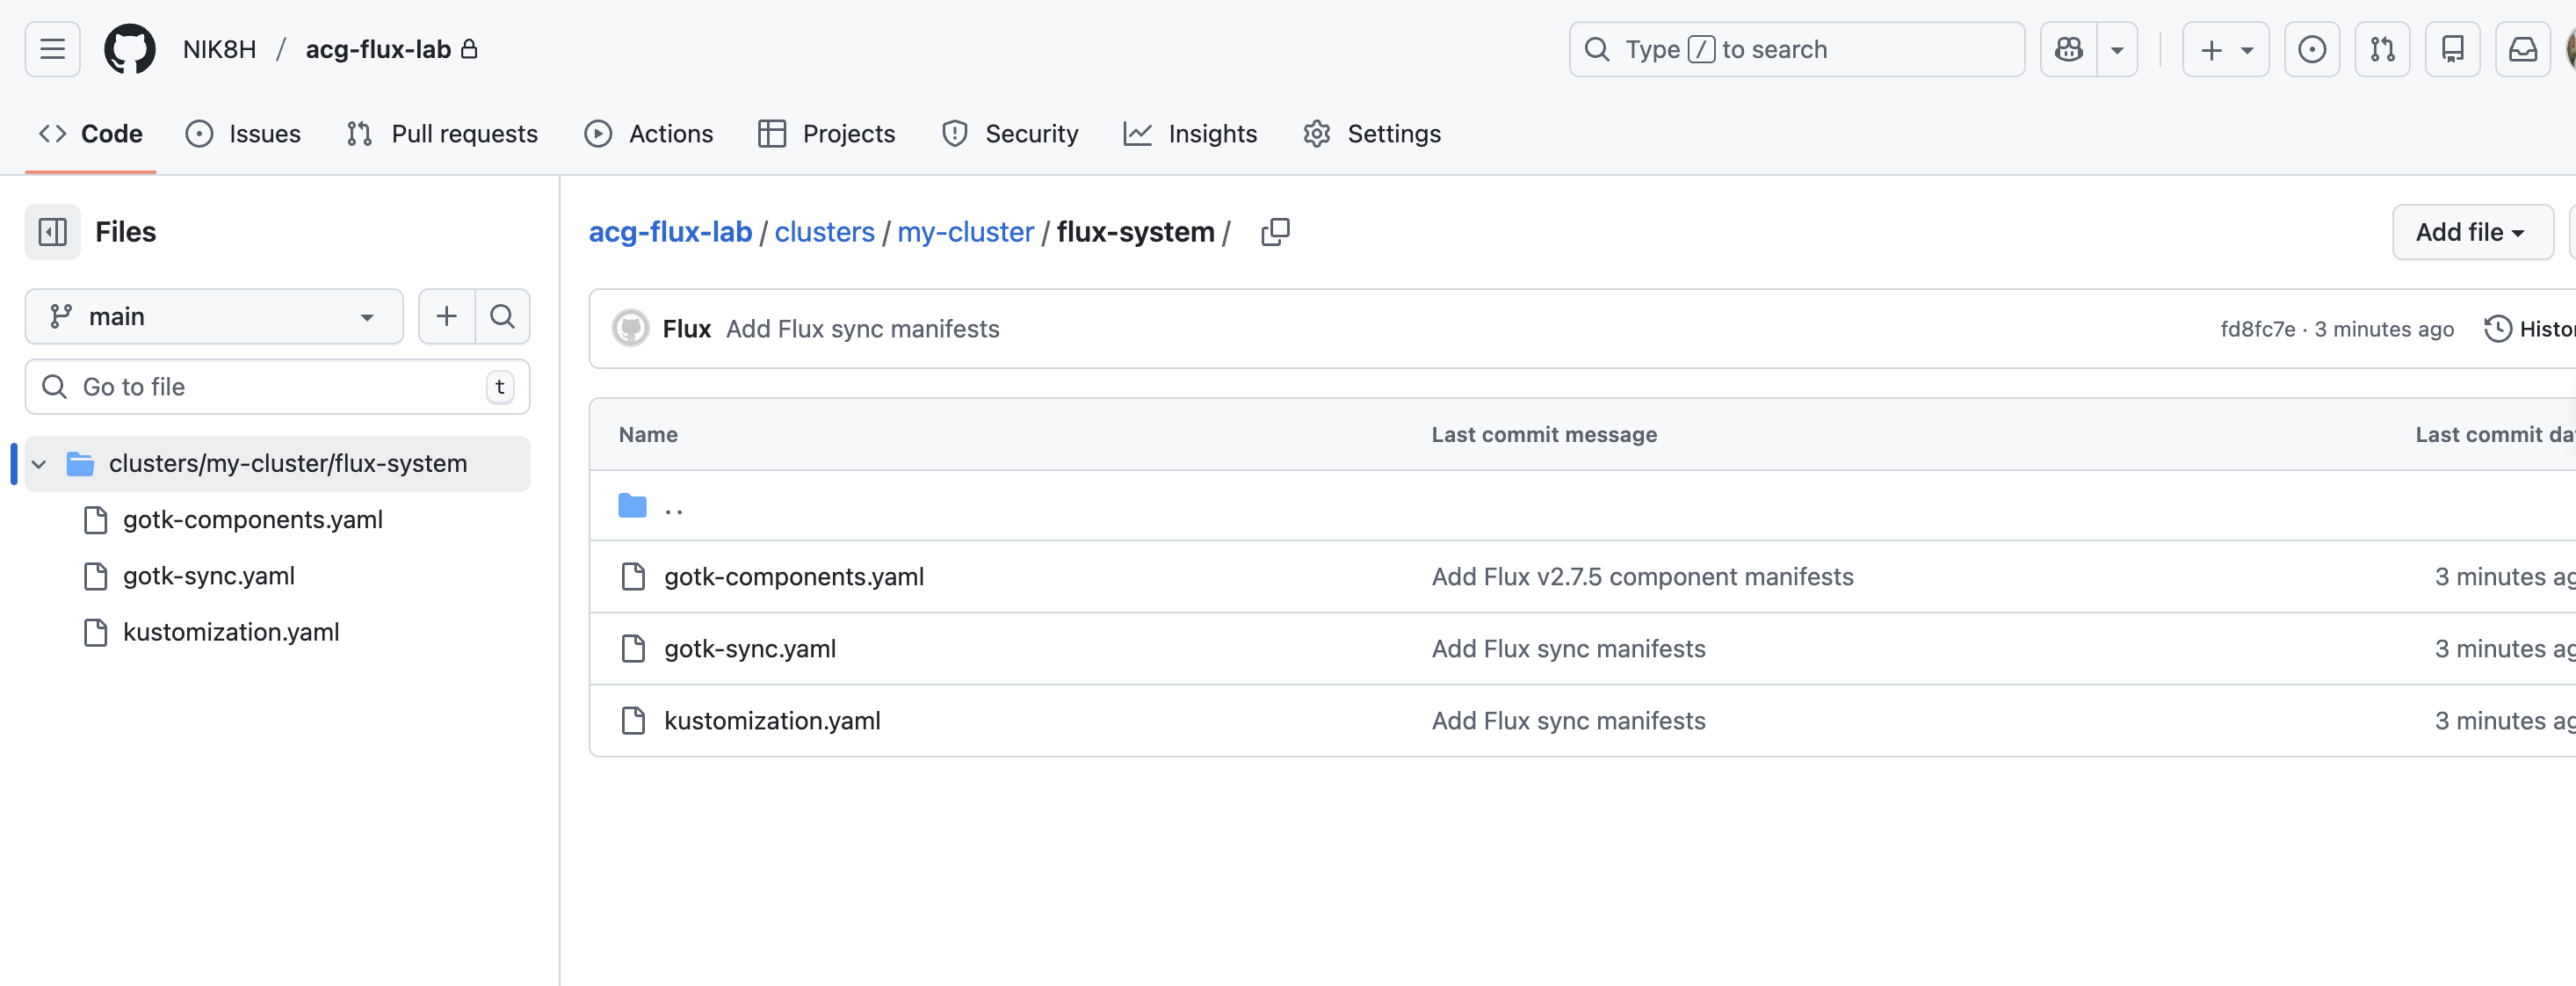
Visit https://github.com//acg-flux-lab to verify that the repository was created.
YAML Manifest
Below is the example manifest that will be added to the repository:
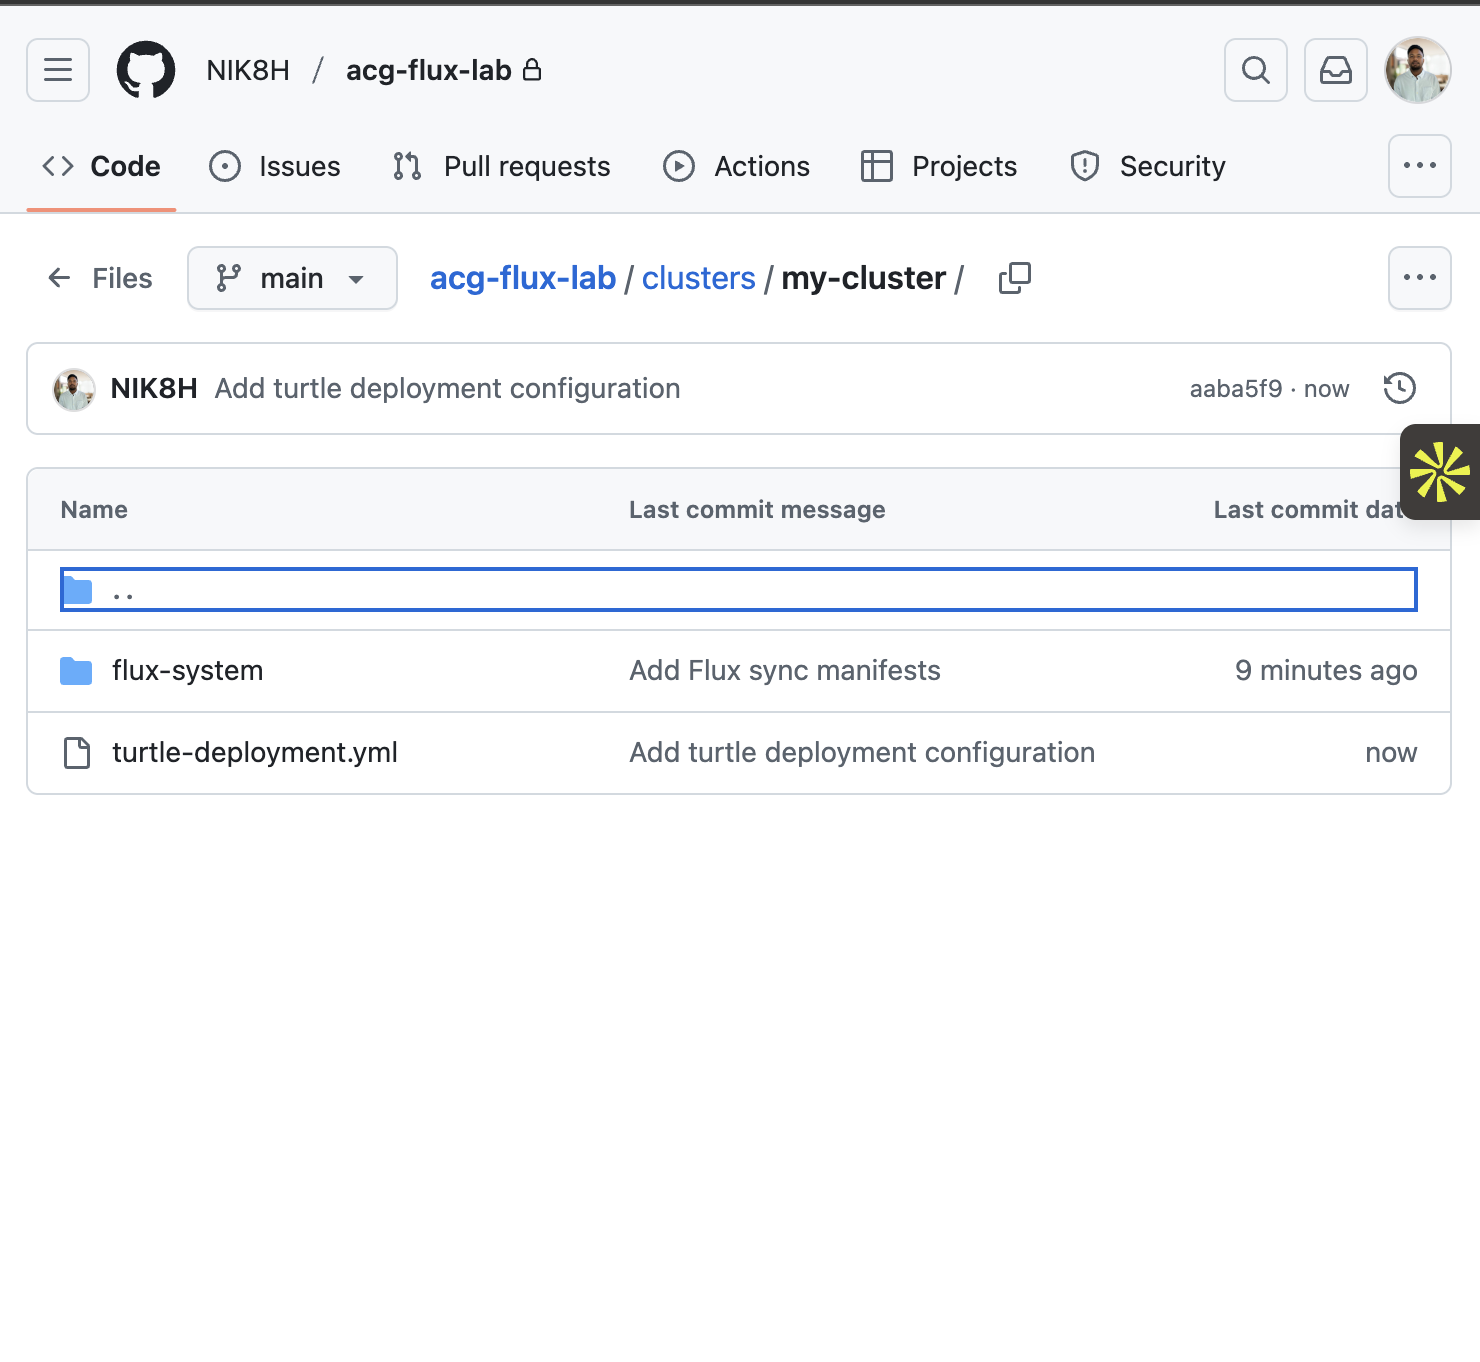
Create a Deployment via the GitHub Repository Using Flux
- In the acg-flux-lab repository on GitHub, click Add files → Create new file.
- Set the path to
clusters/my-cluster/turtle-deployment.yaml. - Paste the following YAML into the editor:
apiVersion: apps/v1
kind: Deployment
metadata:
  name: turtle-deployment
  namespace: default
spec:
  replicas: 3
  selector:
    matchLabels:
      app: turtle
  template:
    metadata:
      labels:
        app: turtle
    spec:
      containers:
        - name: nginx
image: nginx:stable- Commit the new file directly to the main branch.
After Flux reconciles the repository, verify the resources:
kubectl get pods
kubectl get deployments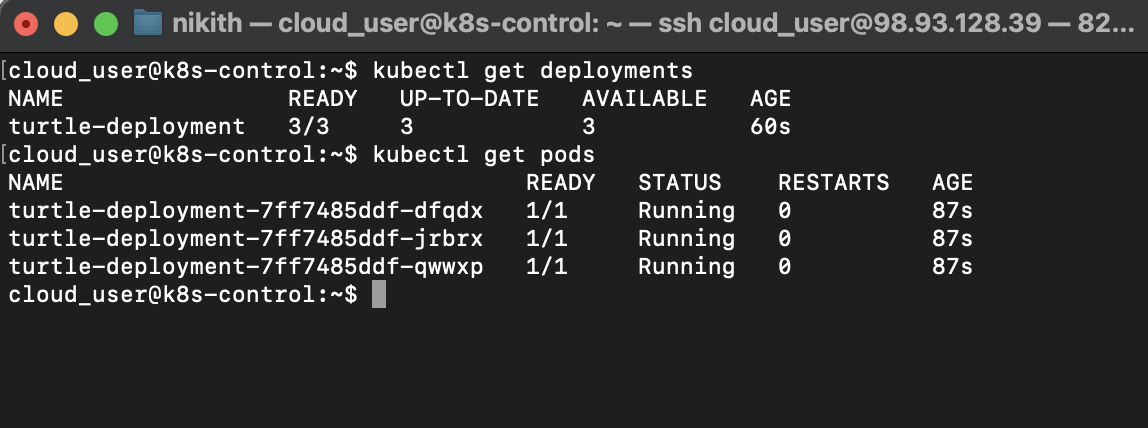
Reference
- (no items)