How Developers Can Sync Notes and Tasks Between VS Code and Notion
Source: Dev.to
Not because I didn’t write them down, but because I wrote them everywhere.
A quick TODO in a code comment, a short summary in Google Docs, a meeting note in Notion, a follow‑up buried in terminal history… By sprint review, something always slipped through.
The problem wasn’t discipline. It was fragmentation.
As a developer advocate I spend a lot of time in VS Code, but my team lives in Notion. Every task that started in my editor had to make a second trip into a Notion board before it became “real.” That extra step rarely happened immediately, and when it didn’t, context was lost.
I wanted one thing: capture notes and tasks where I work, but store them where my team collaborates.
I recently discovered I can also integrate Notion with Continue AI, and I’ll show you how to achieve this in detail in this article.
The Cost of Context Switching
Switching between tools feels harmless, but it adds up.
During a typical workday I would:
- Write a meeting summary in VS Code
- Switch to Notion
- Recreate tasks manually
- Forget half the nuance I had while writing the note
Sometimes I skipped the Notion step entirely and told myself I’d “add it later.” Later never came.
The result was predictable:
- Missed follow‑ups
- PR reviews delayed by “I thought someone else was handling that.”
- Notes that never turned into action
- I didn’t need another task app.
- I needed less friction between thinking and tracking.
Why Continue and Notion Work Together
As a developer, Continue already lives in my VS Code workflow. I use it to reason through problems and draft documentation. What I didn’t realize at first was that Continue can also talk directly to external tools like Notion.
With a simple Notion integration and an API key stored in my terminal session, Continue can:
- Create Notion pages
- Insert tasks into databases
- Update statuses, assignees, and due dates
- Do all of it using plain‑English prompts
- No copy‑paste. No tab switching. Just streamlined focus.
Setting It Up
The beautiful thing is that setting it up is straightforward and only needs to happen once.
Prerequisites
To integrate Continue and Notion you will need:
- Continue CLI –
npm i -g @continuedev/cli - A Notion workspace with Editor (or higher) access
- Node.js 18+ installed locally
- A Continue account with Hub access
Note: Agent usage in Continue requires credits. To use agents, create a Continue API key and store it as a secret.
Step 1 – Create a Notion Integration
In your browser, sign in to Notion.
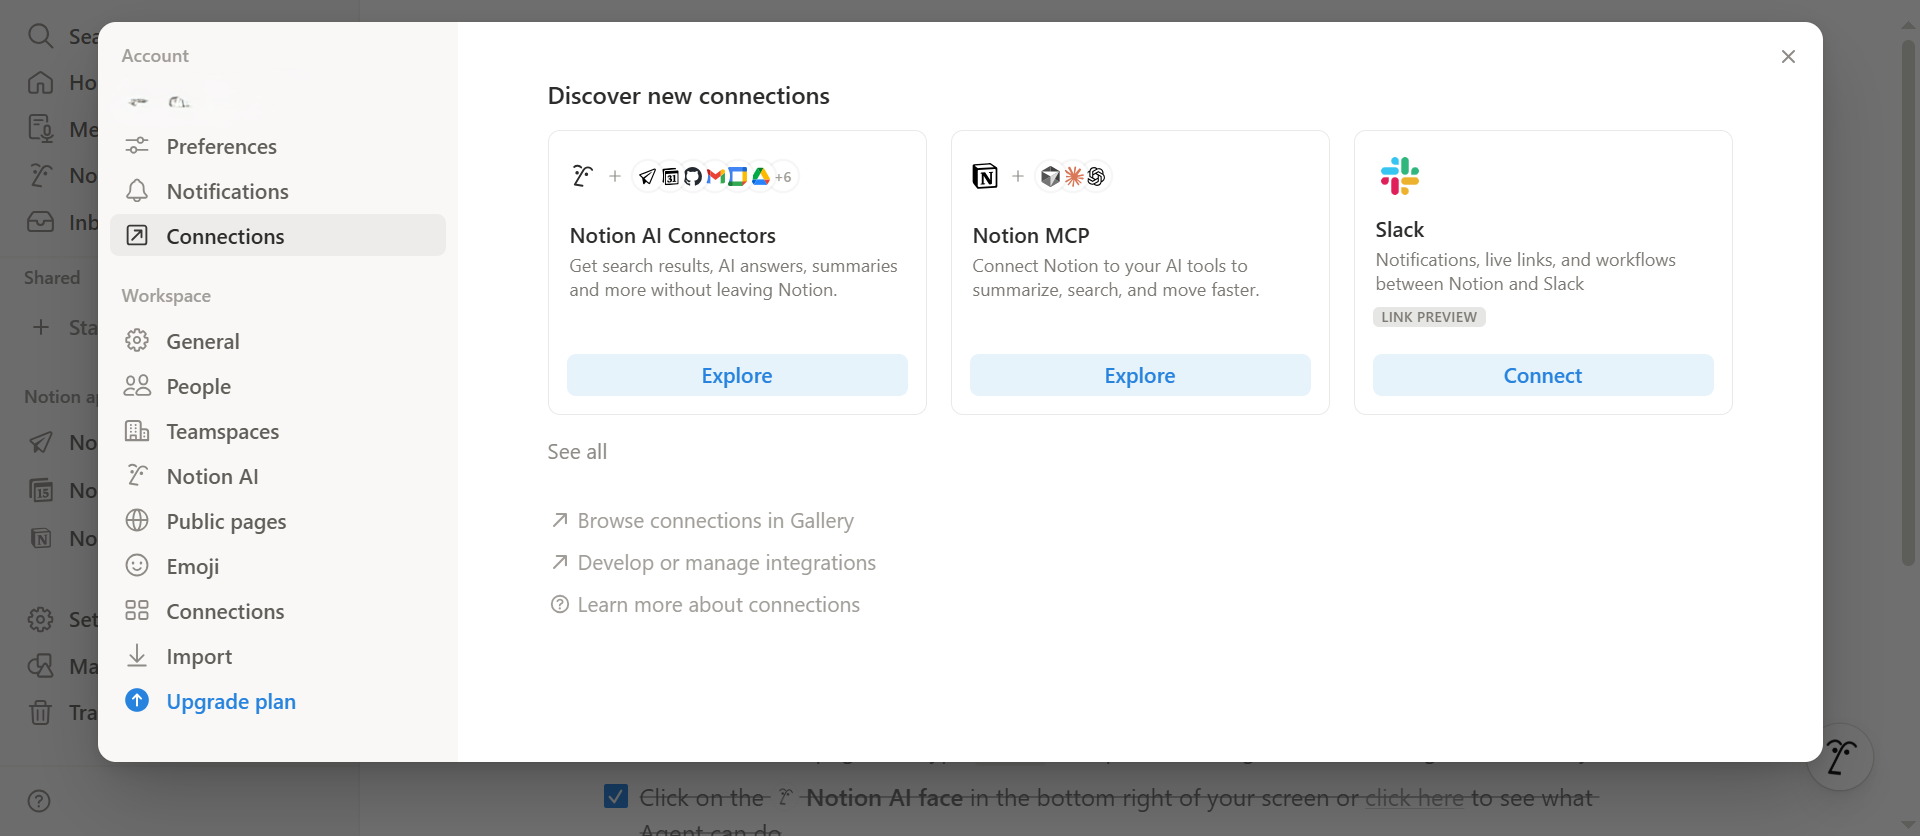
Go to Settings → Connections → Develop or Manage Integrations.
Click New Integration.
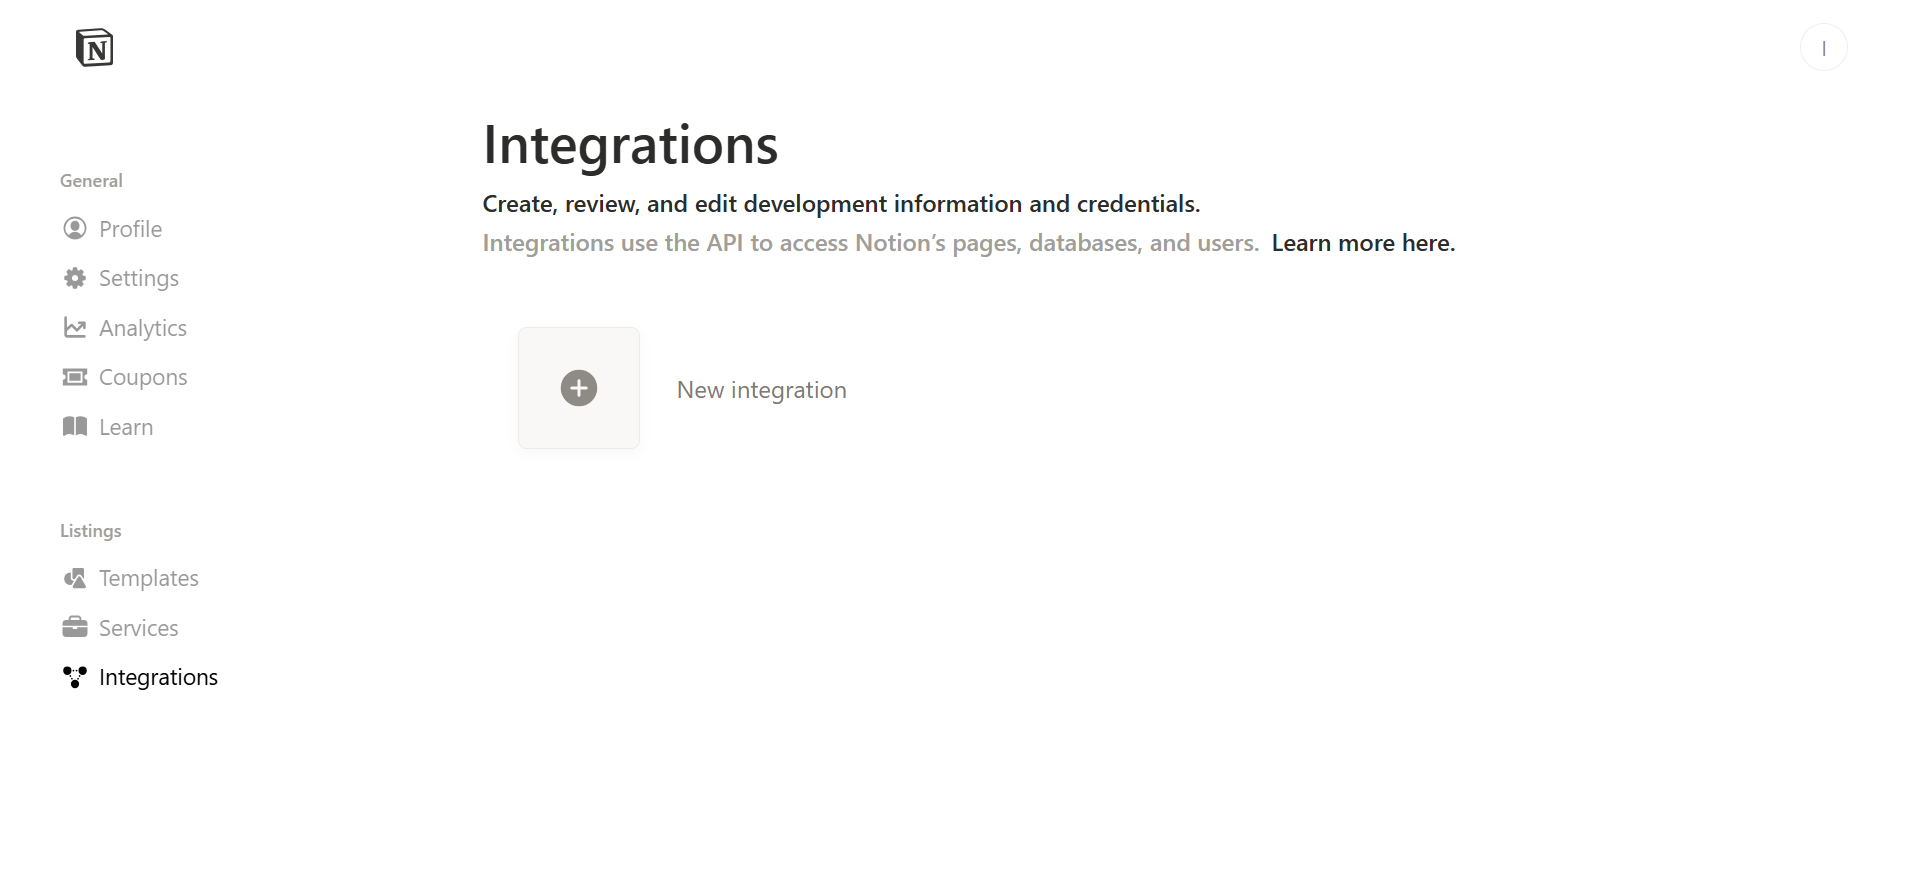
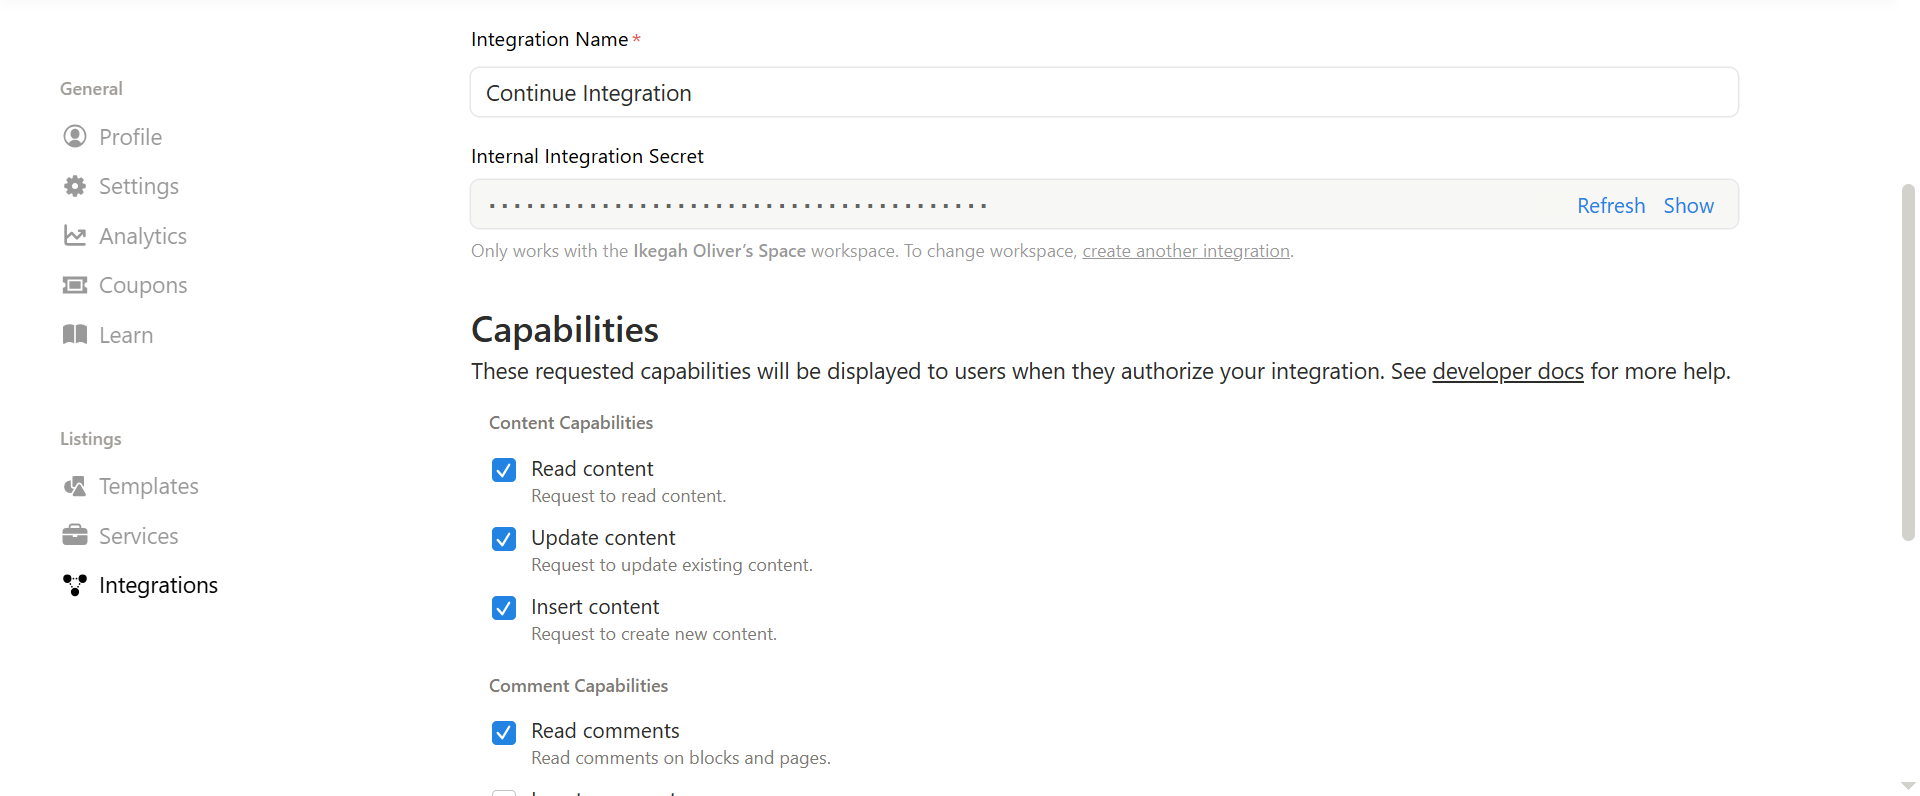
Give the integration a name (e.g., “Continue Integration”), select your workspace, and click Save.
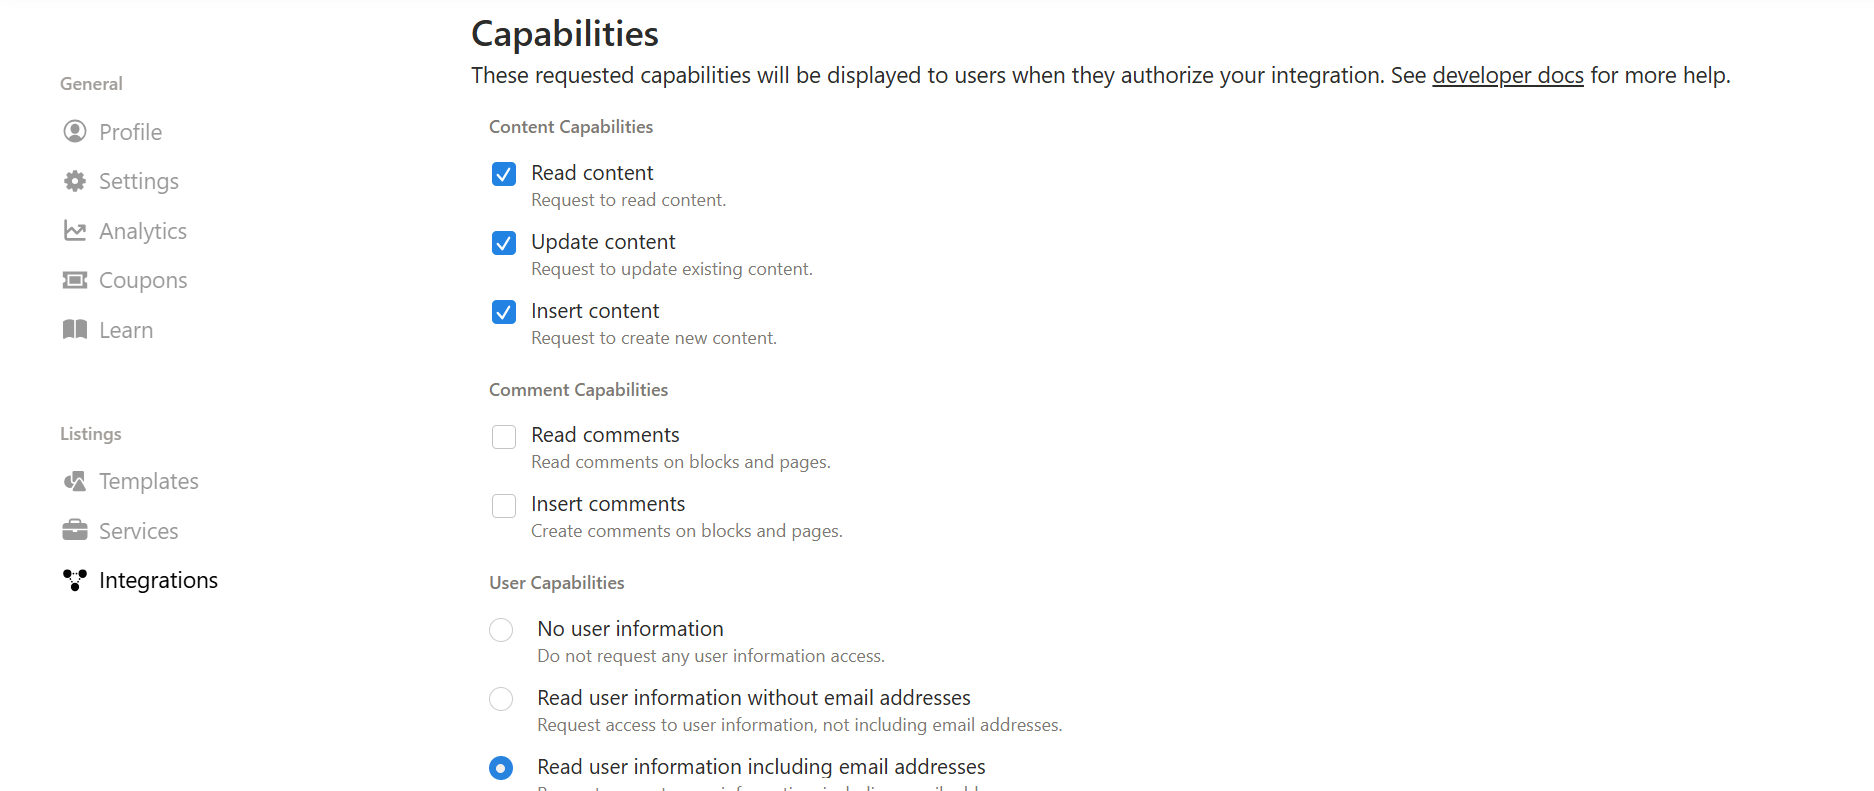
In the integration configuration, enable:
- Read, Update, and Insert under Content Capabilities
- Read comments under Comment Capabilities
- Read user information (including email addresses) under User Capabilities
Copy the Internal Integration Secret and store it safely.
Grant the integration access to the pages/databases you want it to read/write:
- Open the target page or database in Notion.
- Click the three‑dot icon → Connections → search for your integration → Confirm.
Step 2 – Configure the Notion Key in Your Environment (VS Code)
Open a terminal in VS Code, navigate to your project directory, and run:
export NOTION_API_KEY="secret_xxx"Replace secret_xxx with the Internal Integration Secret you copied. This makes the key available for the current session.
Tip: Save the key in a .env file for convenience, but be sure to add .env to .gitignore to keep it private.
Step 3 – Find Your Database ID (Optional)
If you have a specific database (e.g., a “Tasks” table) you want Continue to write to, you’ll need its database ID:
- Open the database in Notion.
- Copy the URL; it looks like
https://www.notion.so/yourworkspace/xxxxxxxxxxxxxxxxxxxxxxxxxxxxxxxx. - The part after the last slash (
xxxxxxxxxxxxxxxxxxxxxxxxxxxxxxxx) is the database ID (remove any hyphens).
You can now reference this ID in your Continue prompts or configuration files.
Using Continue to Create Notion Tasks
With everything wired up, you can issue plain‑English prompts to Continue, such as:
Create a new task in Notion called "Review PR #42" assigned to @jane, due next Friday.Continue will:
- Parse the request.
- Call the Notion API using the stored
NOTION_API_KEY. - Insert the task into the specified database with the appropriate properties.
No copy‑paste, no tab switching—just a single prompt from the editor you’re already in.
TL;DR
- Create a Notion integration and enable read/write permissions.
- Copy the secret and expose it as
NOTION_API_KEYin your terminal (or.env). - (Optional) Grab your database ID for targeted writes.
- Ask Continue to create or update Notion pages/tasks with natural‑language prompts.
Now your notes and tasks stay where you think of them—in VS Code—while the truth lives where your team collaborates—in Notion. No more context loss, no more missed follow‑ups, and a smoother workflow for everyone.
Step 2: Set the Notion Database ID
Open the database in Notion and look at the URL (the long string after the last / and before ?). Then run:
export NOTION_DATABASE_ID="your_database_id"This tells Continue which database to use when a prompt refers to “my database”.
Note: Continue will automatically use the NOTION_API_KEY you set when you run it. You don’t need to manually call the Notion API – just reference “the API key stored in this session” in your prompts.
Step 3: Link and Test Notion in Continue CLI
In the terminal (in your project directory), type cn and press Enter. This launches Continue in interactive (TUI) mode. You should see a prompt where you can type instructions.

Example Prompt
1. Fetch my Tasks database using the Notion API key stored in this terminal.
2. Create a new task named "Buy groceries" with status "To Do".
Press Enter. Continue will list the actions it plans to take (e.g., creating a new database entry) before executing them. Review and approve each action. This will create a new item in your Notion database.
If you trust your prompt and want to skip confirmations, you can run a one‑liner like:
cn -p --auto "1. Fetch my Tasks database. 2. Create a new task 'Write report' with status 'In Progress'."-pskips the interactive UI.--autoauto‑confirms actions.
After running your prompt, switch to Notion to confirm the changes. The new task(s) should appear in your database. You can update or query entries by running new prompts, e.g., “Find tasks due tomorrow” or “Mark task X as done.” Continue handles the details via the Notion API.
Congratulations! You can now seamlessly manage your project tasks in Notion through Continue’s CLI, all from within VS Code.
What’s Next?
At the end of the day, the value of this integration isn’t novelty; it’s alignment. Your thoughts start in the editor, your work lives in Notion, and Continue quietly connects the two without demanding extra effort. By capturing notes and tasks as they’re created, you remove the most significant source of workflow failure: delay. The result is fewer missed follow‑ups, clearer ownership, and a system that works with how developers already think and write.
If you want to go further, Continue supports a wide range of example prompts and workflows you can adapt to your own setup—from task automation to documentation and planning flows. I highly recommend exploring those examples to see what’s possible and to refine prompts that fit your day‑to‑day work. You can find them [here].