Deploying a MEAN Stack App Without a Cloud Provider
Source: Dev.to
🏗️ The Architecture
We are using a monorepo approach, meaning both the Angular frontend and Node.js backend live in the same repository. Here is how the flow works:
- Push code to the
productionbranch. - GitHub Actions builds the Docker images.
- Images are pushed to Docker Hub.
- A Self‑Hosted Runner on your VM pulls the latest images and restarts the containers.
- Nginx acts as a reverse proxy to route traffic.
If you are curious about how this differs from cloud‑specific hosting, check out my previous post on Hosting a Node.js Server in an EC2 Instance.
1. Setting Up the Server (VirtualBox)
I used a Debian VM for this setup.
- Network: Set your VM adapter to Bridged Mode. This allows the VM to get an IP from your router, making it a real node on your Local Area Network (LAN).
- Access: You should be able to SSH into it:
ssh user@your_vm_ip.
For a detailed breakdown of how to handle LAN networking and port forwarding to make your server accessible from the internet, refer to my post: How Web Technology Works – Part 01.
2. Docker Hub & GitHub Secrets
To push images automatically, GitHub needs permission to talk to Docker Hub. Do not use your account password.
-
Go to Docker Hub > Settings > Personal access tokens.
-
Create a New Access Token with Read & Write access.
-
In your GitHub repository, go to Settings > Secrets and variables > Actions.
-
Add the following secrets:
DOCKERHUB_USERNAME– your Docker Hub usernameDOCKERHUB_TOKEN– the token you just created
3. The Self‑Hosted Runner
Instead of using GitHub’s servers to deploy, we use our own VM. This is called a Self‑Hosted Runner.
- In GitHub: Settings > Actions > Runners > New self‑hosted runner.
- Select Linux and follow the commands to download and configure it on your VM.
Once configured, install it as a service so it runs in the background:
sudo ./svc.sh install
sudo ./svc.sh start
4. Containerization (The Code)
Since we are in a monorepo, we need separate Dockerfiles and a single Compose file.
Backend Dockerfile (backend/Dockerfile)
FROM node:20-alpine
WORKDIR /app
COPY package*.json ./
RUN npm ci
COPY . .
EXPOSE 8080
CMD ["node", "server.js"]
Frontend Dockerfile (frontend/Dockerfile)
FROM node:20-alpine AS build
WORKDIR /app
COPY package*.json ./
RUN npm ci
COPY . .
RUN npm run build

FROM nginx:alpine
COPY --from=build /app/dist/your-app-name /usr/share/nginx/html
EXPOSE 80
CMD ["nginx", "-g", "daemon off;"]
Docker Compose (docker-compose.yml)
version: '3.8'
services:
  backend:
    image: your-docker-username/mean-backend:latest
    extra_hosts:
      - "host.docker.internal:host-gateway"
    container_name: mean-backend
    restart: always
    ports:
      - "8080:8080"

  frontend:
    image: your-docker-username/mean-frontend:latest
    container_name: mean-frontend
    restart: always
    depends_on:
      - backend
    ports:
      - "81:80"
5. Nginx Reverse Proxy
Install Nginx on the host VM:
sudo apt install nginxWe use it to route port 80 traffic to our containers.
Configuration (/etc/nginx/sites-available/default):
server {
    listen 80;
    server_name 10.131.44.201; # Use your VM IP

    location /api/ {
        proxy_pass http://localhost:8080;
        proxy_set_header Host $host;
        proxy_set_header X-Real-IP $remote_addr;
        proxy_set_header X-Forwarded-For $proxy_add_x_forwarded_for;
    }

    location / {
        proxy_pass http://localhost:81;
        proxy_set_header Host $host;
        proxy_set_header X-Real-IP $remote_addr;
        proxy_set_header X-Forwarded-For $proxy_add_x_forwarded_for;
    }
}
Check the configuration syntax:
sudo nginx -tReload Nginx:
sudo systemctl reload nginx6. The CI/CD Pipeline
Create .github/workflows/deploy.yml. This script automates the entire process.
name: Build and Deploy
on:
  push:
    branches: [ production ]

jobs:
  build:
    runs-on: ubuntu-latest
    steps:
      - uses: actions/checkout@v4
      - uses: docker/login-action@v3
        with:
          username: ${{ secrets.DOCKERHUB_USERNAME }}
          password: ${{ secrets.DOCKERHUB_TOKEN }}
      - name: Build and Push Backend
        run: |
          docker build -t ${{ secrets.DOCKERHUB_USERNAME }}/mean-backend:latest ./backend
          docker push ${{ secrets.DOCKERHUB_USERNAME }}/mean-backend:latest
      - name: Build and Push Frontend
        run: |
          docker build -t ${{ secrets.DOCKERHUB_USERNAME }}/mean-frontend:latest ./frontend
          docker push ${{ secrets.DOCKERHUB_USERNAME }}/mean-frontend:latest
      - name: Deploy on Self‑Hosted Runner
        uses: appleboy/ssh-action@v0.1.10
        with:
          host: ${{ secrets.VM_HOST }}
          username: ${{ secrets.VM_USER }}
          key: ${{ secrets.VM_SSH_KEY }}
          script: |
            cd /path/to/your/repo
            docker compose pull
            docker compose up -d
Note: Adjust the
host,username,key, andcdpath to match your environment.
🎉 You’re Done!
You now have a fully automated CI/CD pipeline that builds Docker images, pushes them to Docker Hub, and deploys them on a local VM using a self‑hosted GitHub Actions runner and Nginx as a reverse proxy. No cloud provider required. Happy coding!
CI/CD Pipeline on a Local Virtual Machine
Below is the complete GitHub Actions workflow and the steps to verify the deployment.
GitHub Actions Workflow (.github/workflows/ci-cd.yml)
name: CI/CD

on:
  push:
    branches: [ main ]

jobs:
  build:
    runs-on: self-hosted
    steps:
      - name: Checkout repository
        uses: actions/checkout@v3

      - name: Build Backend Image
        run: |
          cd ./backend
          docker build -t ${{ secrets.DOCKERHUB_USERNAME }}/mean-backend .

      - name: Build Frontend Image
        run: |
          cd ./frontend
          docker build -t ${{ secrets.DOCKERHUB_USERNAME }}/mean-frontend .

      - name: Push Backend Image
        run: |
          docker push ${{ secrets.DOCKERHUB_USERNAME }}/mean-backend

      - name: Push Frontend Image
        run: |
          docker push ${{ secrets.DOCKERHUB_USERNAME }}/mean-frontend

  deploy:
    needs: build
    runs-on: self-hosted
    steps:
      - name: Pull and Restart Services
        run: |
          cd ~/your-app-dir
          docker-compose pull
          docker-compose up -d
Verifying the Pipeline
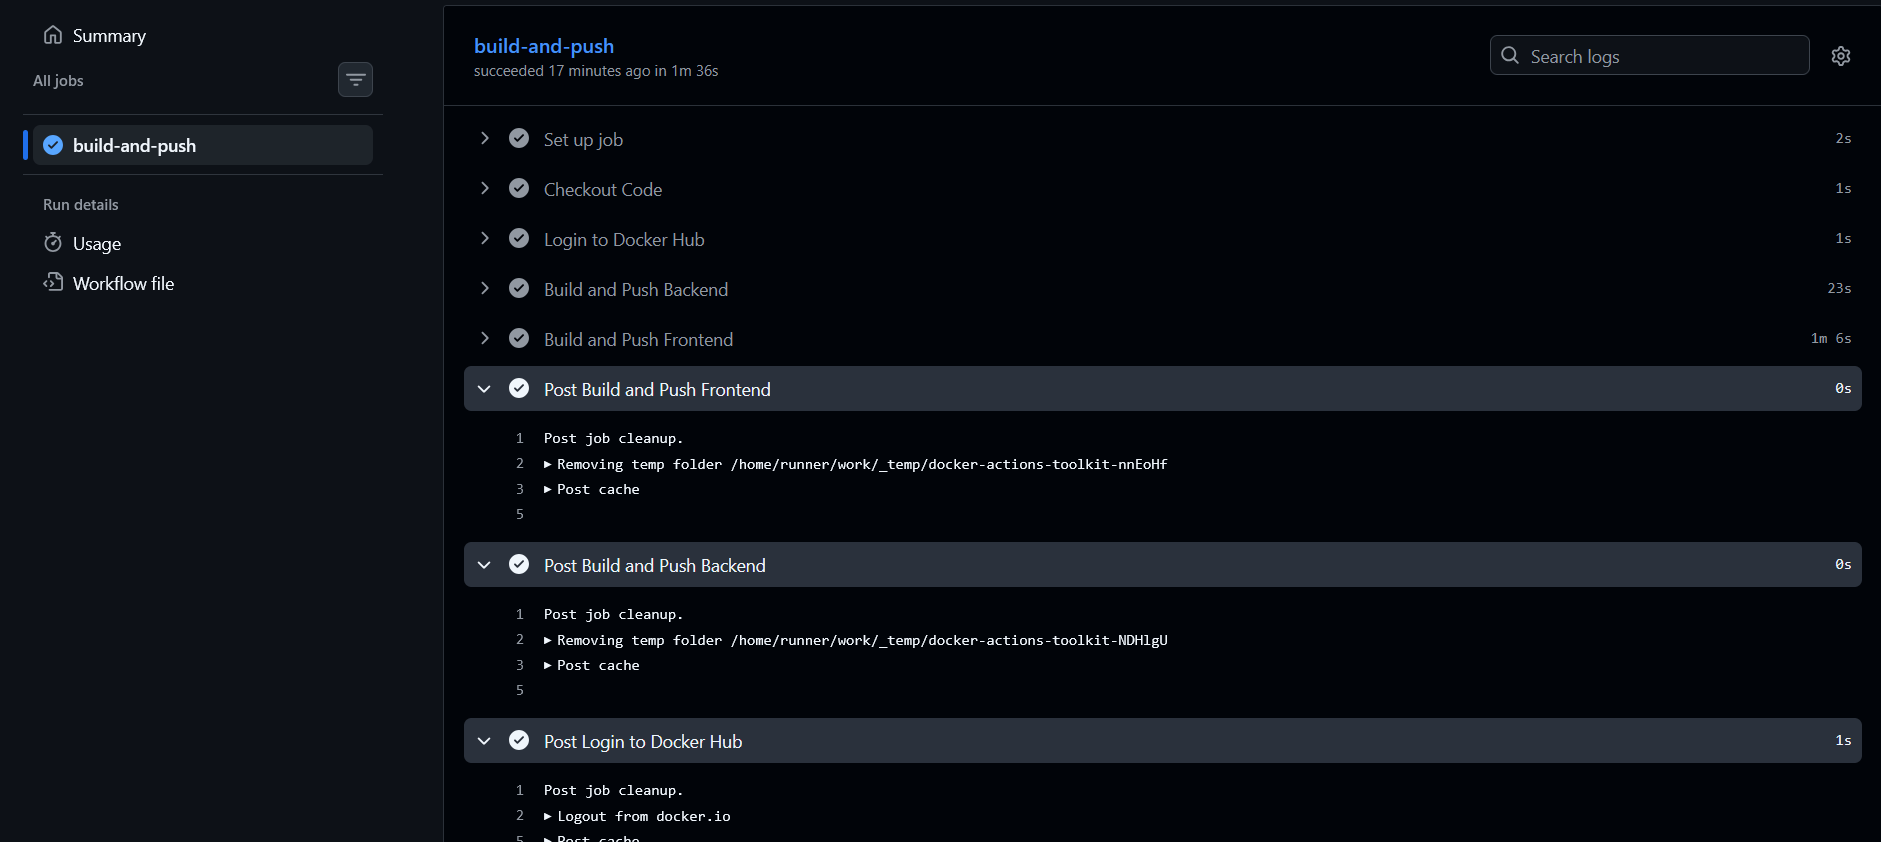
1. CI/CD Success
After pushing to main, you should see all green checkmarks in GitHub Actions.
2. Docker Hub
Your images will appear on Docker Hub with the latest tag.

3. Running Services
Log into the VM and confirm the containers are up and running.
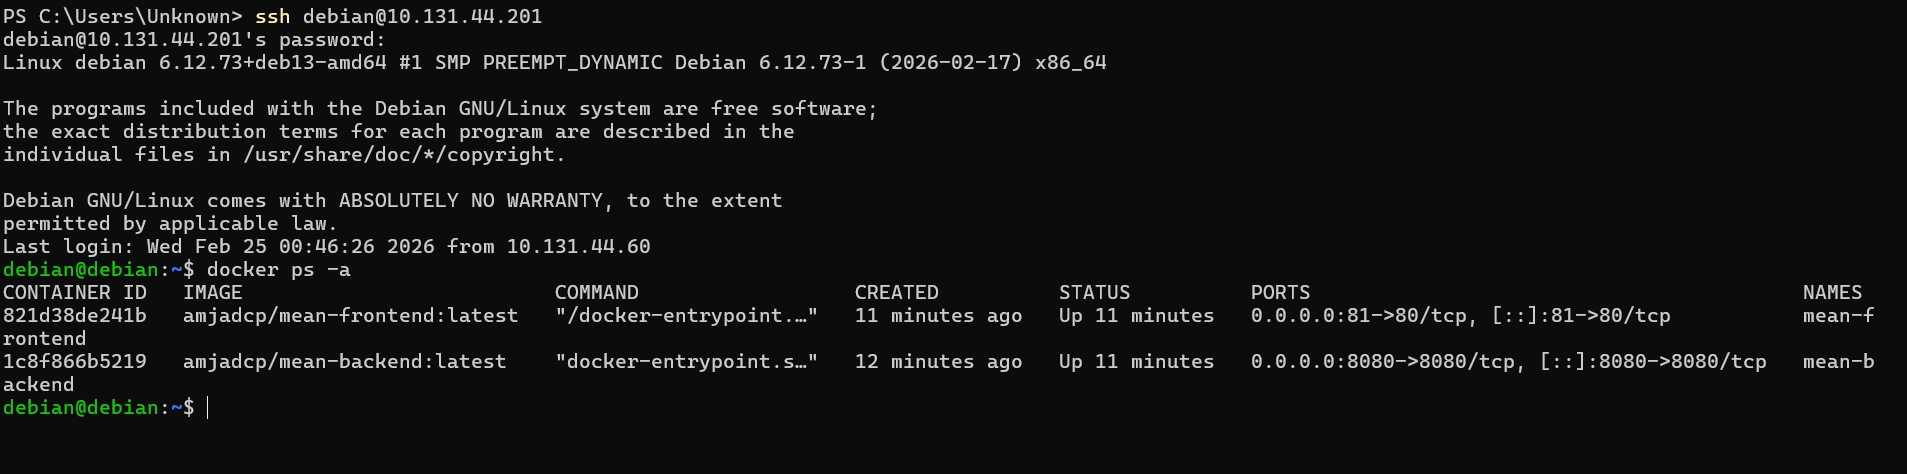
Your application should now be reachable on the local network:
http://VM_IP/Why This Works
Setting up a CI/CD pipeline on a local virtual machine demonstrates that DevOps is fundamentally about logic and architecture, not just the cloud provider you choose. By using VirtualBox in Bridged Mode, you get a production‑like environment with full control over networking and deployment cycles—without any cloud spend.
Key Takeaways
- Infrastructure Flexibility – The same setup works on any Linux box: a VM, a Raspberry Pi, or a bare‑metal server.
- Automation – A self‑hosted runner lets you keep deployment logic local while still leveraging GitHub for builds.
- Monorepo Efficiency – Managing both the Angular frontend and Node.js backend in a single repository simplifies the CI/CD workflow.
What challenges did you face setting up your local environment? Let me know in the comments!